Rocks vs Buggy
In-depth Matchup Guide
I’ve found this matchup to be quite skill intensive and centered around a couple of crucial cards. Below is an extended turn-by-turn explanation of the play patterns I repeatedly ran into during my testing, and my attempt to solve them. As a Rocks main this well be of course from Rocks’ POV, but there are a lot of tips for Buggys too.
The new Alvida is strong
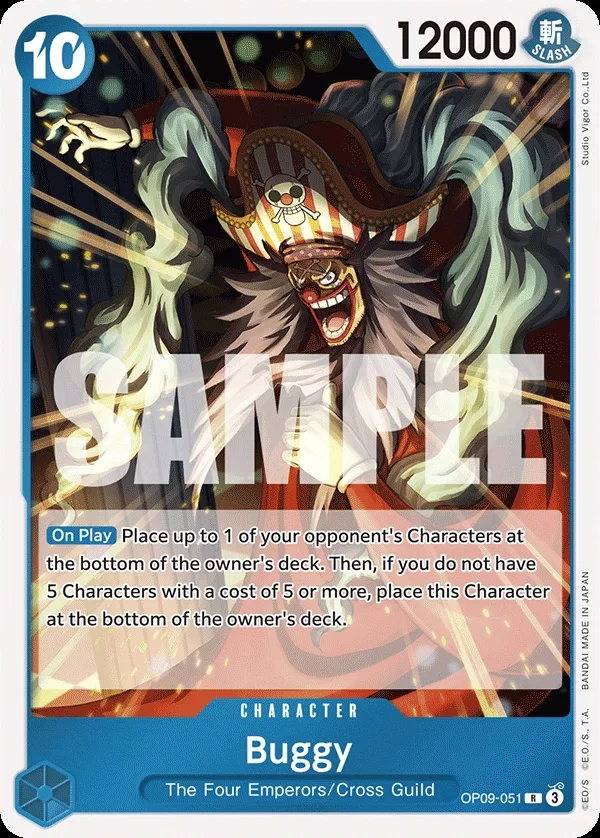
Buggy has never been a strong meta contender, especially against Rocks, because his biggest play, the “Red Roc on a 12k stick” Buggy, both needs a full board and is weak to anti-removal.
The new EB05 Alvida solves both of these problems, completely turning the matchup around.
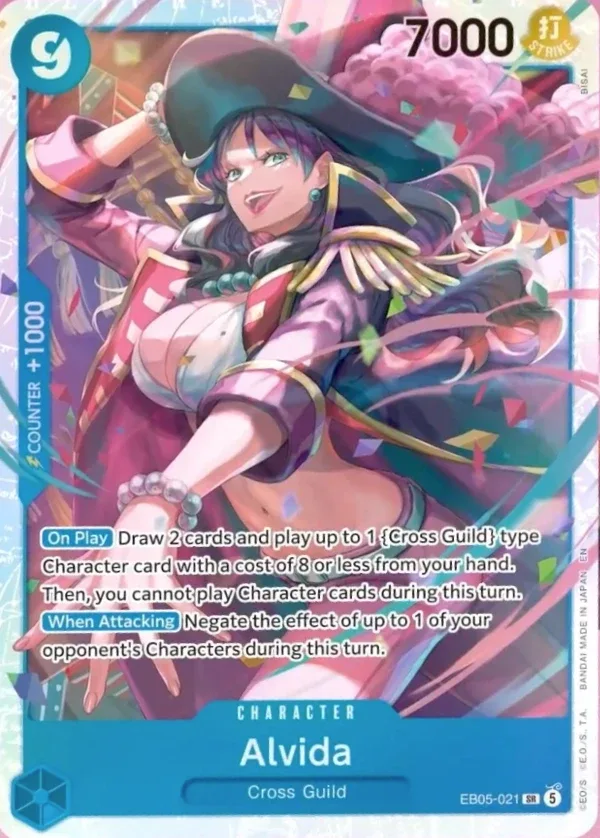
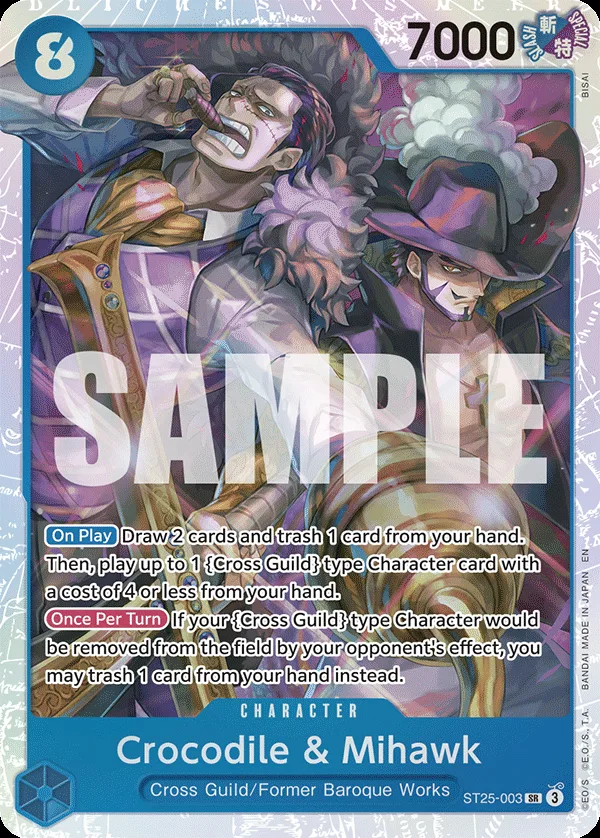
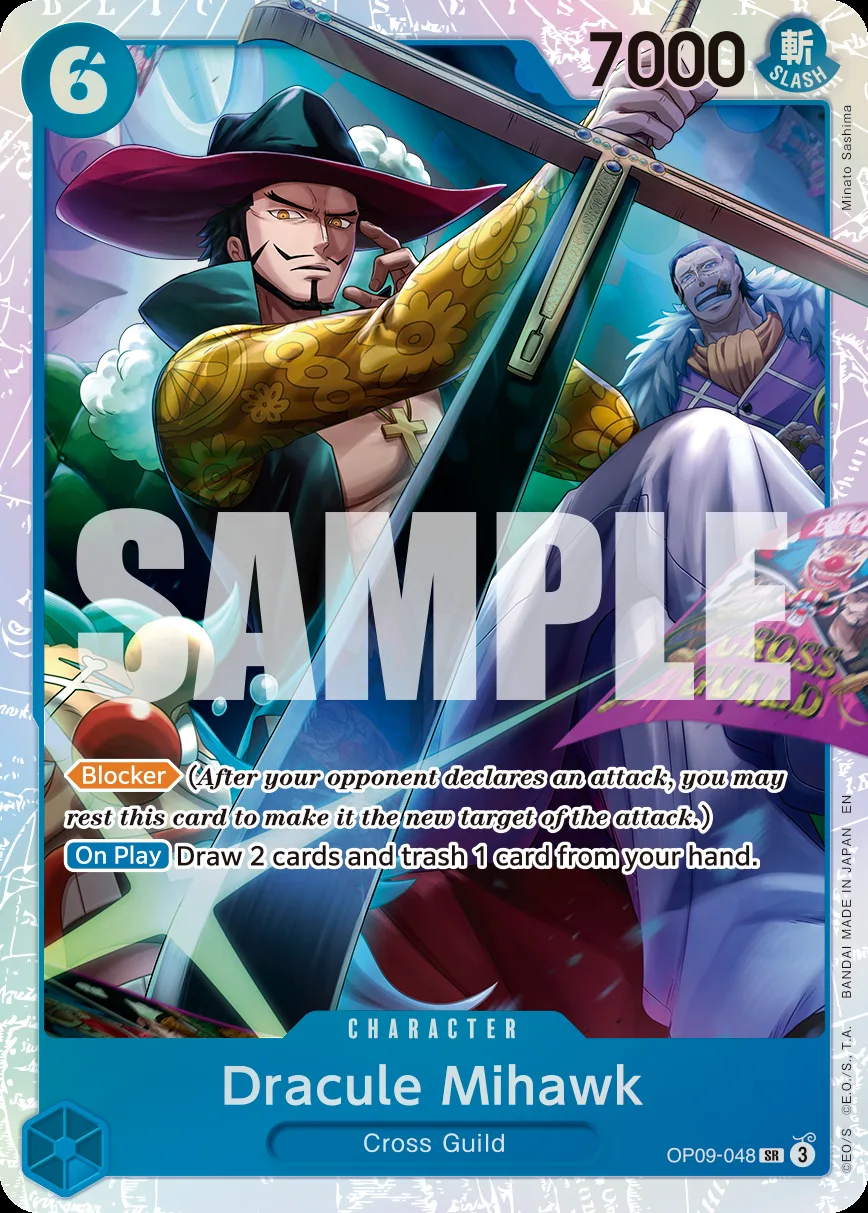
Alvida is an insane card: on the turn she’s played via the leader effect, she generates two 7k threats (usually C&M, which also gives removal protection, or Blocker Mihawk), draws 4 and trashes 2 for 5 Don!!, essentially being hand neutral, which is completely busted.
With her “When Attacking” she can negate Rocks’ main counter sources in Shiki and Newgate, but above all she can negate Kyo’s effect, so the 12k Buggy can effectively be a huge tempo swing.
Of course, the moment an Alvida is turned sideways she becomes Shiki fodder, so a good Buggy player won’t swing with her until she can get value out of the 10-cost Buggy.
Typical deck curves
In this matchup Rocks must steal their curve, so going first is 100% better to prevent Buggy from using the leader ability on curve on turn 3. Sure, they get earlier access to the double leader ability (yes, it’s not once per turn) at 10 Don!!, but trust me, it’s harder going second (I don’t think we are in OP13-era, dice-dependent territory, but whoever goes first definitely has a strong edge).
Your ideal curve going first looks something like this:
OR
Kyo (5)Linlin (7)Shiki
OR
second Linlin + Kyo (usually stronger if Shiki can't get value and you haven't developed Kyo on 3 Don!!) (9)Shiki + second Kyo (10)Rocks chain (possibly into more Shikis): the more 10-costs you play, the better
Going second instead:
OR
Kyo if we didn't find it on turn 1 (I prioritize having a Kyo on board over a John) (6)Newgate
OR
John + Kyo (depending on the previous turns: yes, having it on board is top priority) (8)Mr. S-to-the-I (even if he doesn't get value)
OR
Daddybeard + Kyo (10)A meaningful Rocks play (usually Shiki + you guessed it) depending on the state of the board
Buggy’s curve going first is:
Going second, it changes very little: the curve stays the same, but fortunately they can only use the leader ability and flood one turn later. Also keep in mind that at 10 Don!! they can use the leader ability twice.
TL;DR
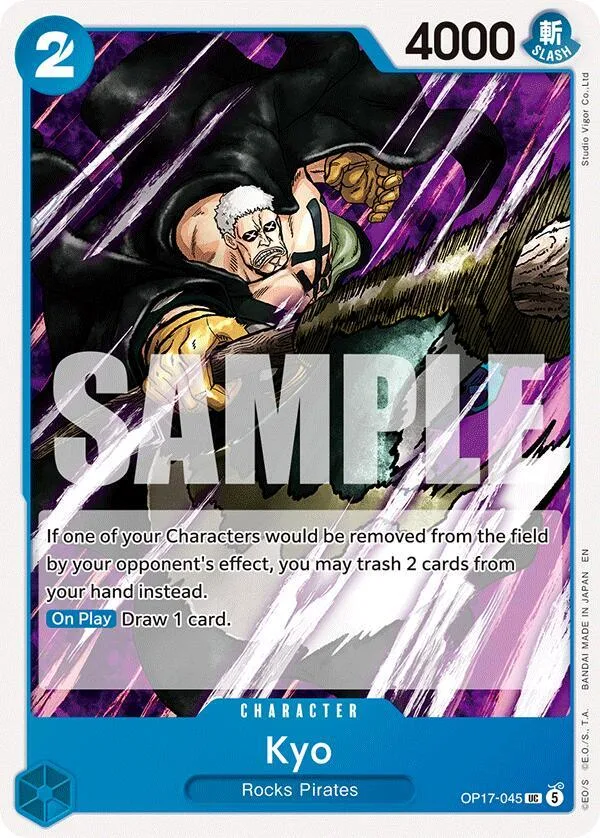

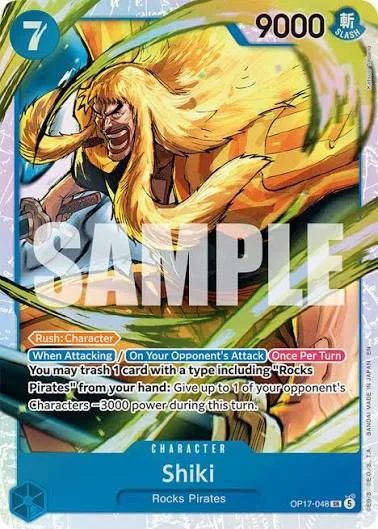
I will now go into very deep detail on the common play patterns we encounter in this matchup and how to act accordingly, but here’s a TL;DR in case you don’t want to read my reasoning for it (just make sure to read the most important pattern section).
- Go first
- Mulligan priority: Kyo → Shiki (I’d say hard mulligan for them) → less important but worth keeping: Linlin (going first) / Newgate (going second) + Rocks (you need to see him at 10 Don!!) if you already have Kyo
- Counter the swings that ask for 1 card, don’t go under 2 lives (3 if you’re full of bricks)
- Counter with events, you won’t need their Main effect in this matchup; don’t counter with Rocks unless absolutely necessary, you need him on the board
- Always go for board control (you can’t starve them: you must use the leader ability every turn)
- You win this matchup by building a massive board of Rockses and Shikis
- You lose this matchup if you can’t remove their Alvidas and if they manage to stick more 10-costs on their board than you
- Like ours, their big hand size doesn’t always mean a strong defense: Buggy lists are low on 2k counters, but they’ve started running a +4k event (which only works on the leader, though)
- Gloriosa, Jinbe, Stussy, John: all your removal/defensive cards in general are leader ability pitch fodder in this matchup. Sadly, Alvida and C&M invalidate all of them
- Rocks’s tech: There aren’t many tech choices to improve this matchup: the Usopp event and Jinbe are not very useful, so a standard 100% Rocks Pirates list is the way to go
- Buggy’s tech: Galdino is very strong against Rocks (and I believe in general), I think every Buggy should run it at least at 2x; 2x of the Cross Guild stage also seems good to cycle for Alvidas
The easiest way to explain something is just doing it, so let’s look at some in-game examples.
Example 1: The player with Initiative should be Aggressive
In this first game I won the dice roll, went first and chose to keep this hand, which is close to perfect:
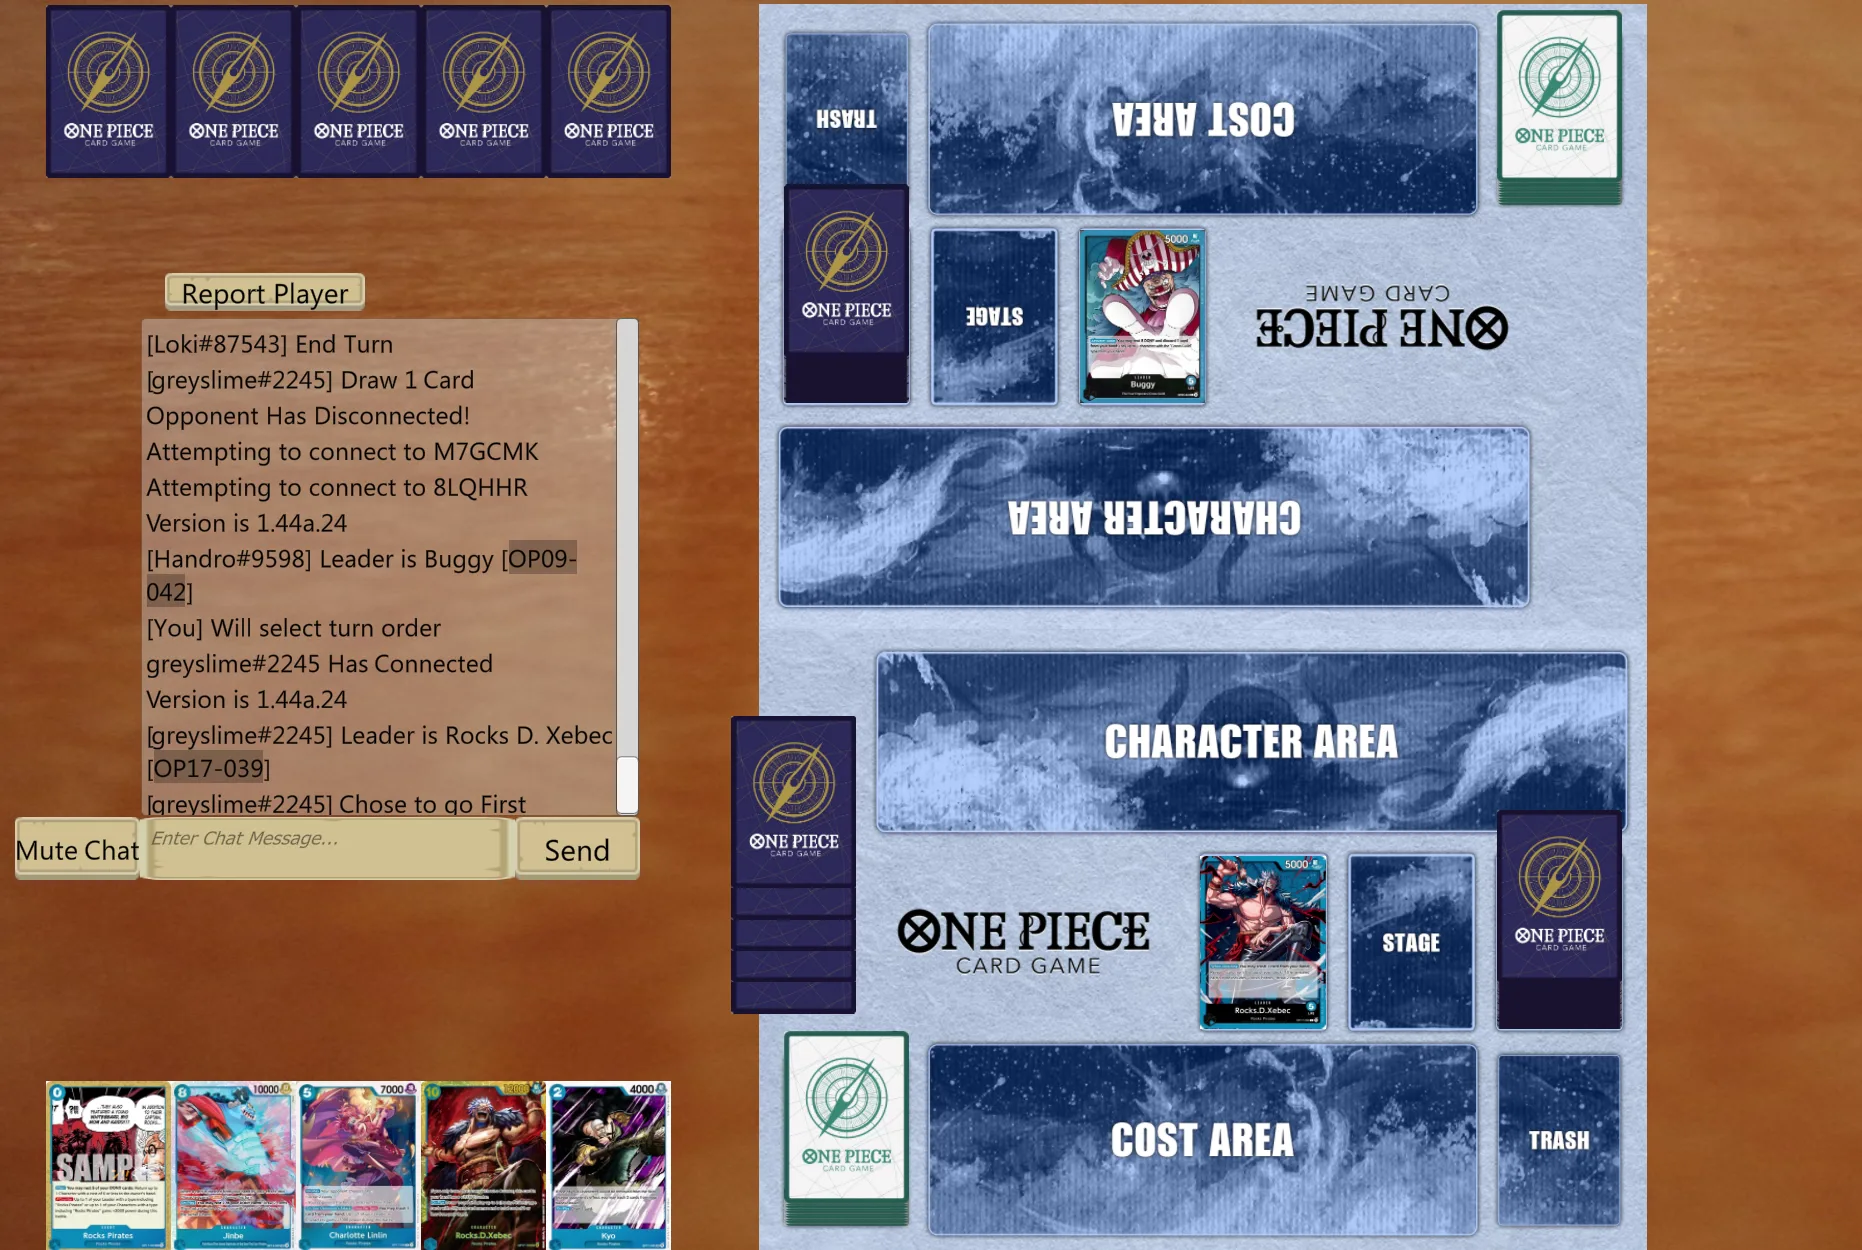
We have Kyo and Linlin on curve and Xebec ready; we’re just missing a Shiki, but we’ll draw him eventually.
Fast forward to our 5 Don!! turn: we develop a Linlin, and he answers by developing his strongest combo.
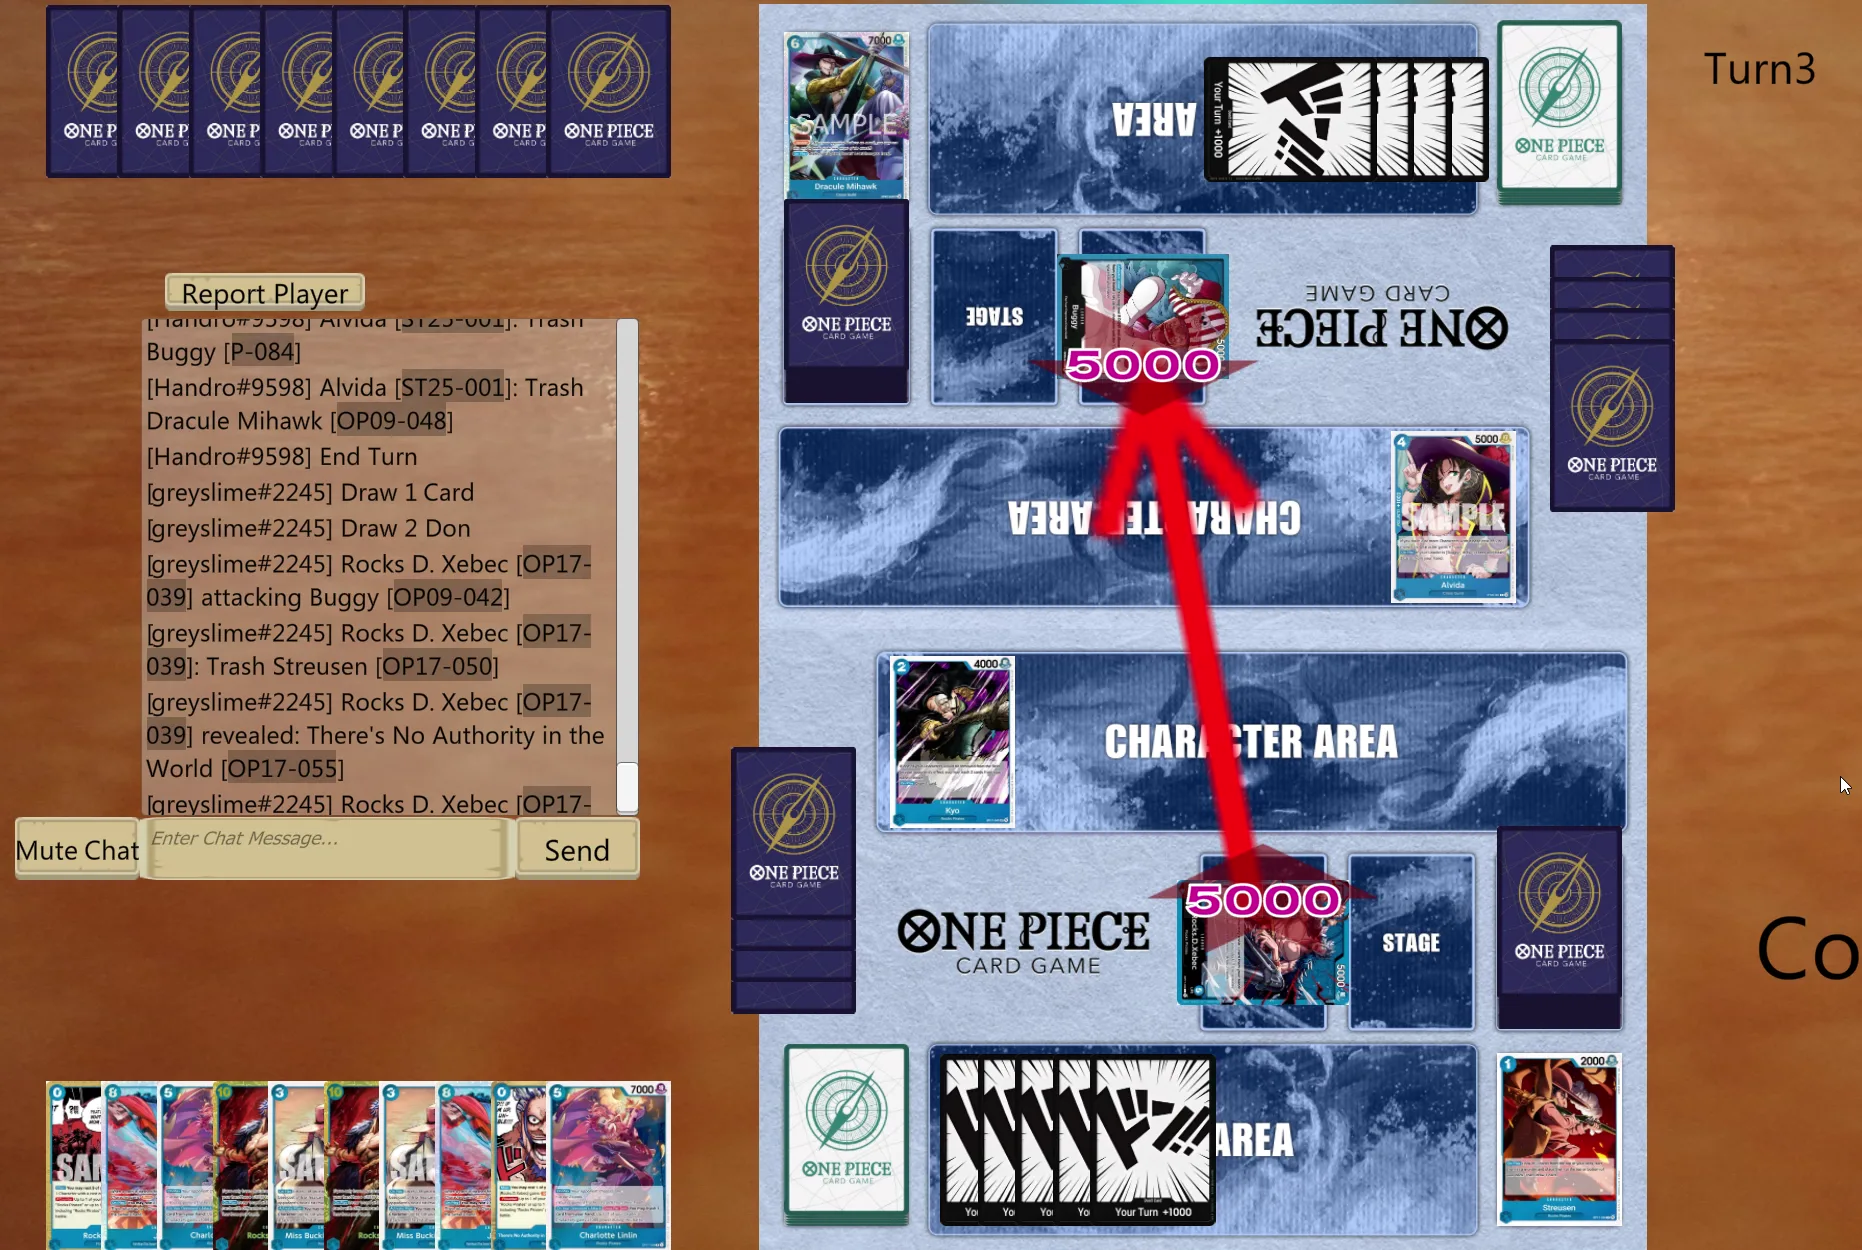
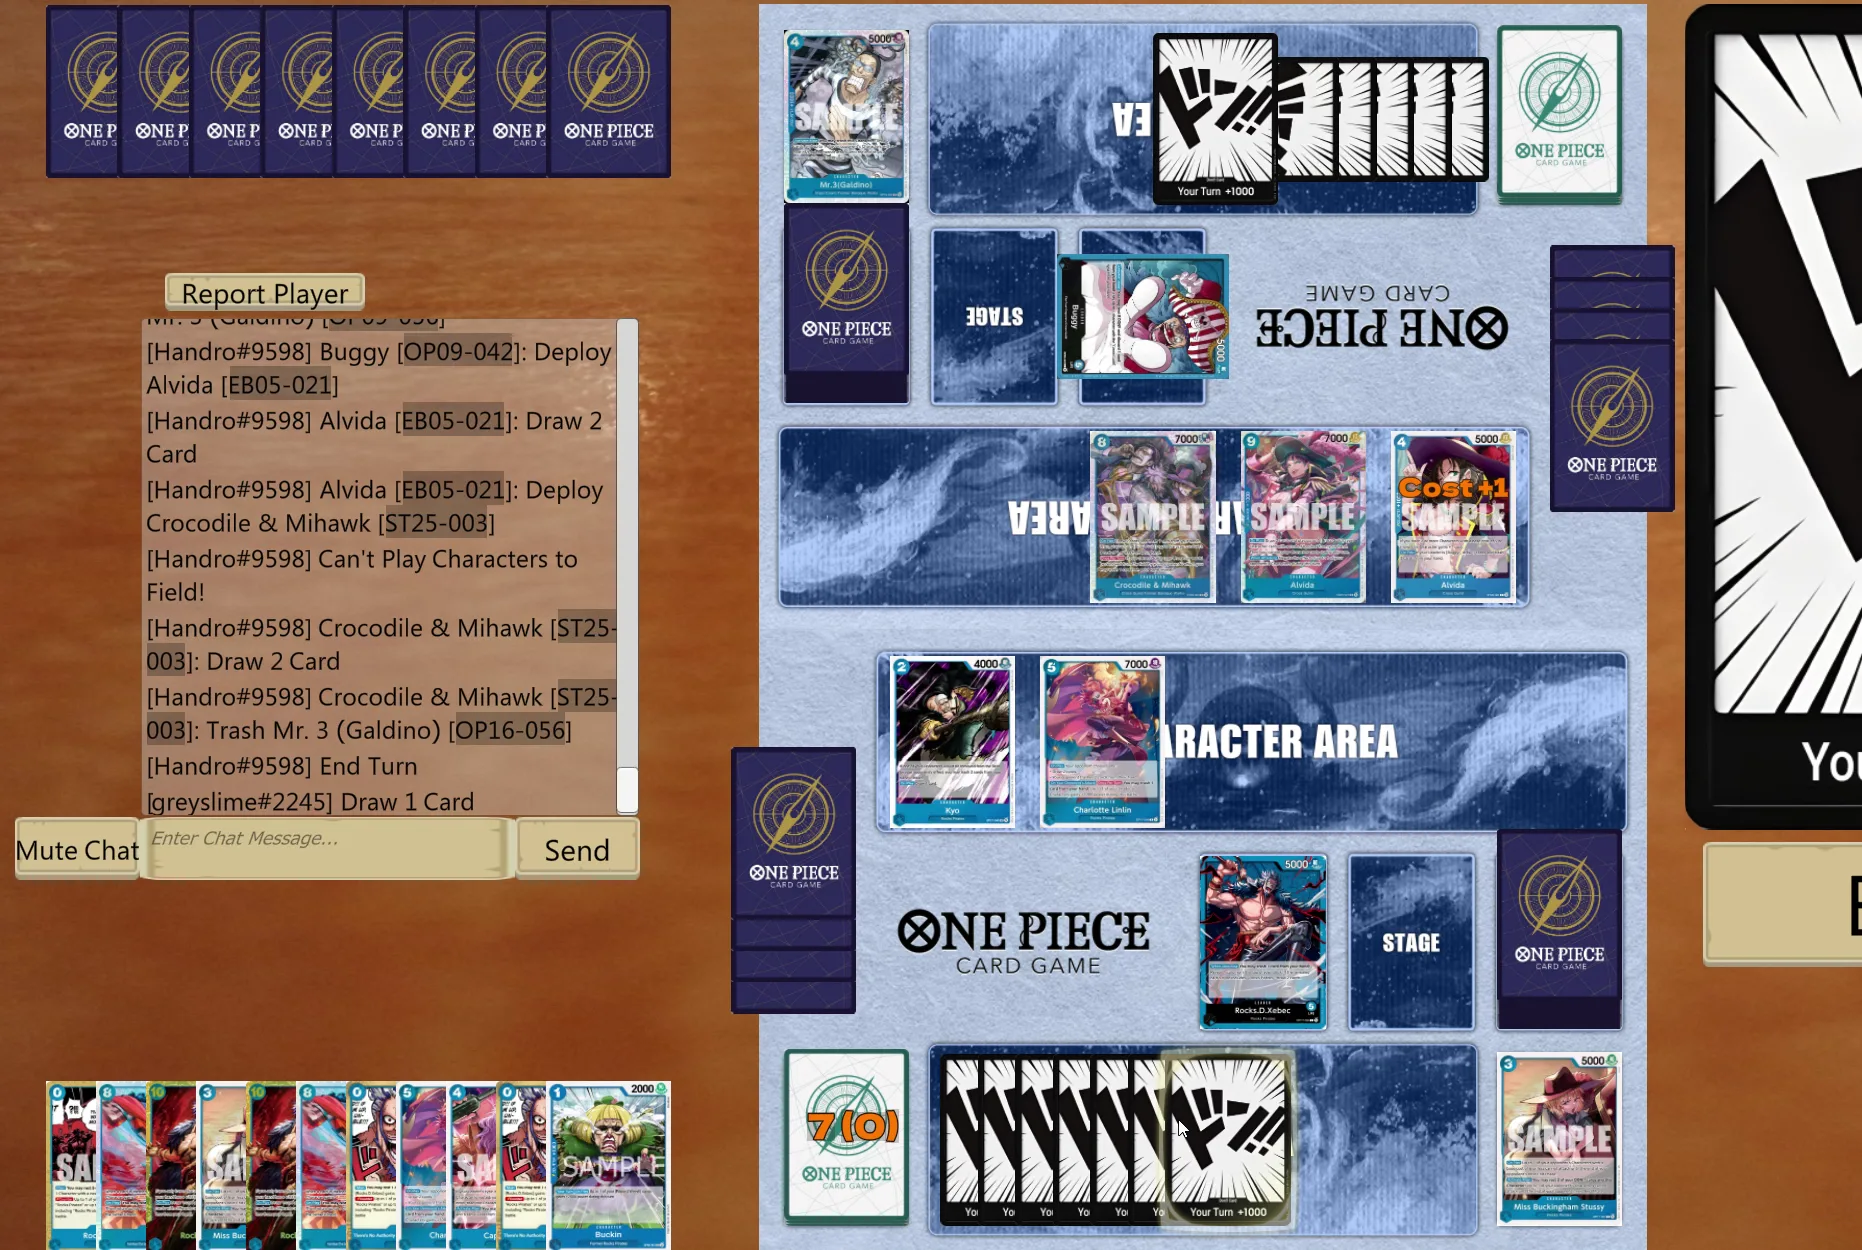
In this spot we expect him to play a second board-flood combo next turn, to set up a Buggy in 2 turns. Since he needs a full board and the Alvida effect to negate Kyo, he won’t swing (to avoid getting punished by a Shiki), so he won’t put much pressure on us. But this is a line he can only follow if he feels confident that he has time. Since he’s still at 4 lives and I don’t have a Shiki in hand (which wouldn’t have any impact this turn anyway), I decide to go aggressive with a double 7k swing of Linlin + my leader boosted by 2 Don!!, and develop another Linlin (he’ll never trash from his hand, so we keep a higher hand size by drawing even more).
On the next turn, as predicted, he keeps flooding his board and swings with C&M, giving us the chance to get Shiki value next turn. I counter all the swings, both to stay high on life and to maintain board pressure.
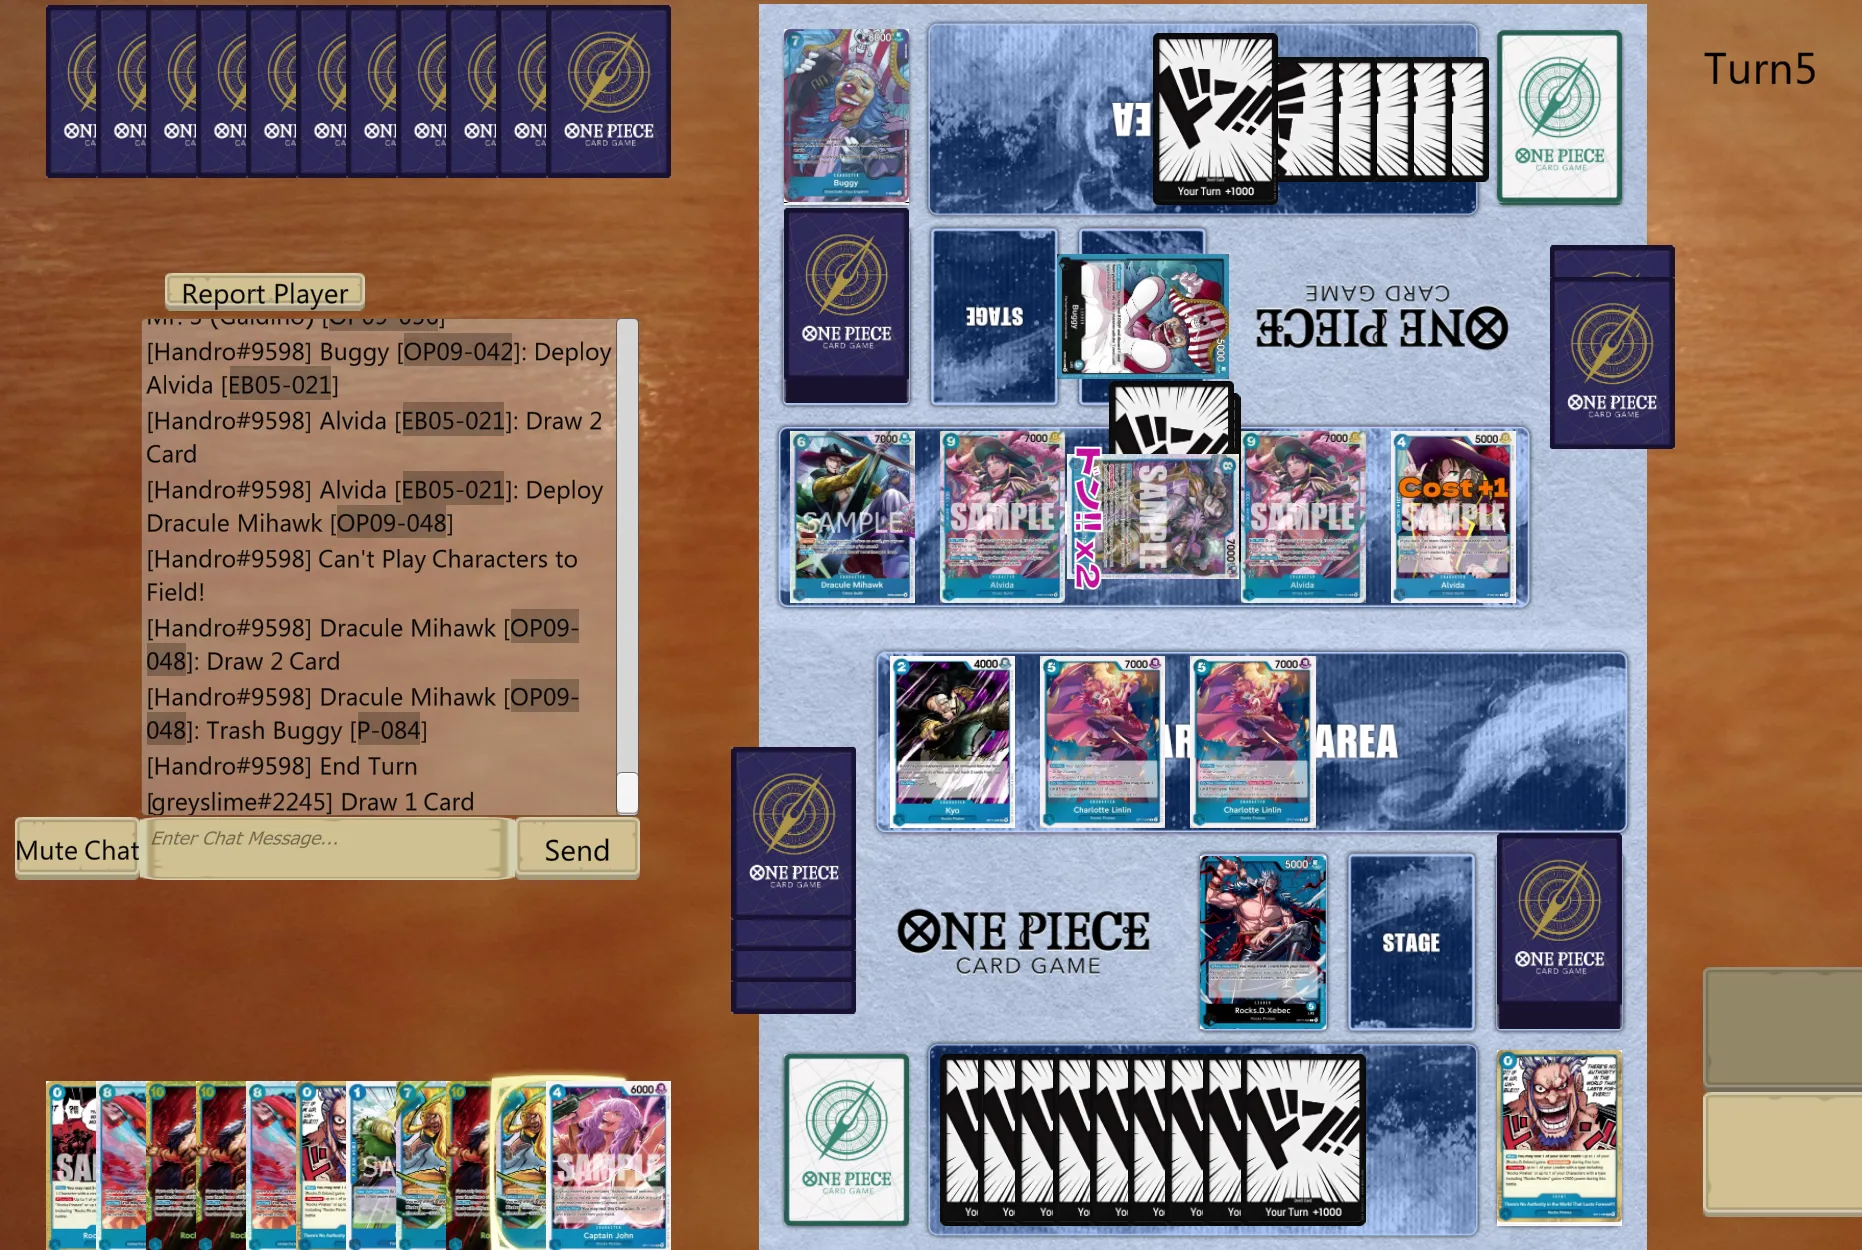
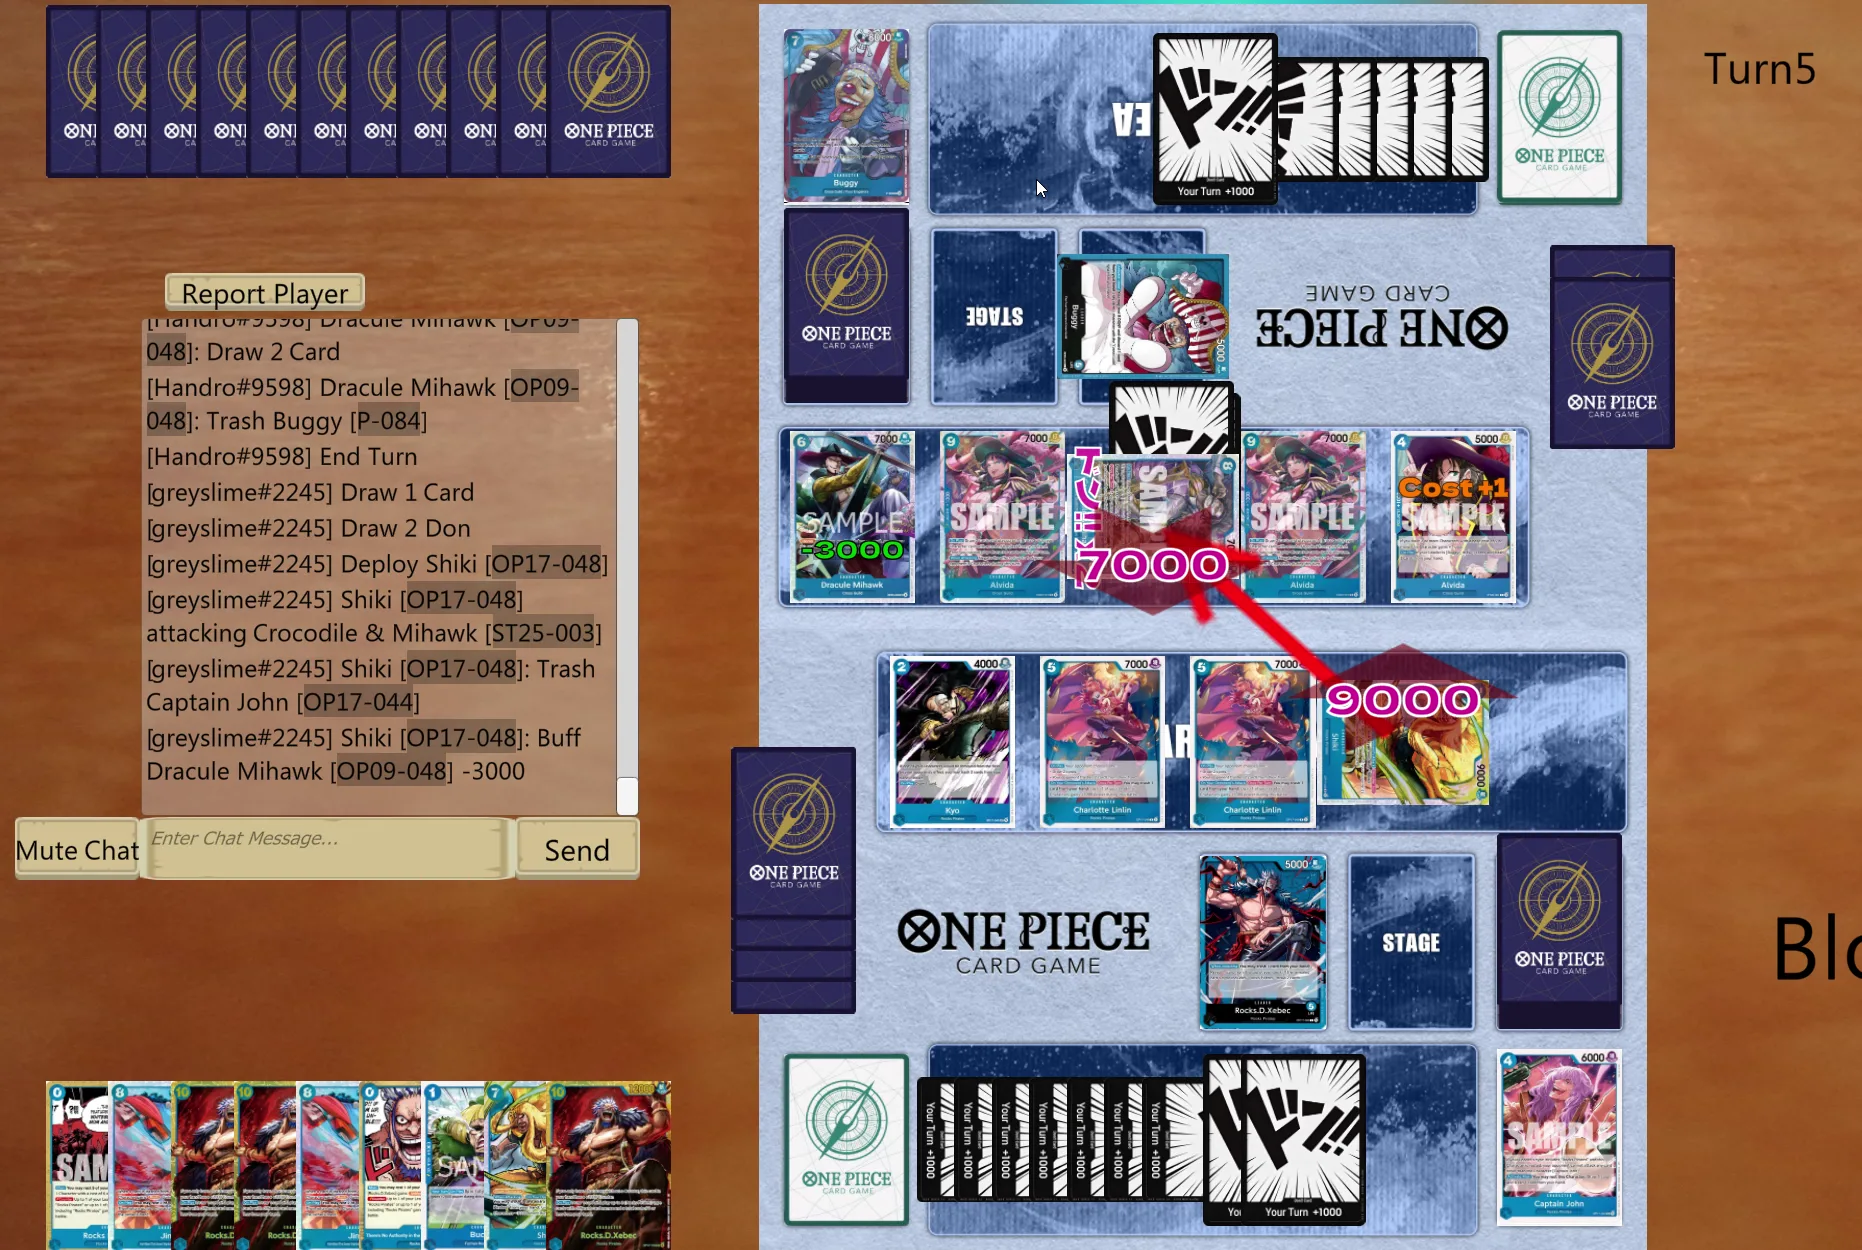
At this point I play my Shiki and sadly misclick its minus effect onto the blocker instead of C&M lol. Normally you want to fight for board control in this spot, since a 4k C&M is guaranteed to die, and if he gives up his blocker for it we’re even happier (he won’t). But I chose this game as an example specifically because this unexpected change of plans led me to discover an alternative route to victory: if you pressure them heavily (and stay high on life), they can’t ignore your board and have to commit to fighting for it, or they will die (or reach 0 life, which with the unblockable event is a death sentence anyway). So I swing another triple 7k to the face to bring them down to 1.
Their predictable reply is to negate Kyo and bottom-deck Shiki, but at this point, with all my counters still in hand (actually I had only counters in hand), I manage to keep my Linlins alive (again misclicking some counters, ignore the chat lol).
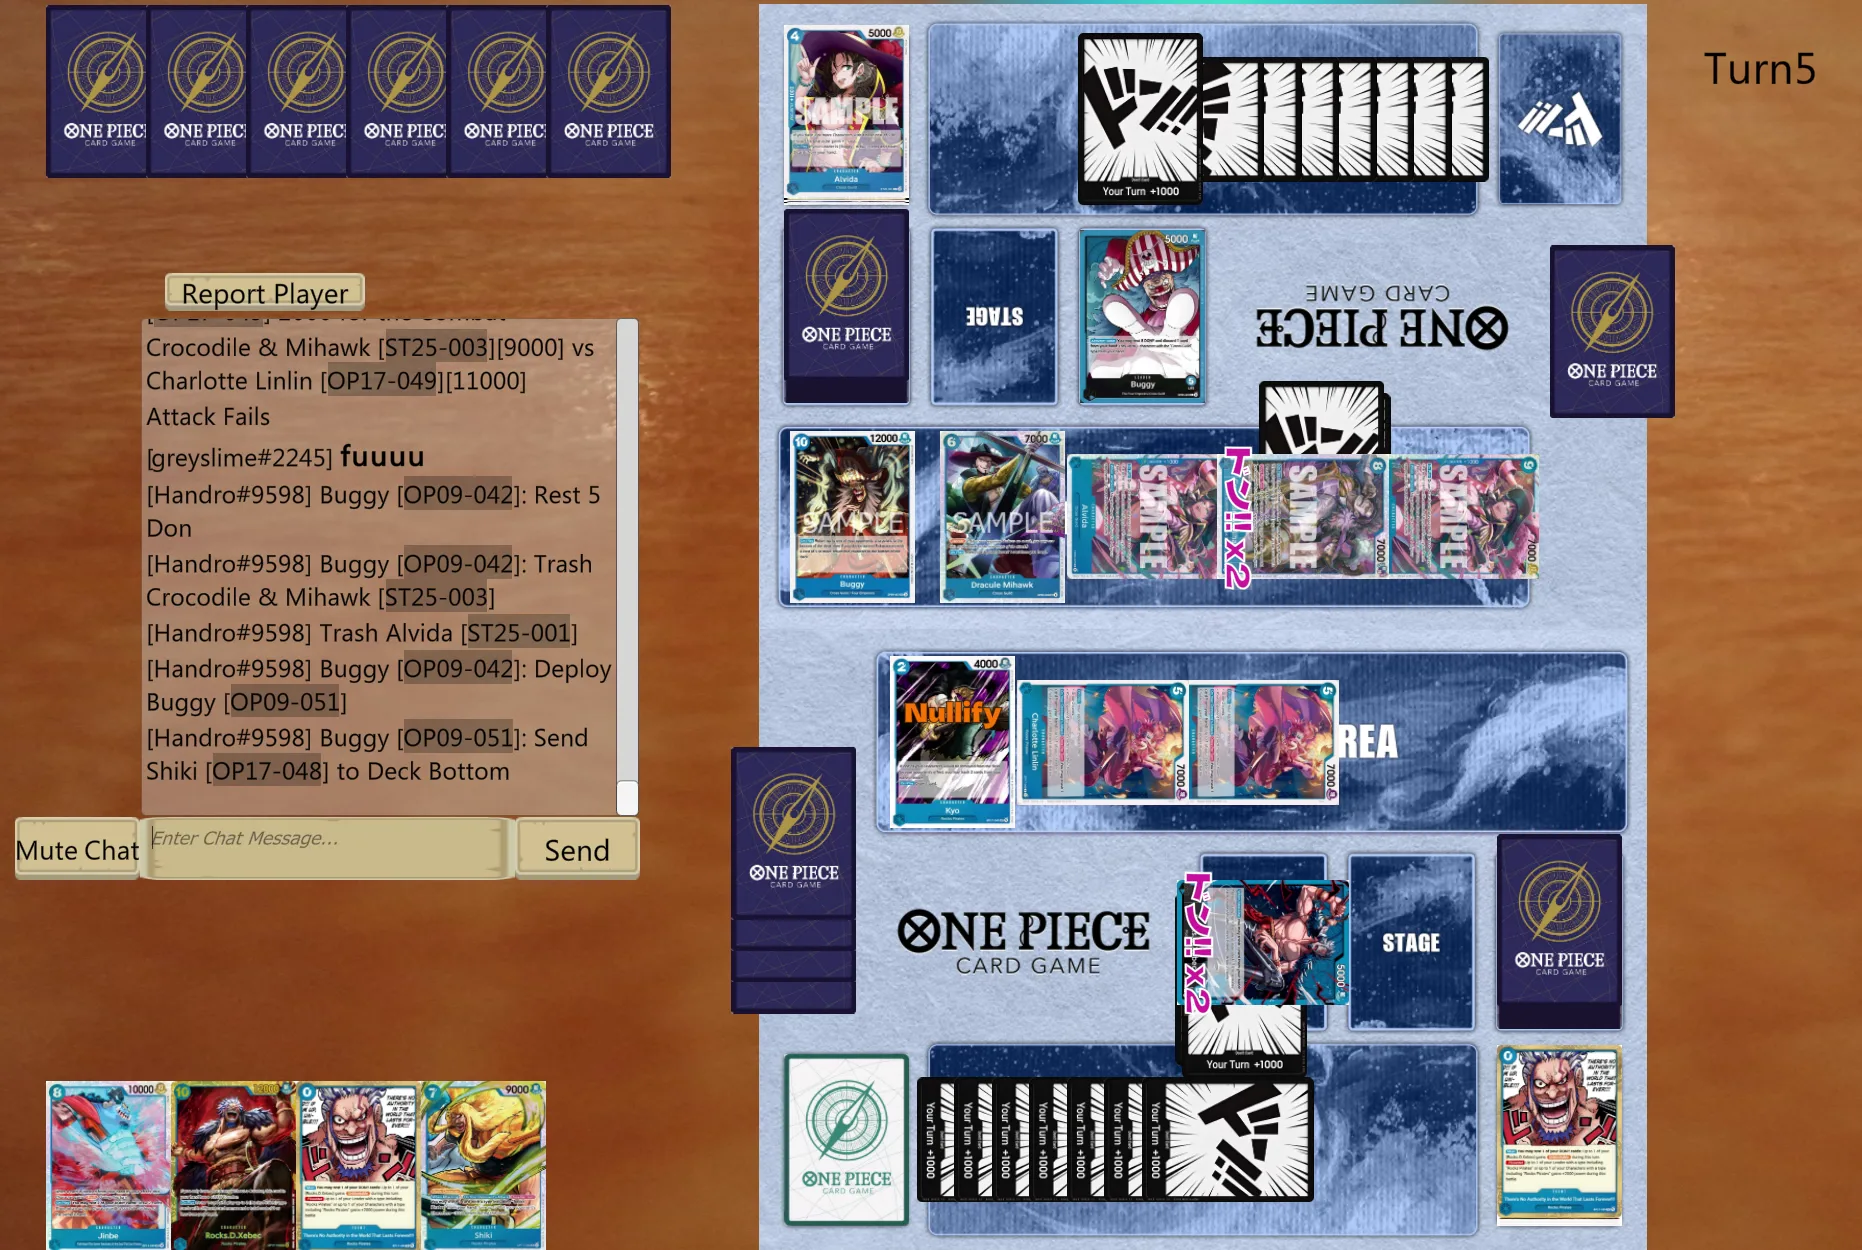
Here there’s an argument for playing a 10-cost (not Jinbe, because C&M is on board to protect the blocker, but when it isn’t, Jinbe can be a surprise lethal line) and using Shiki to clear the board given their low hand size, but that would bring us down to a low hand size too, where we might get counter-wiped.
So, having the unblockable event in hand (and the option to just play a Shiki afterwards), I decide to test them with a 9k swing: if they don’t have the counter event in hand and don’t give me the blocker, it’s mathematically lethal. They end up giving me the blocker, which tells me they might be quite bricked up. Now, with no blocker, I have a free Shiki line that, combined with the Linlins I saved earlier, helps me clear both Alvidas, basically securing the game.
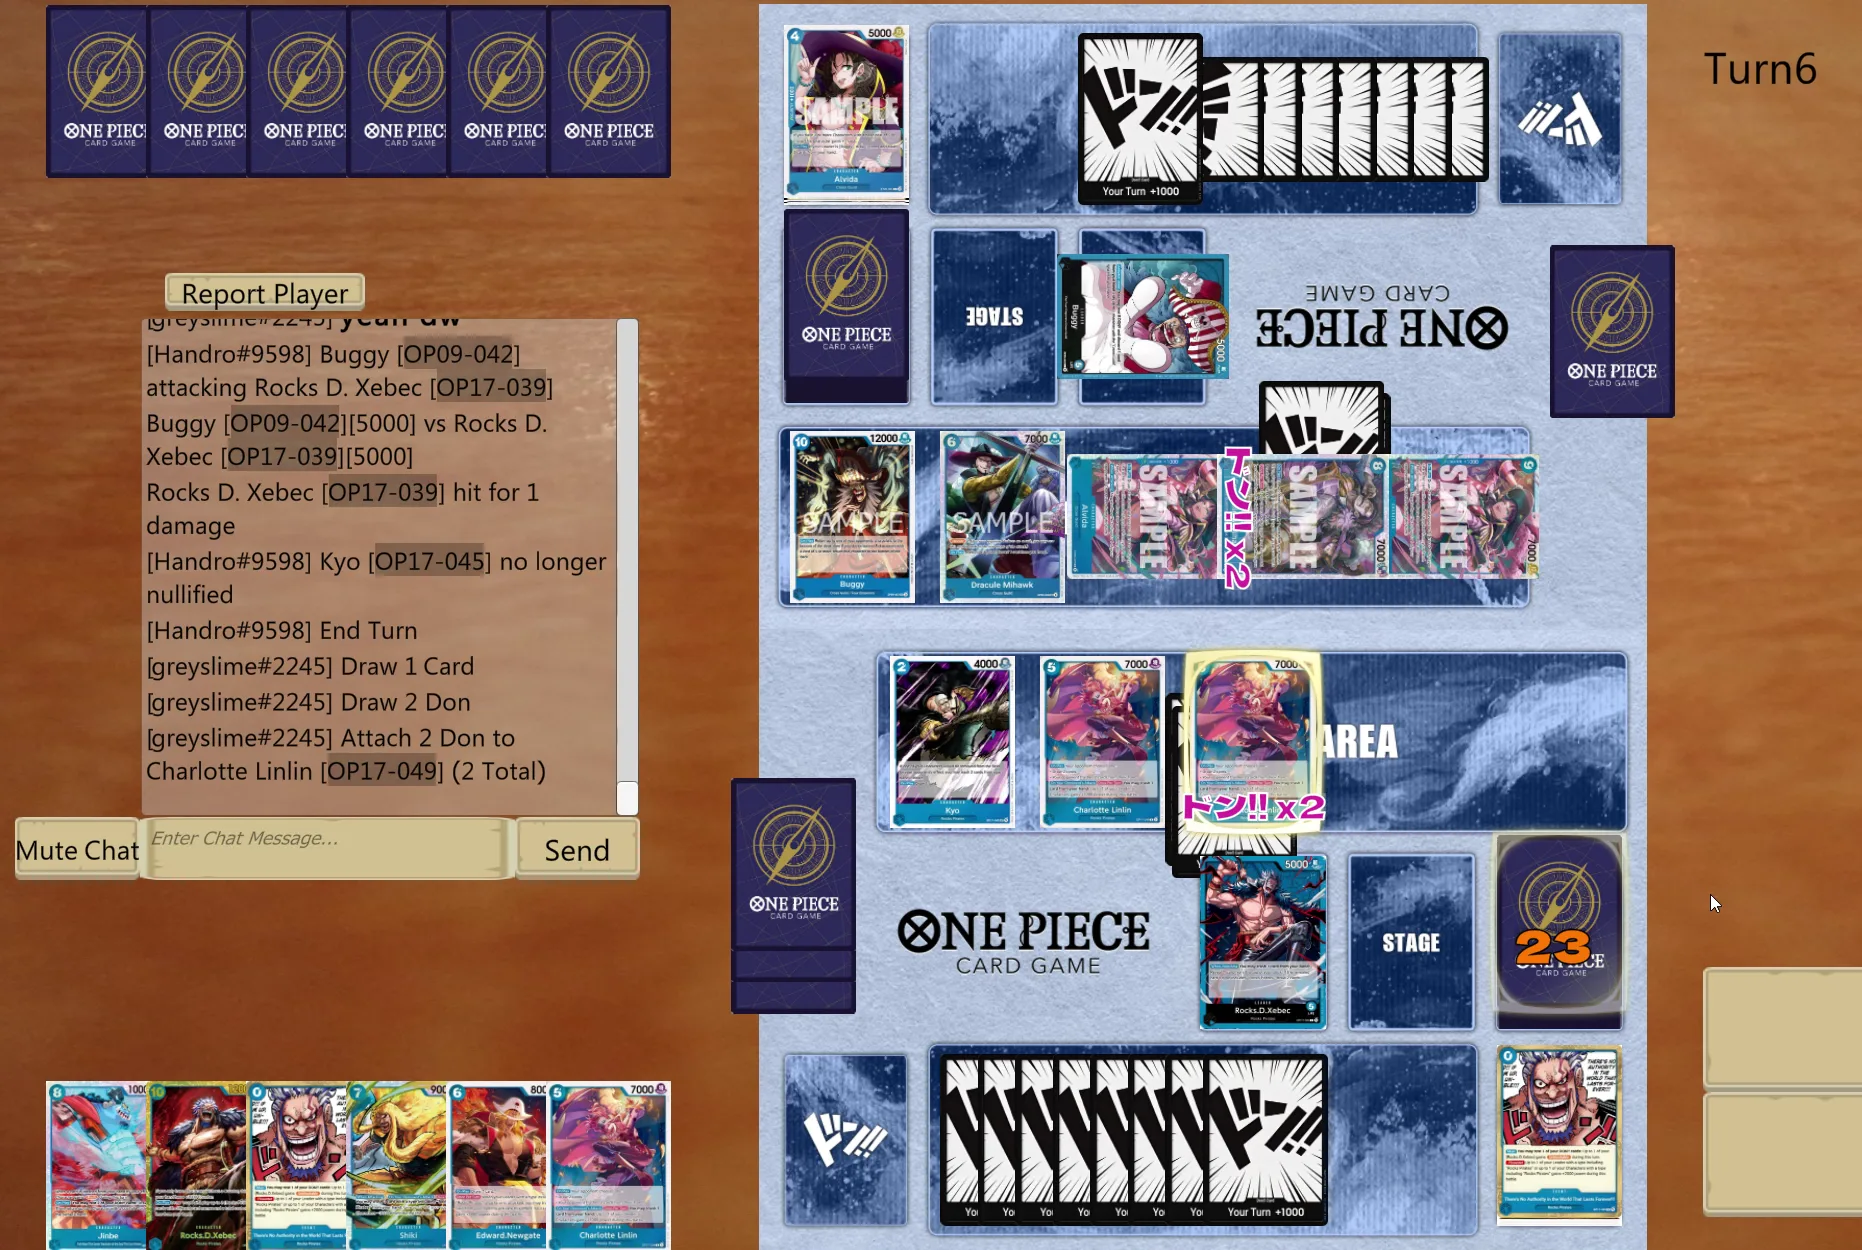
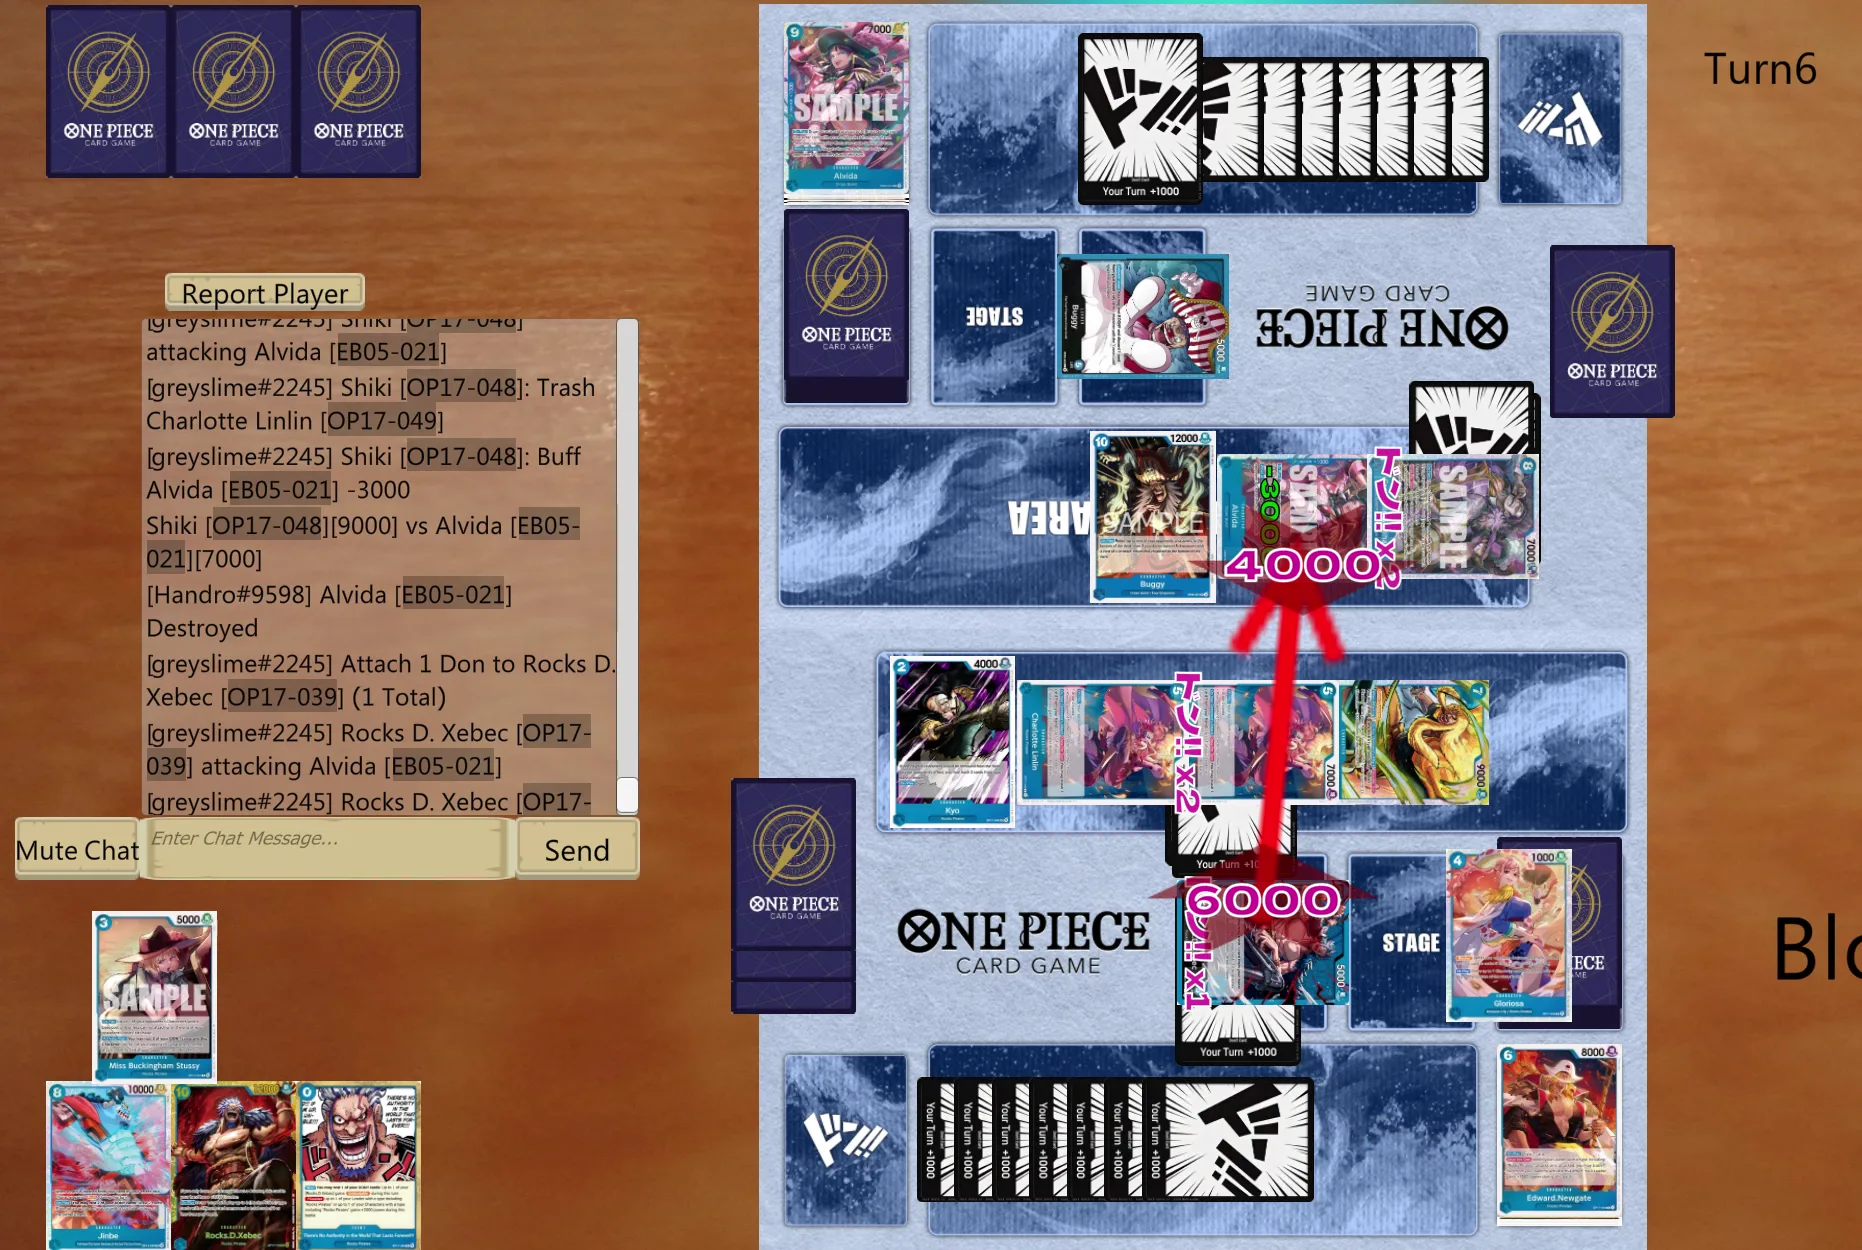
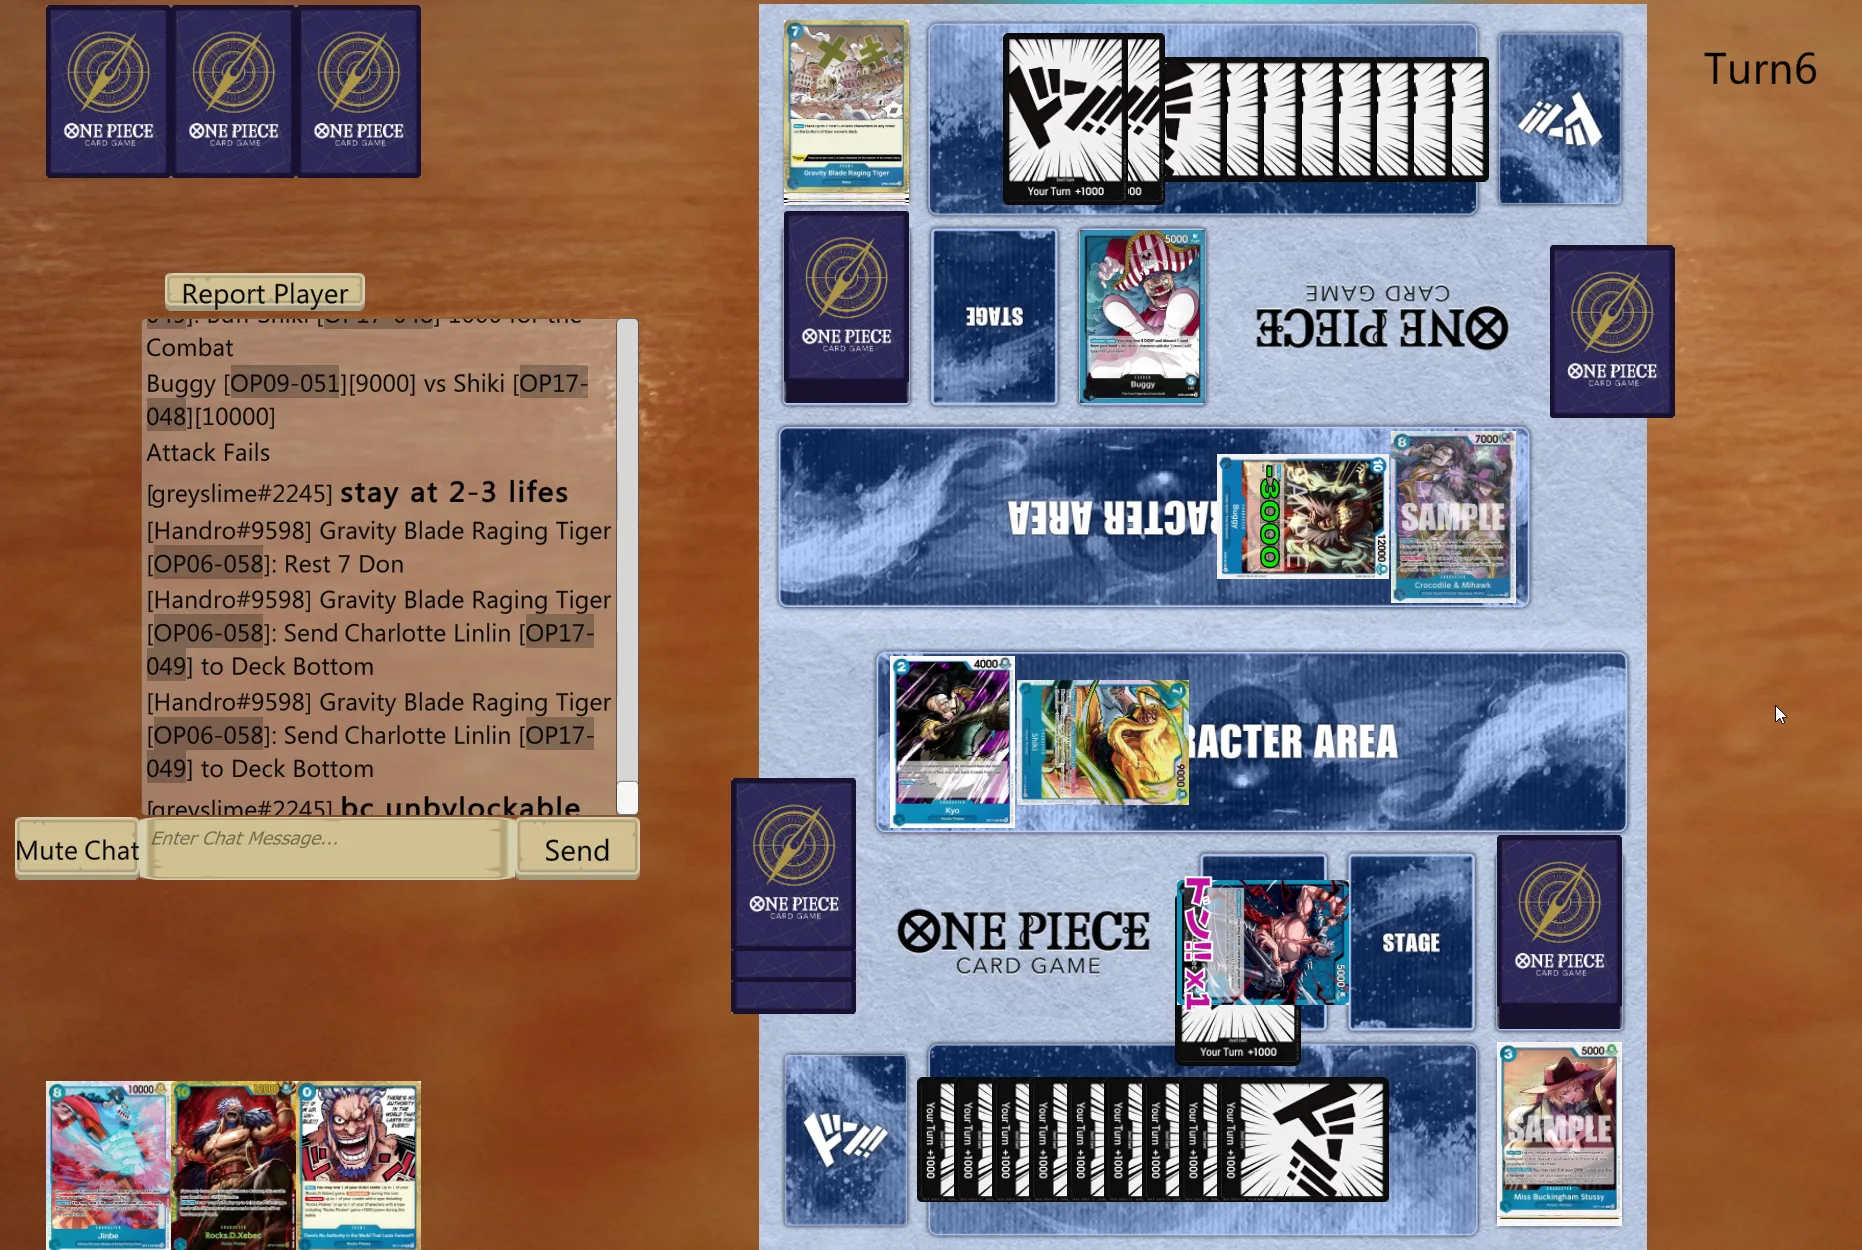
His next turn is forced defense: he must choose to either play removal or blocker up, and he can’t do both (unless he has exactly flooder + blocker + a second 10-cost in hand, but the double leader effect would leave him with 1 card in hand, which would be lethal anyway). We let him Gravity Blade our Linlins just to flex, and we have lethal math next turn. Misclicks aside, this was a solid representation of the flow of a winning game.
Example 2: Highest board Tempo wins
Another example of how to curve out going first: we hit Marlon into Linlin and this time, since he played a blocker instead of C&M and we know he won’t be able to Buggy next turn, directly into Shiki.
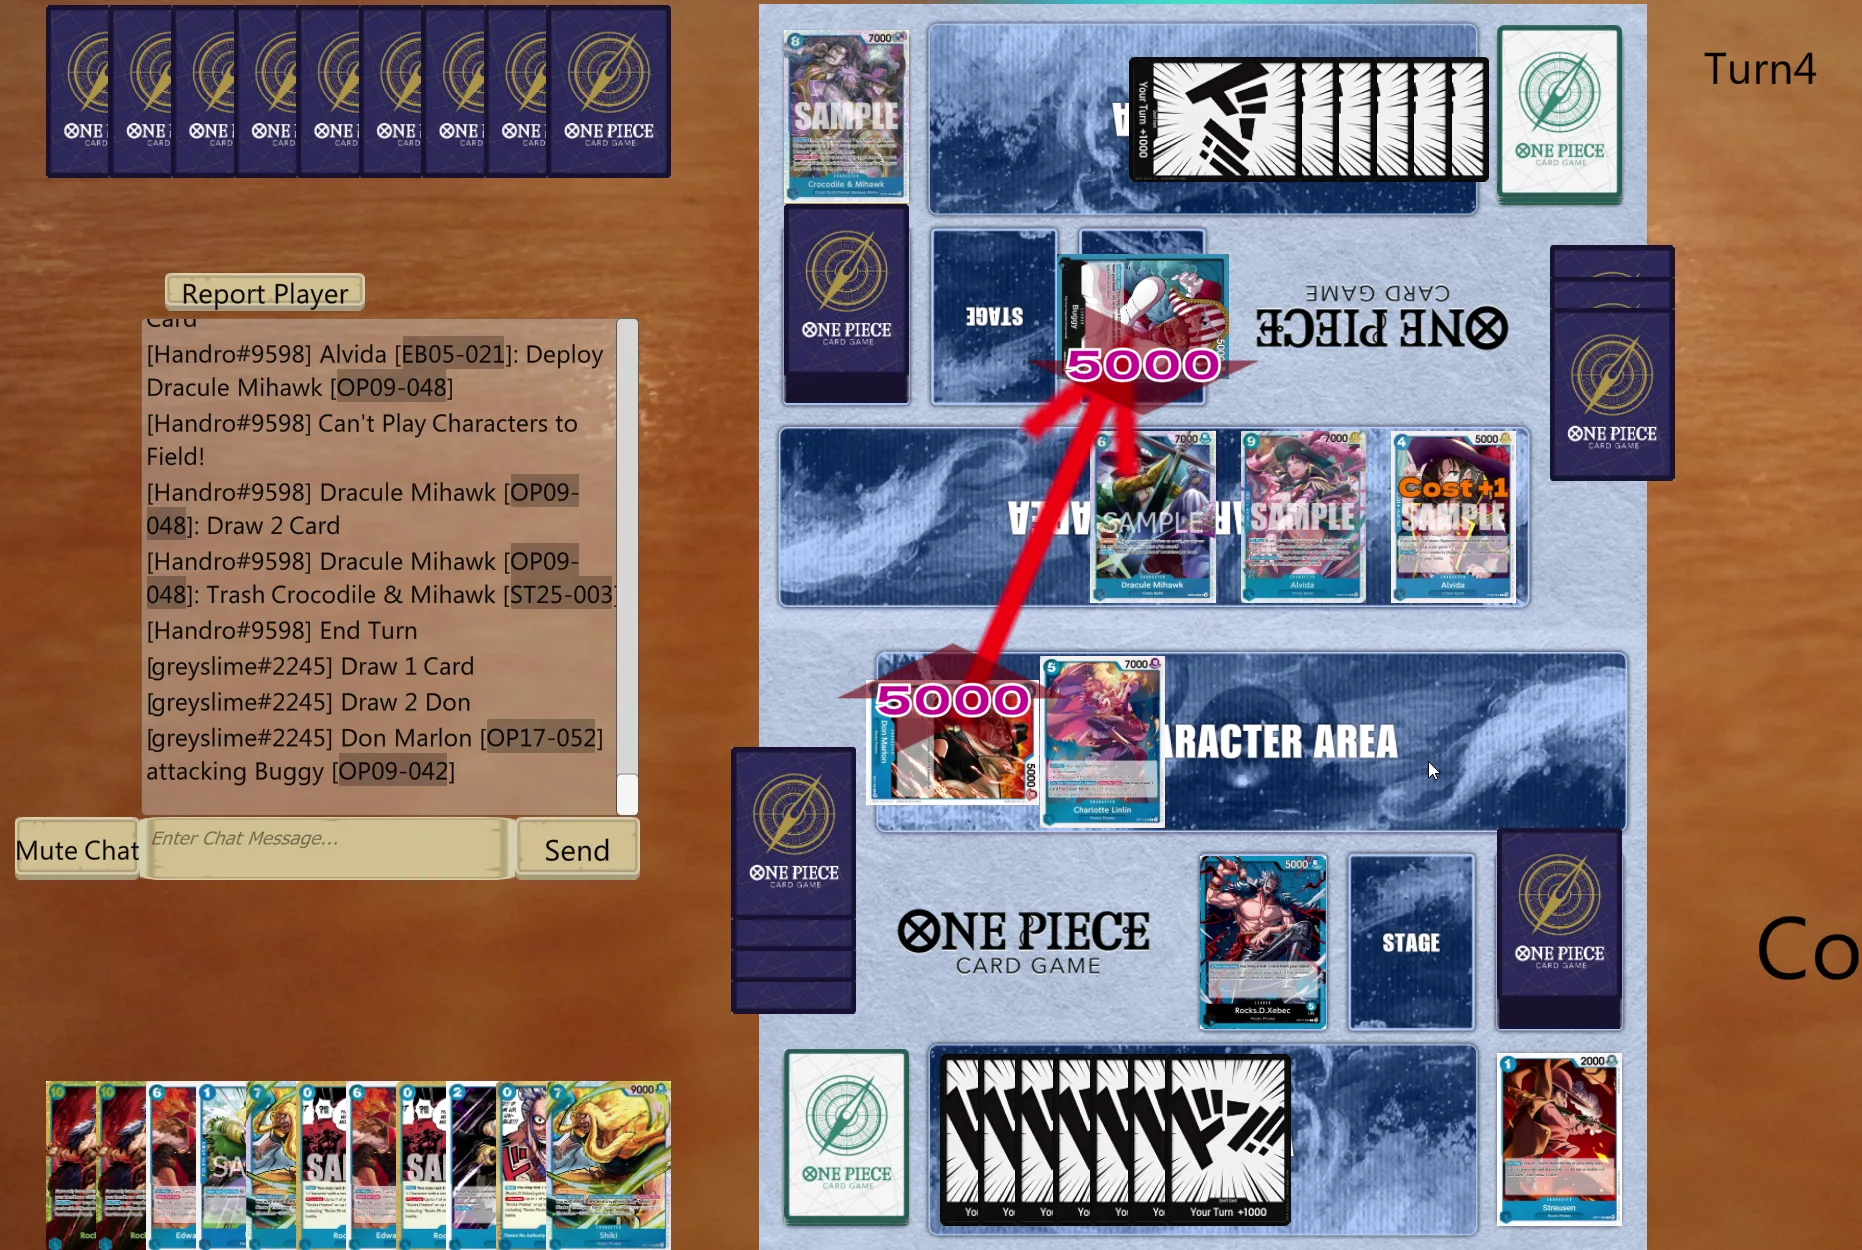
We force our opponent to either keep up with the pressure and give us a lot of cards the following turn if he decides to develop another Alvida, or, as he ends up doing, play defensively (a double Galdino here lets him draw a lot of resources but trades a lot of tempo, especially because he definitely is not going to swing his 7ks).
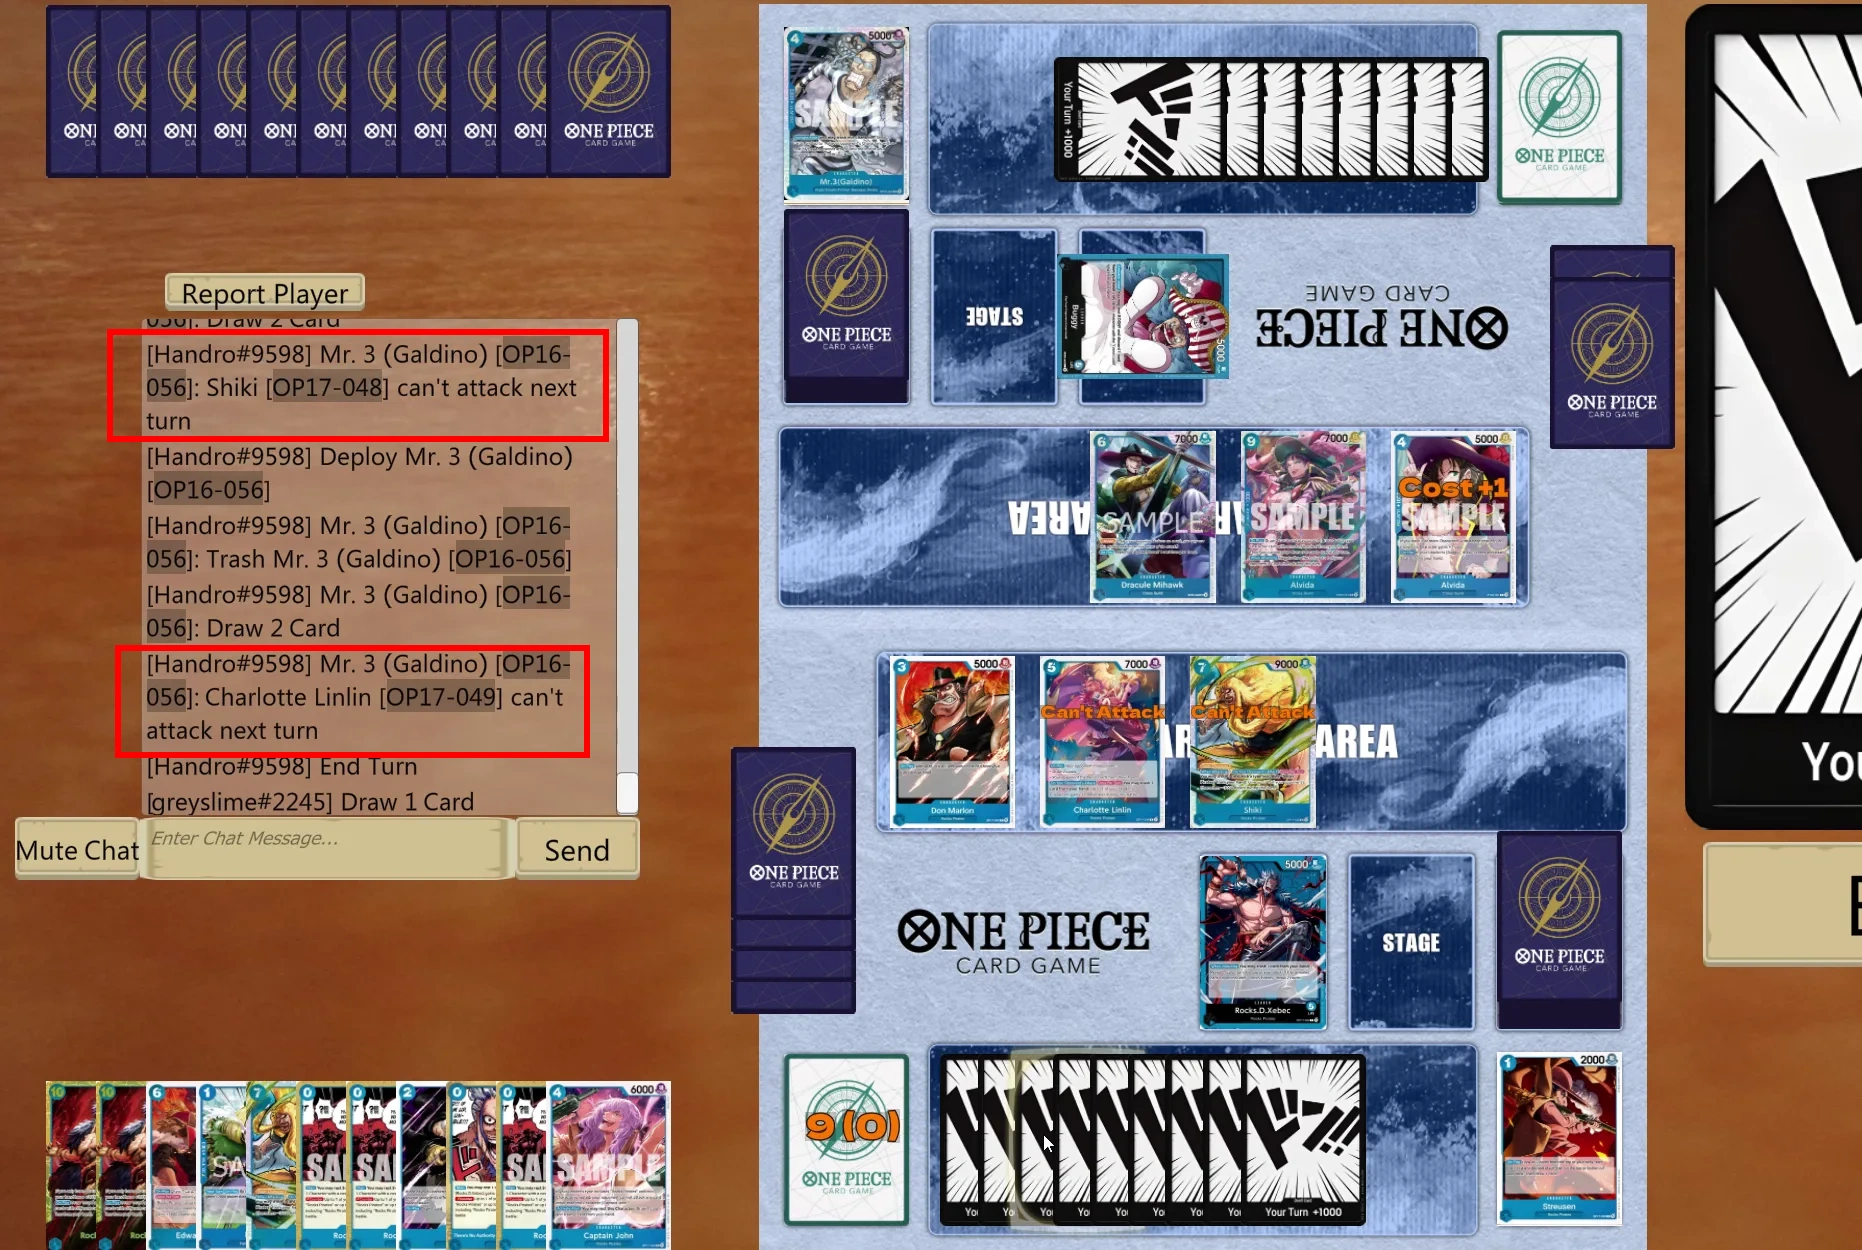
We reply with a second Shiki and finally a Kyo, which will force an Alvida swing.
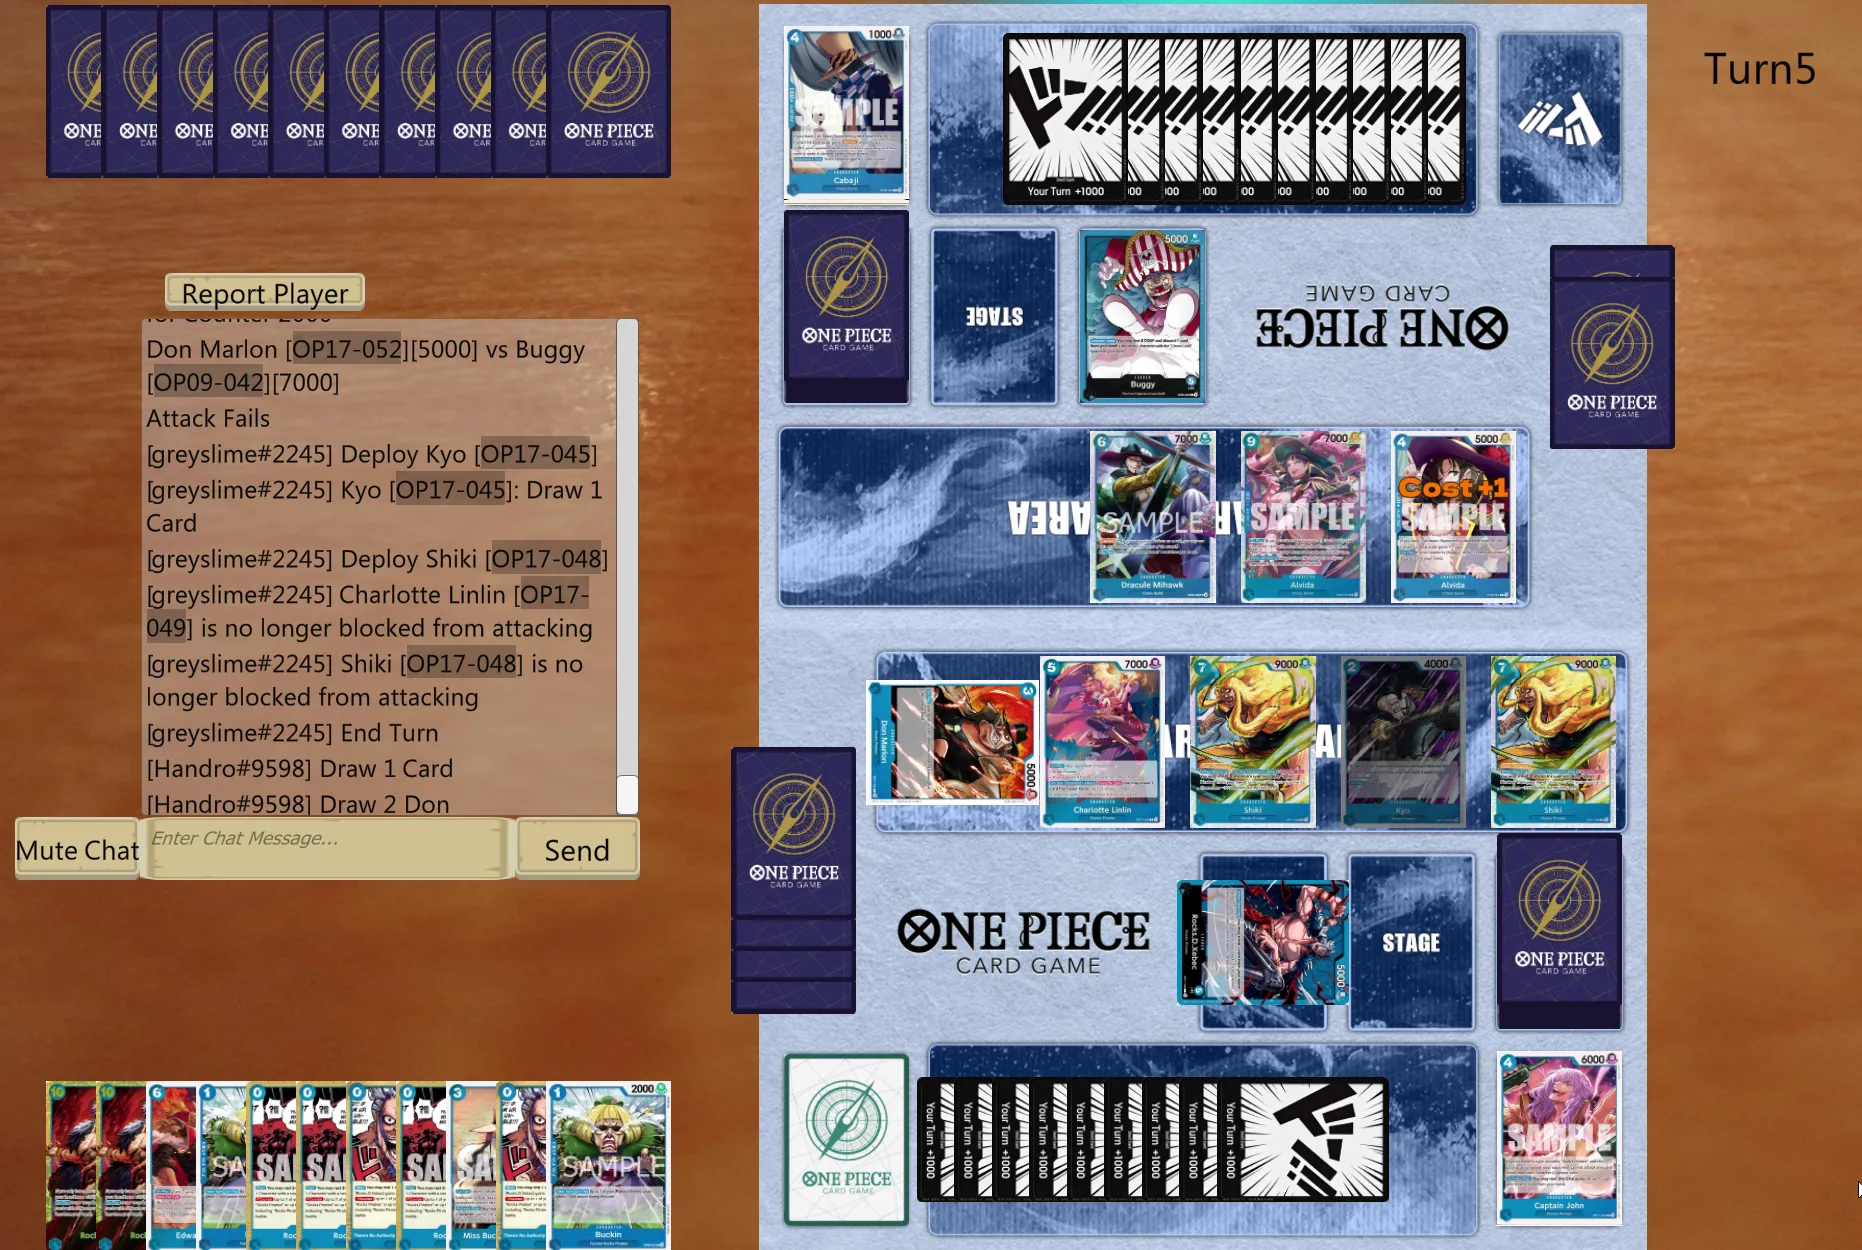
He is then forced to use removal, but his 10-costs won’t stick since he doesn’t have a full board! And this happens twice!
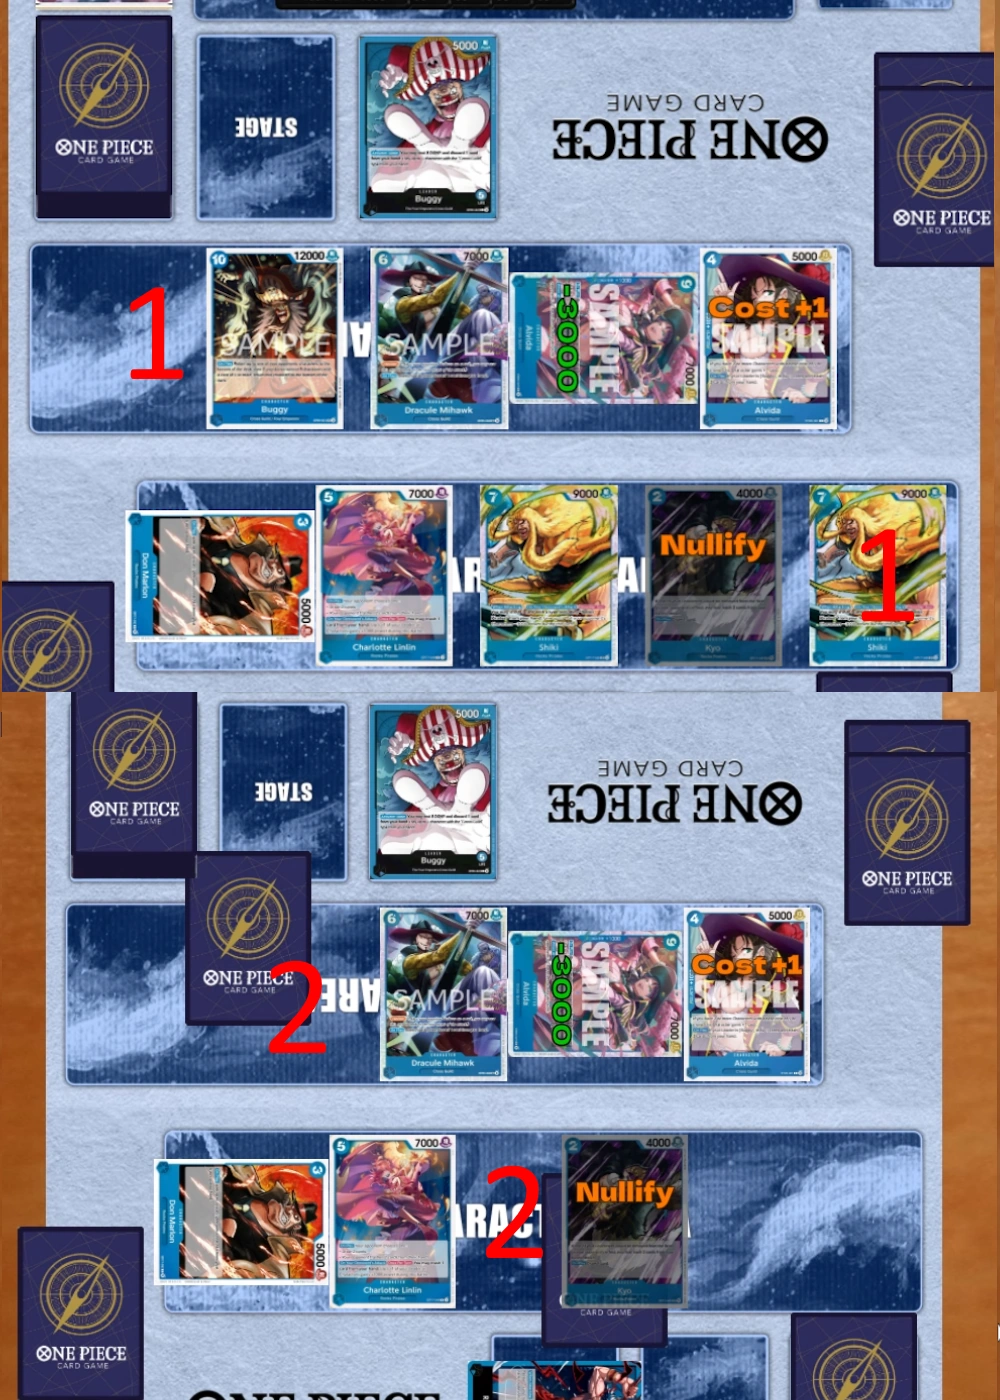
I don’t know what was in my opponent’s hand, but if he had the line to first use a board flooder like C&M or Alvida and then a single 10-cost, perhaps it could have turned the game around. From this point onwards, though, it’s downhill for me.
On my turn, with no C&M on board, in hindsight I think the correct line was to aggro him down with Jinbe and try to bring him to 0 life, but I ended up playing Rocks instead, for safety.
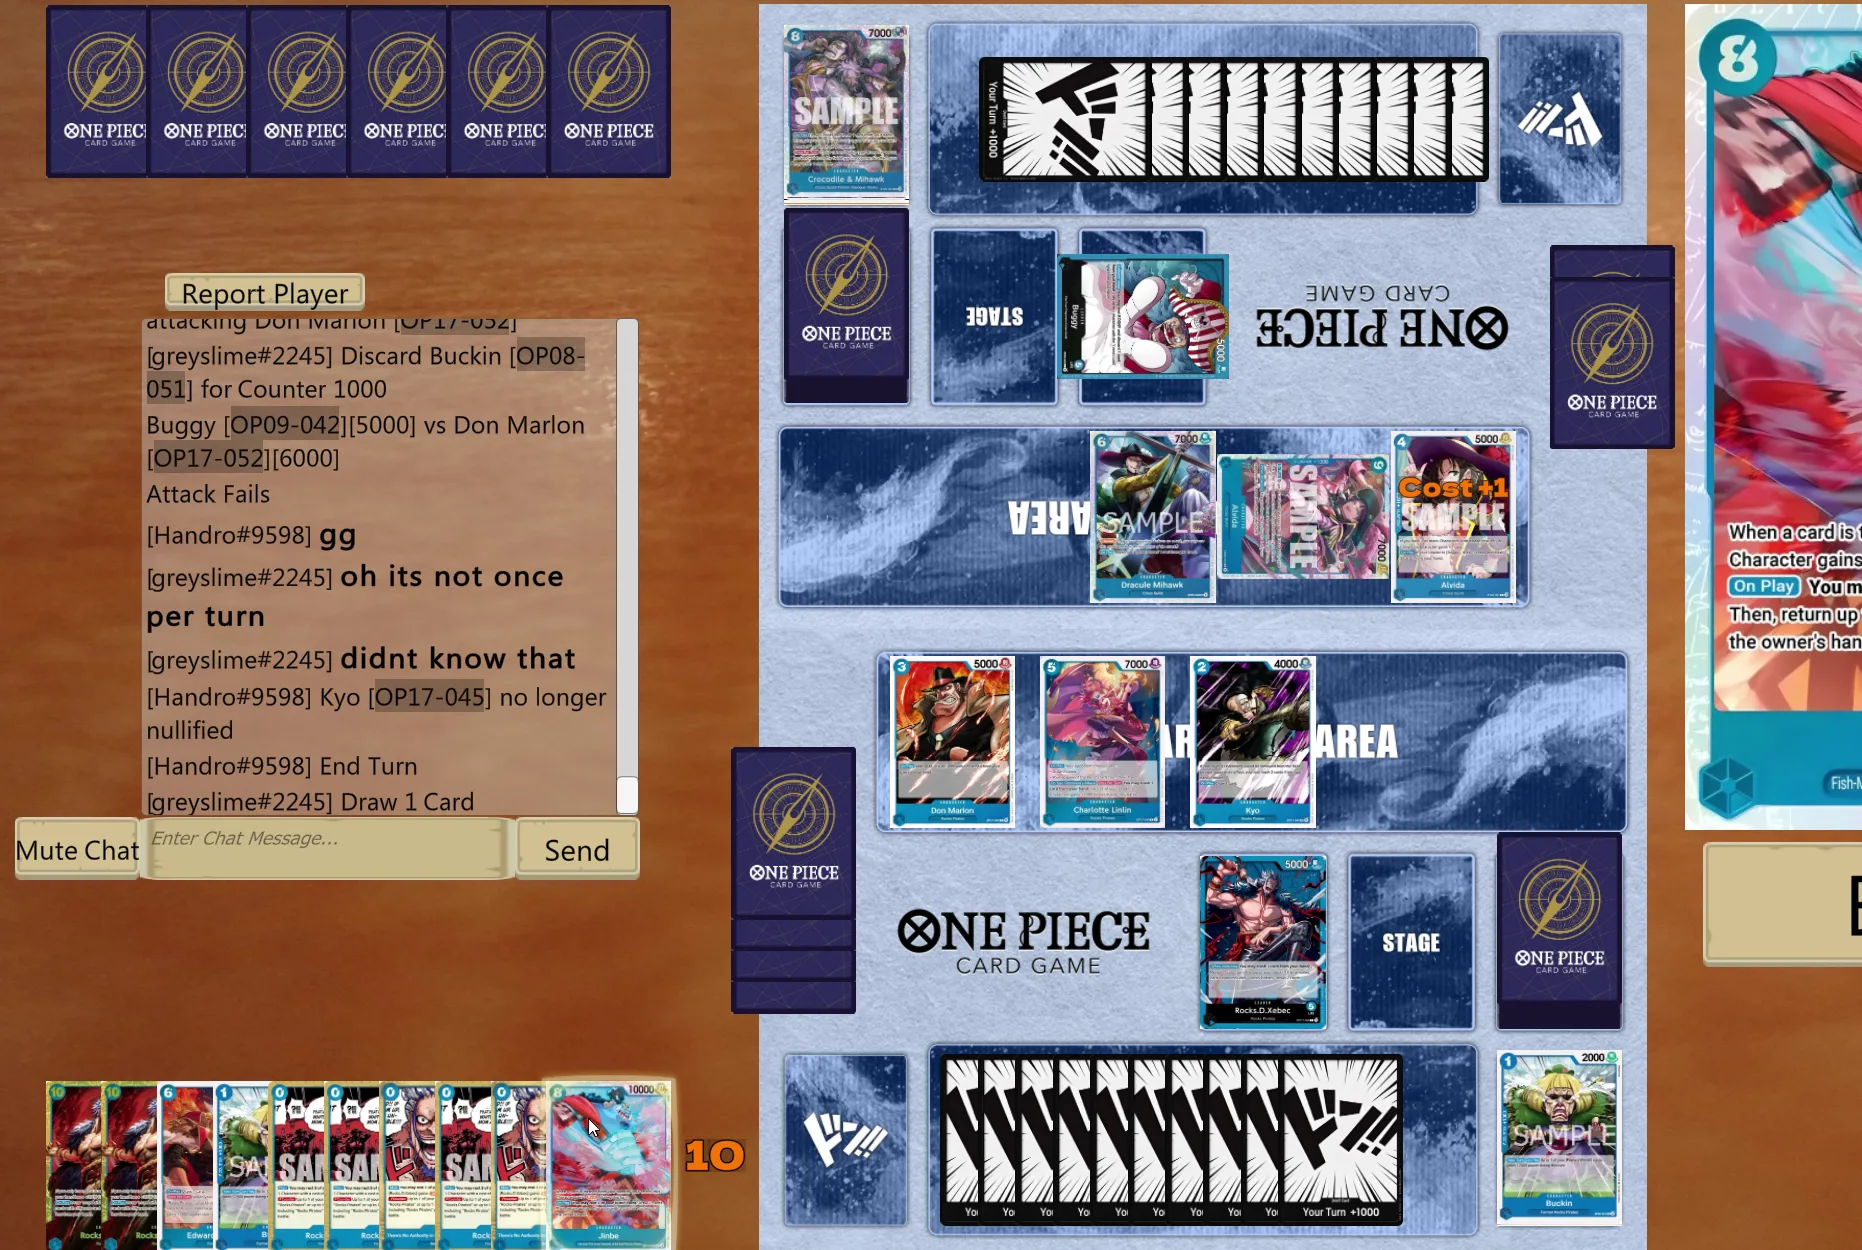
Either way, it comes down to a couple of turns of board grind, followed by a mathematically secured victory.
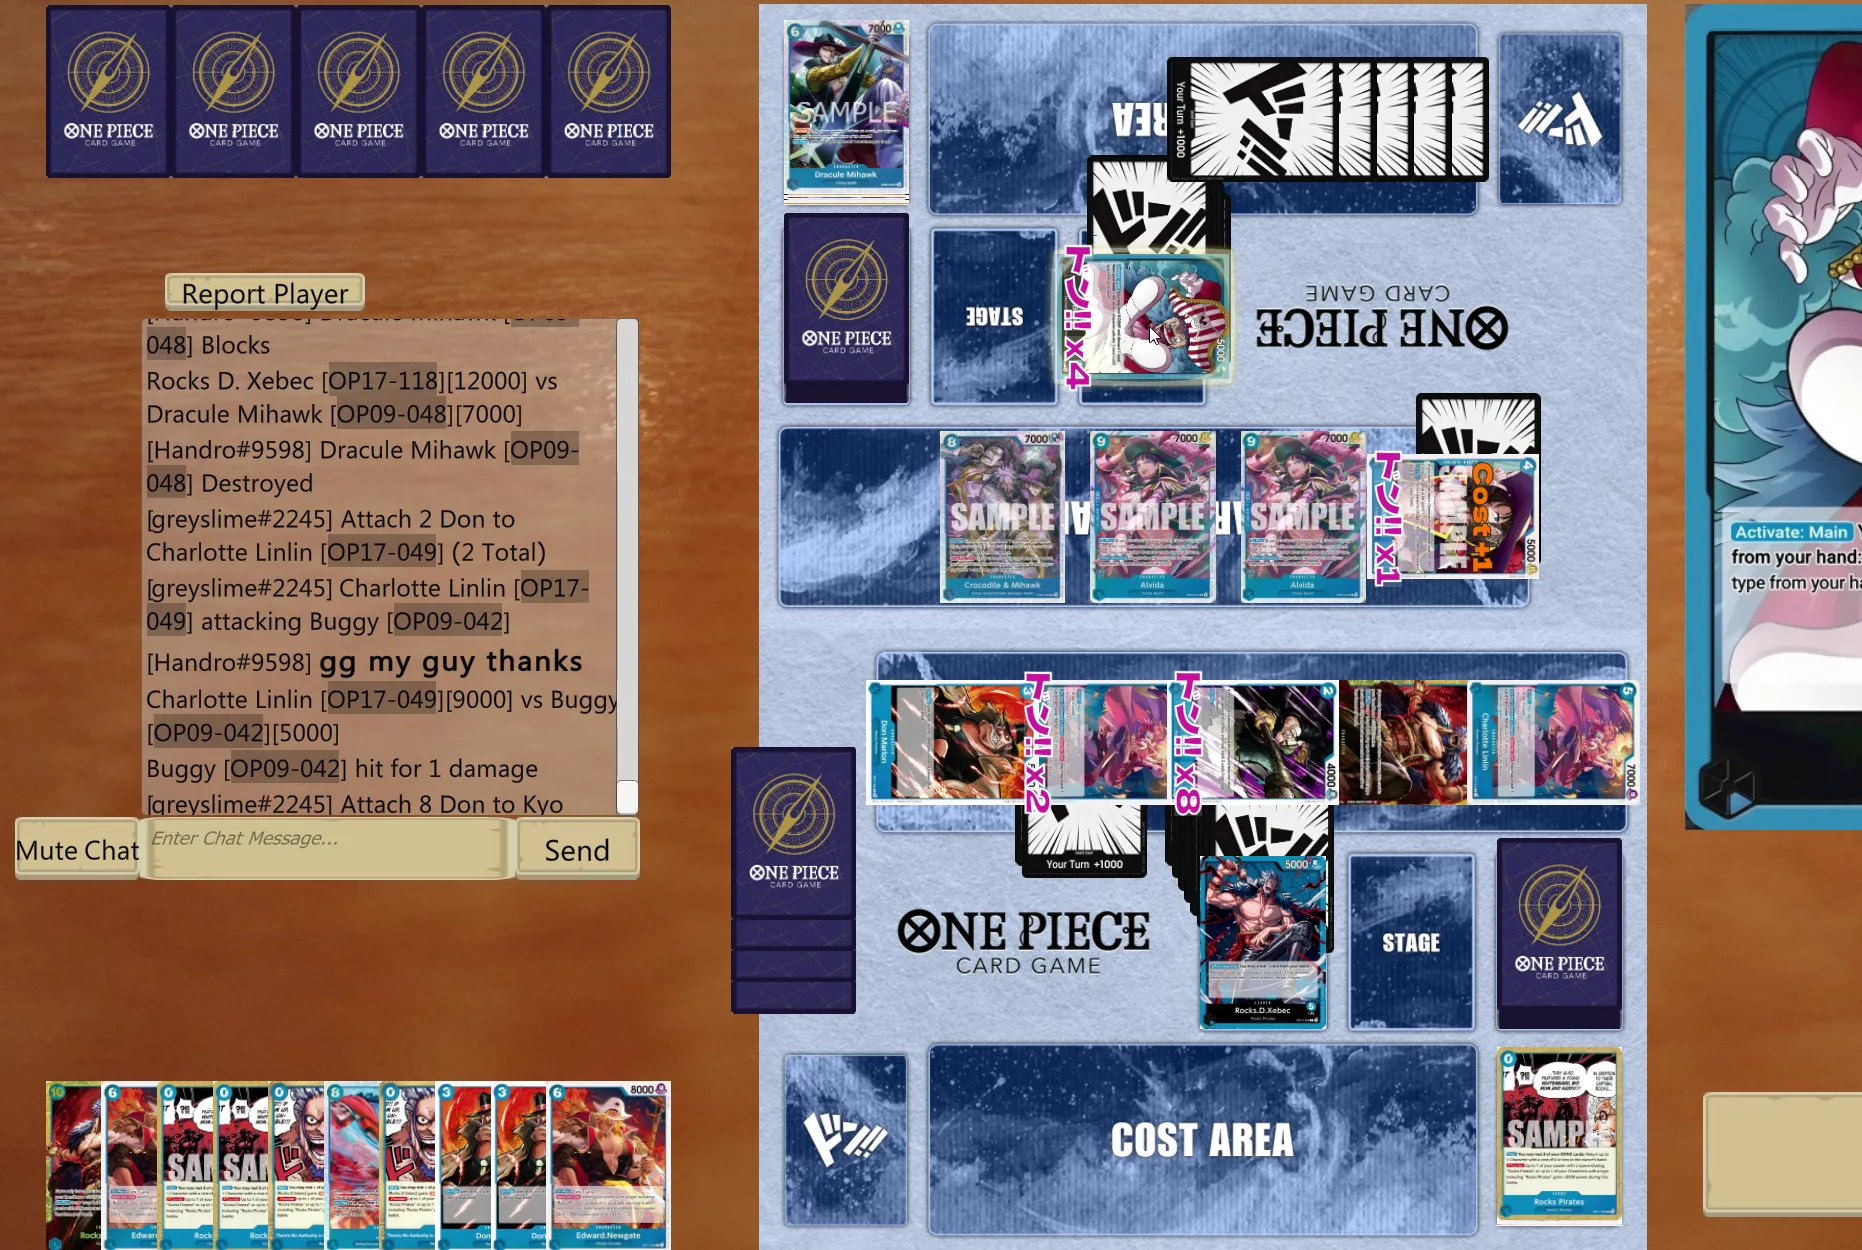
Example 3: You can lose to your Mulligan
In this other match the outcome was also heavily influenced by the mulligan: let’s see what happens when you miss your key cards…
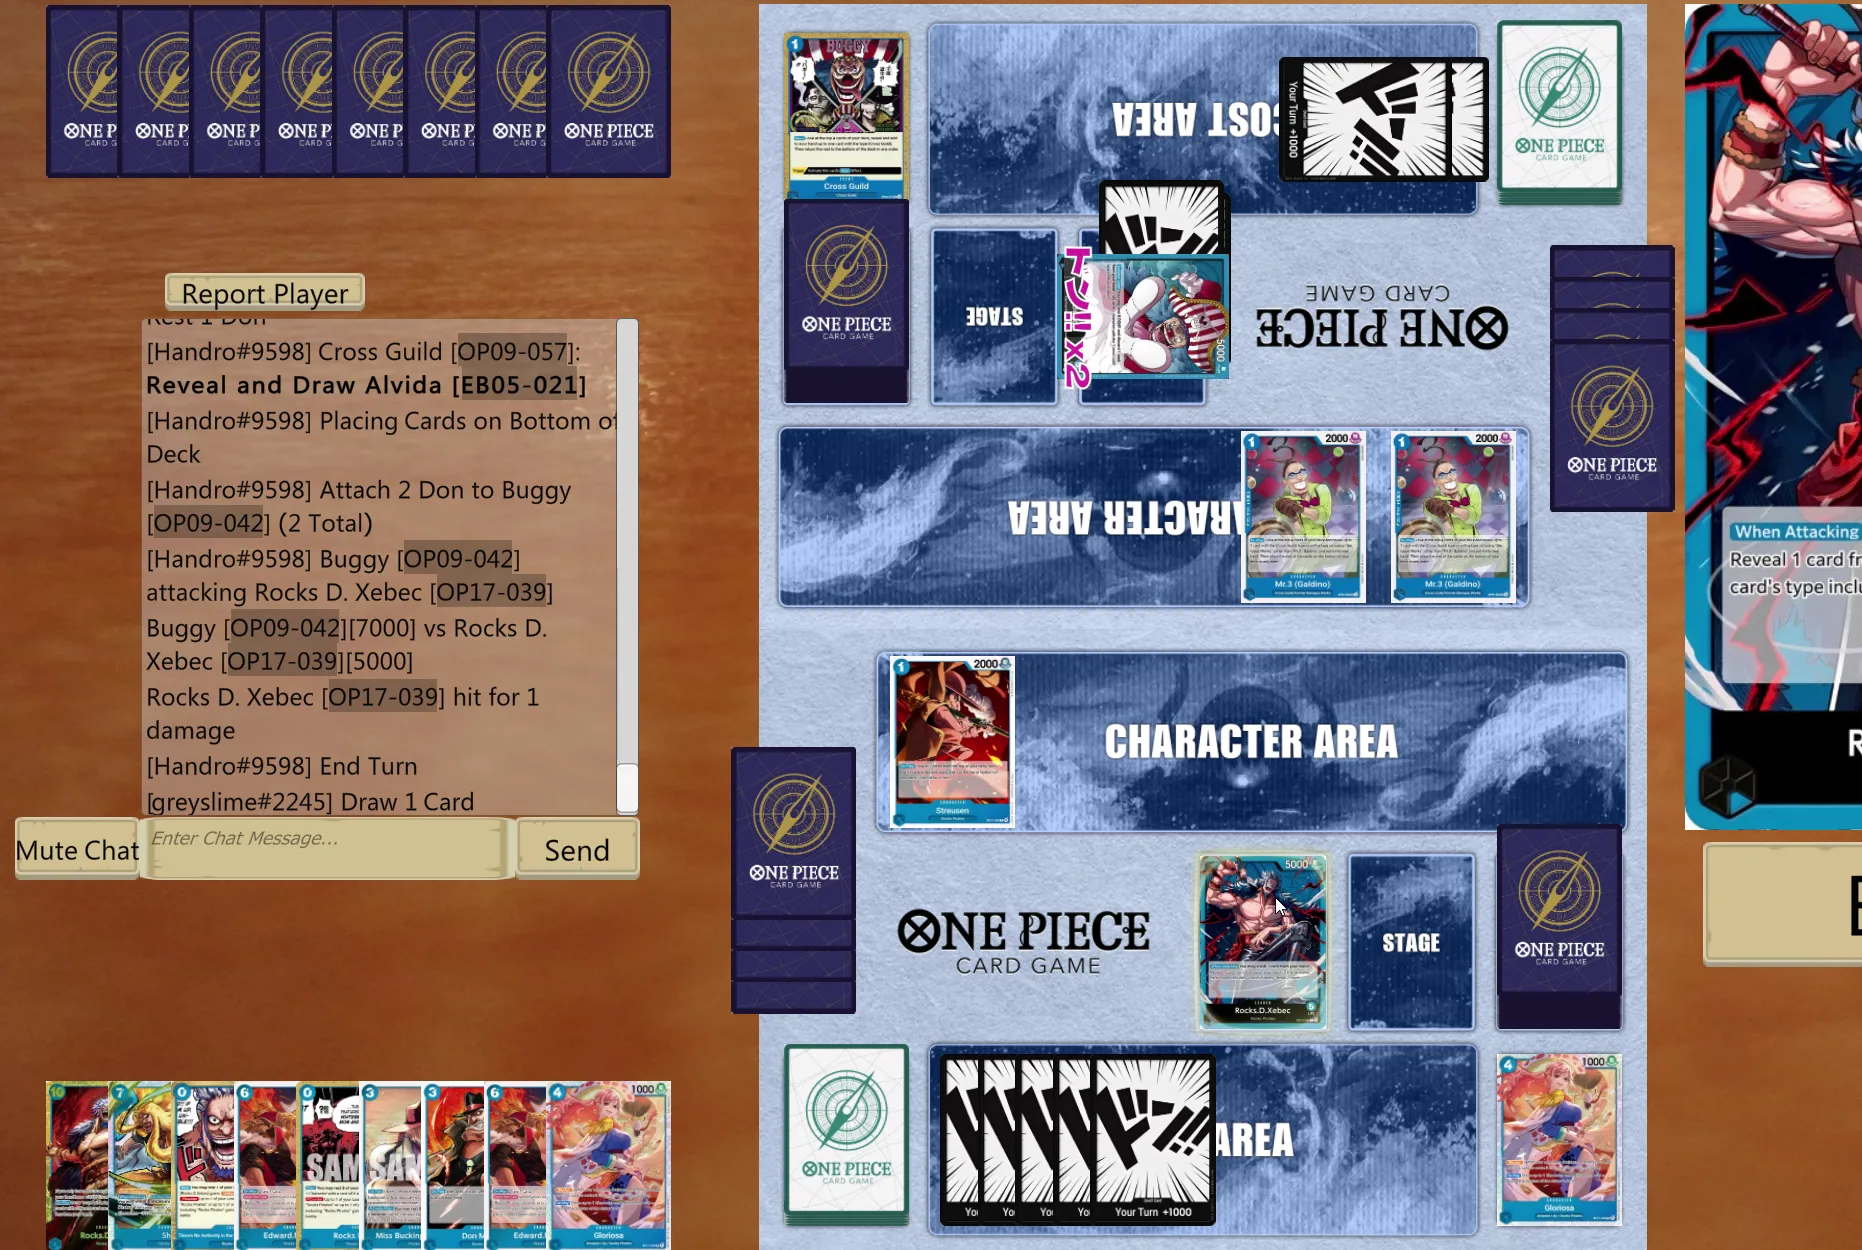
At 5 Don!!, even after using the leader effect, I hadn’t found either Kyo or Linlin, so I ended up developing a Marlon.
On the 7 Don!! turn I finally draw both Kyo and Linlin, and I play them instead of Shiki to play around Buggy.
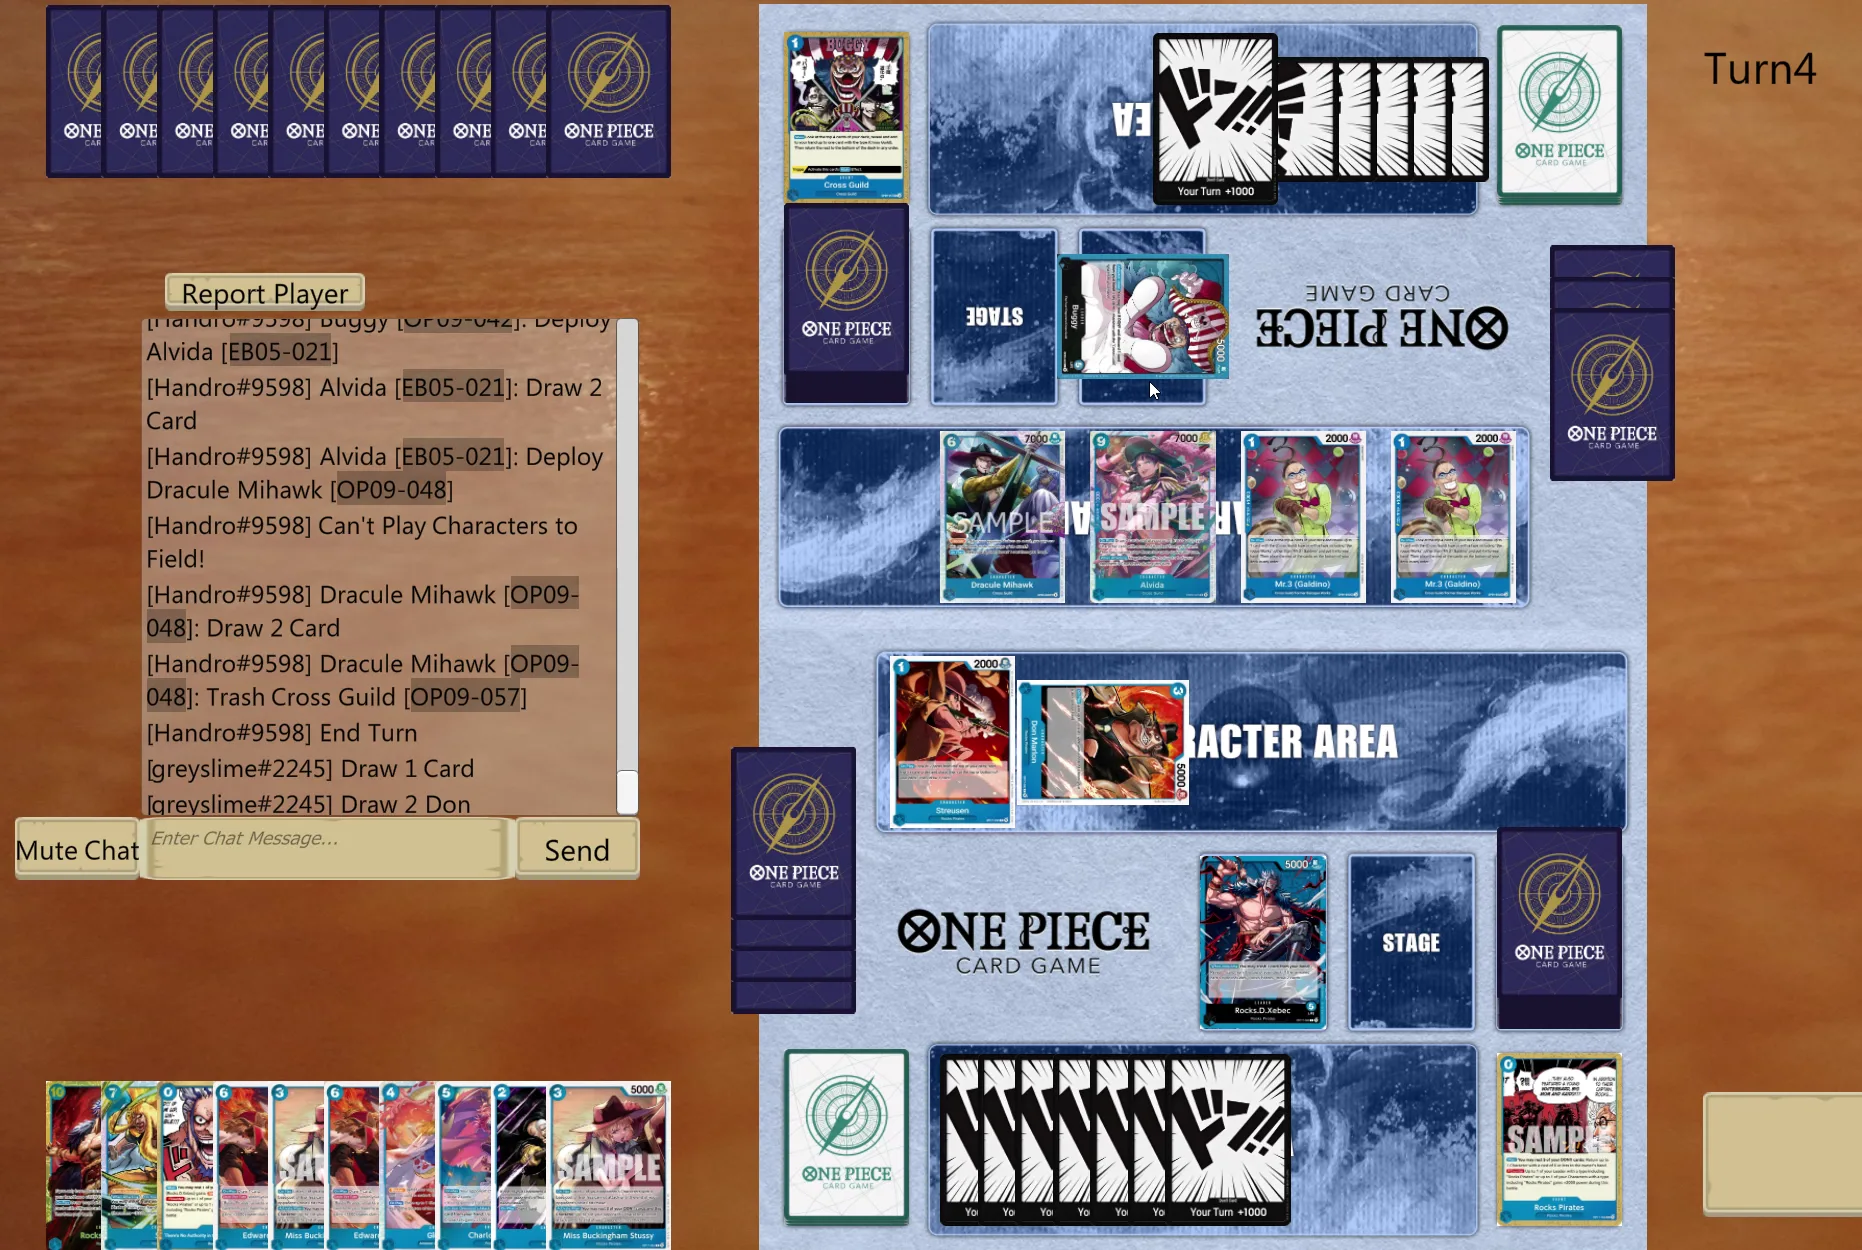
My opponent keeps flooding the board with double Alvida, which in this spot is not GG already, but definitely a grim situation.
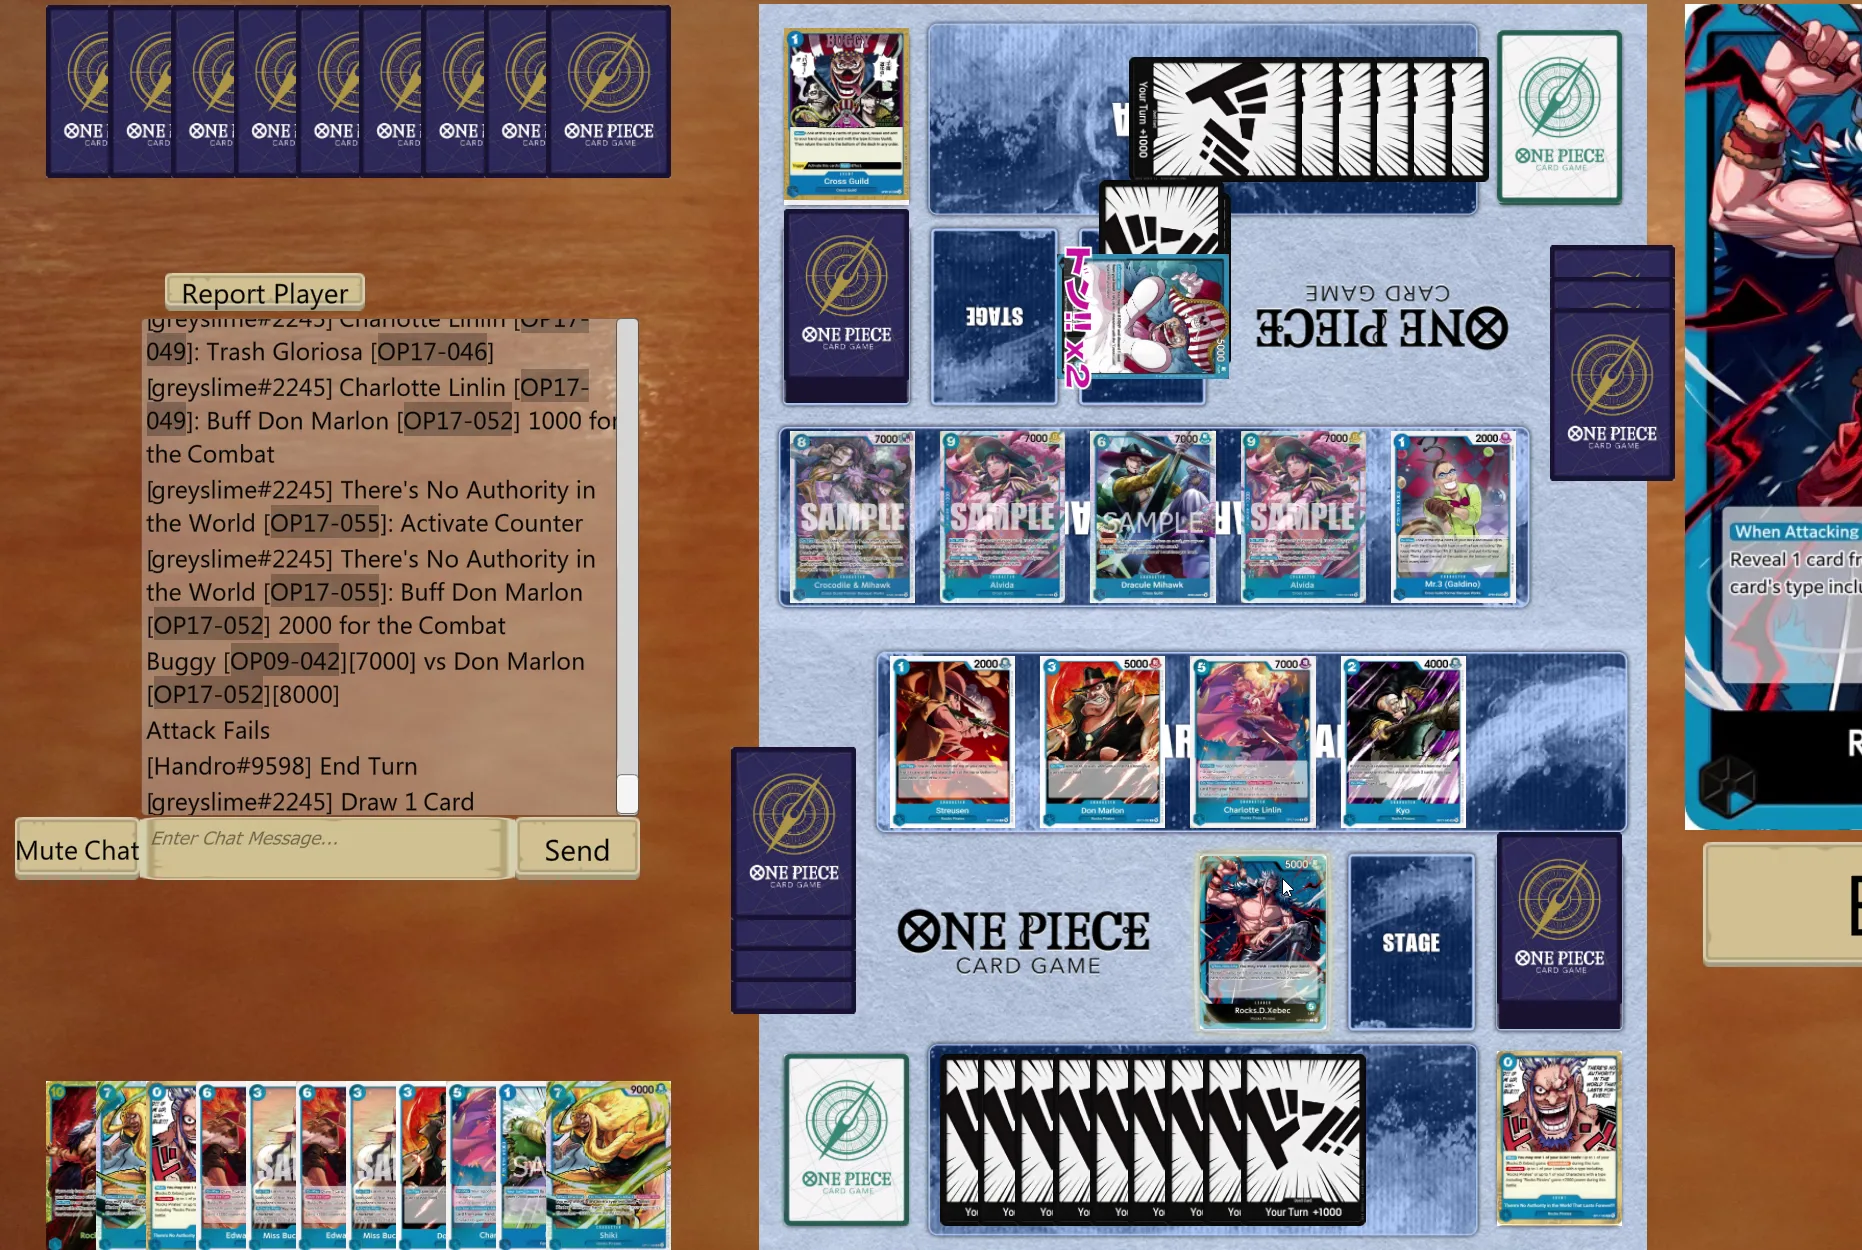
Since Shiki would have zero impact, I choose to go Newgate + Stussy: it’s better to keep Shiki for next turn in combo with Rocks (since one Alvida will negate Kyo and our biggest body will get Bugged).
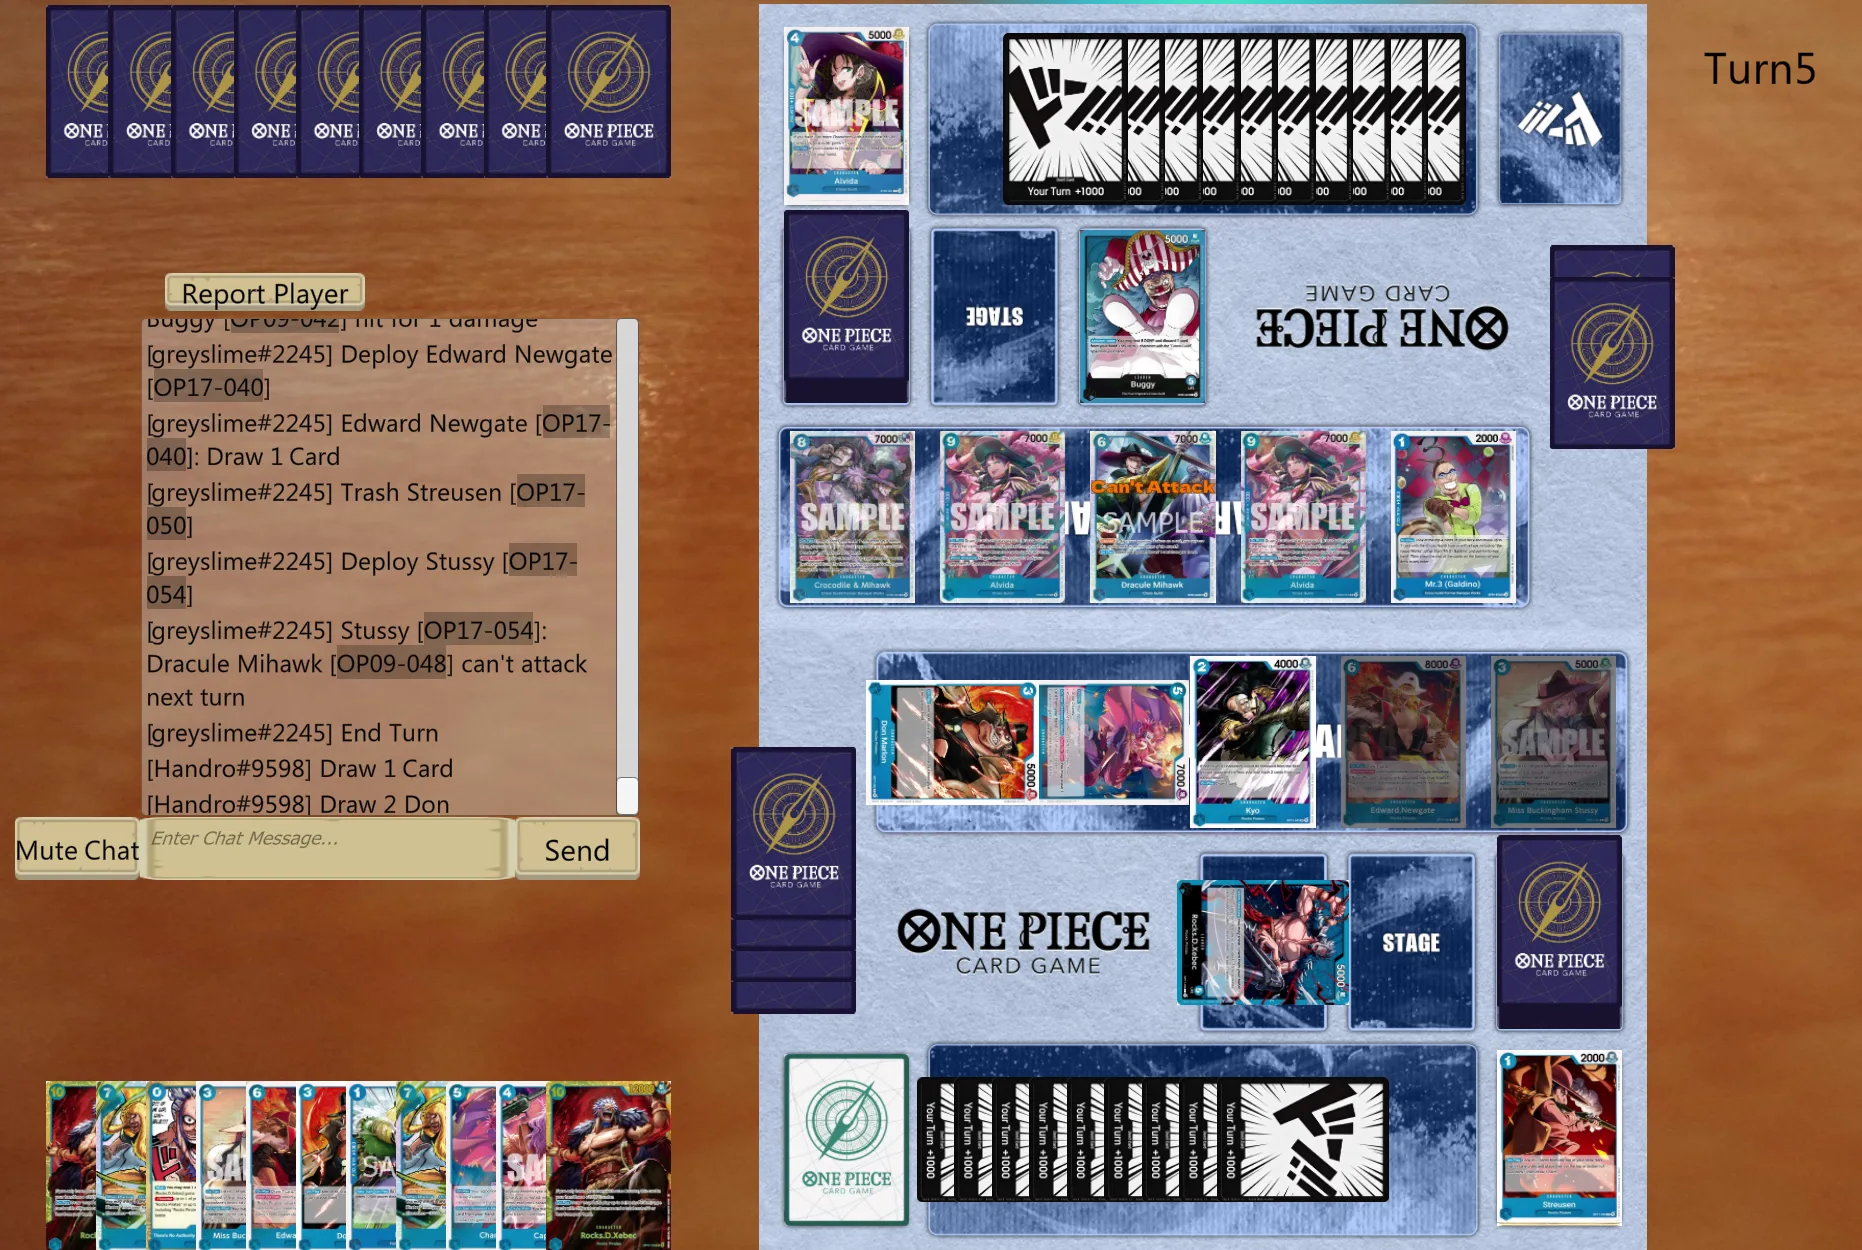
On his turn he Galdino’d my Linlin and started turning his bodies sideways, comboing Alvida with the 10-cost Buggy, as expected.
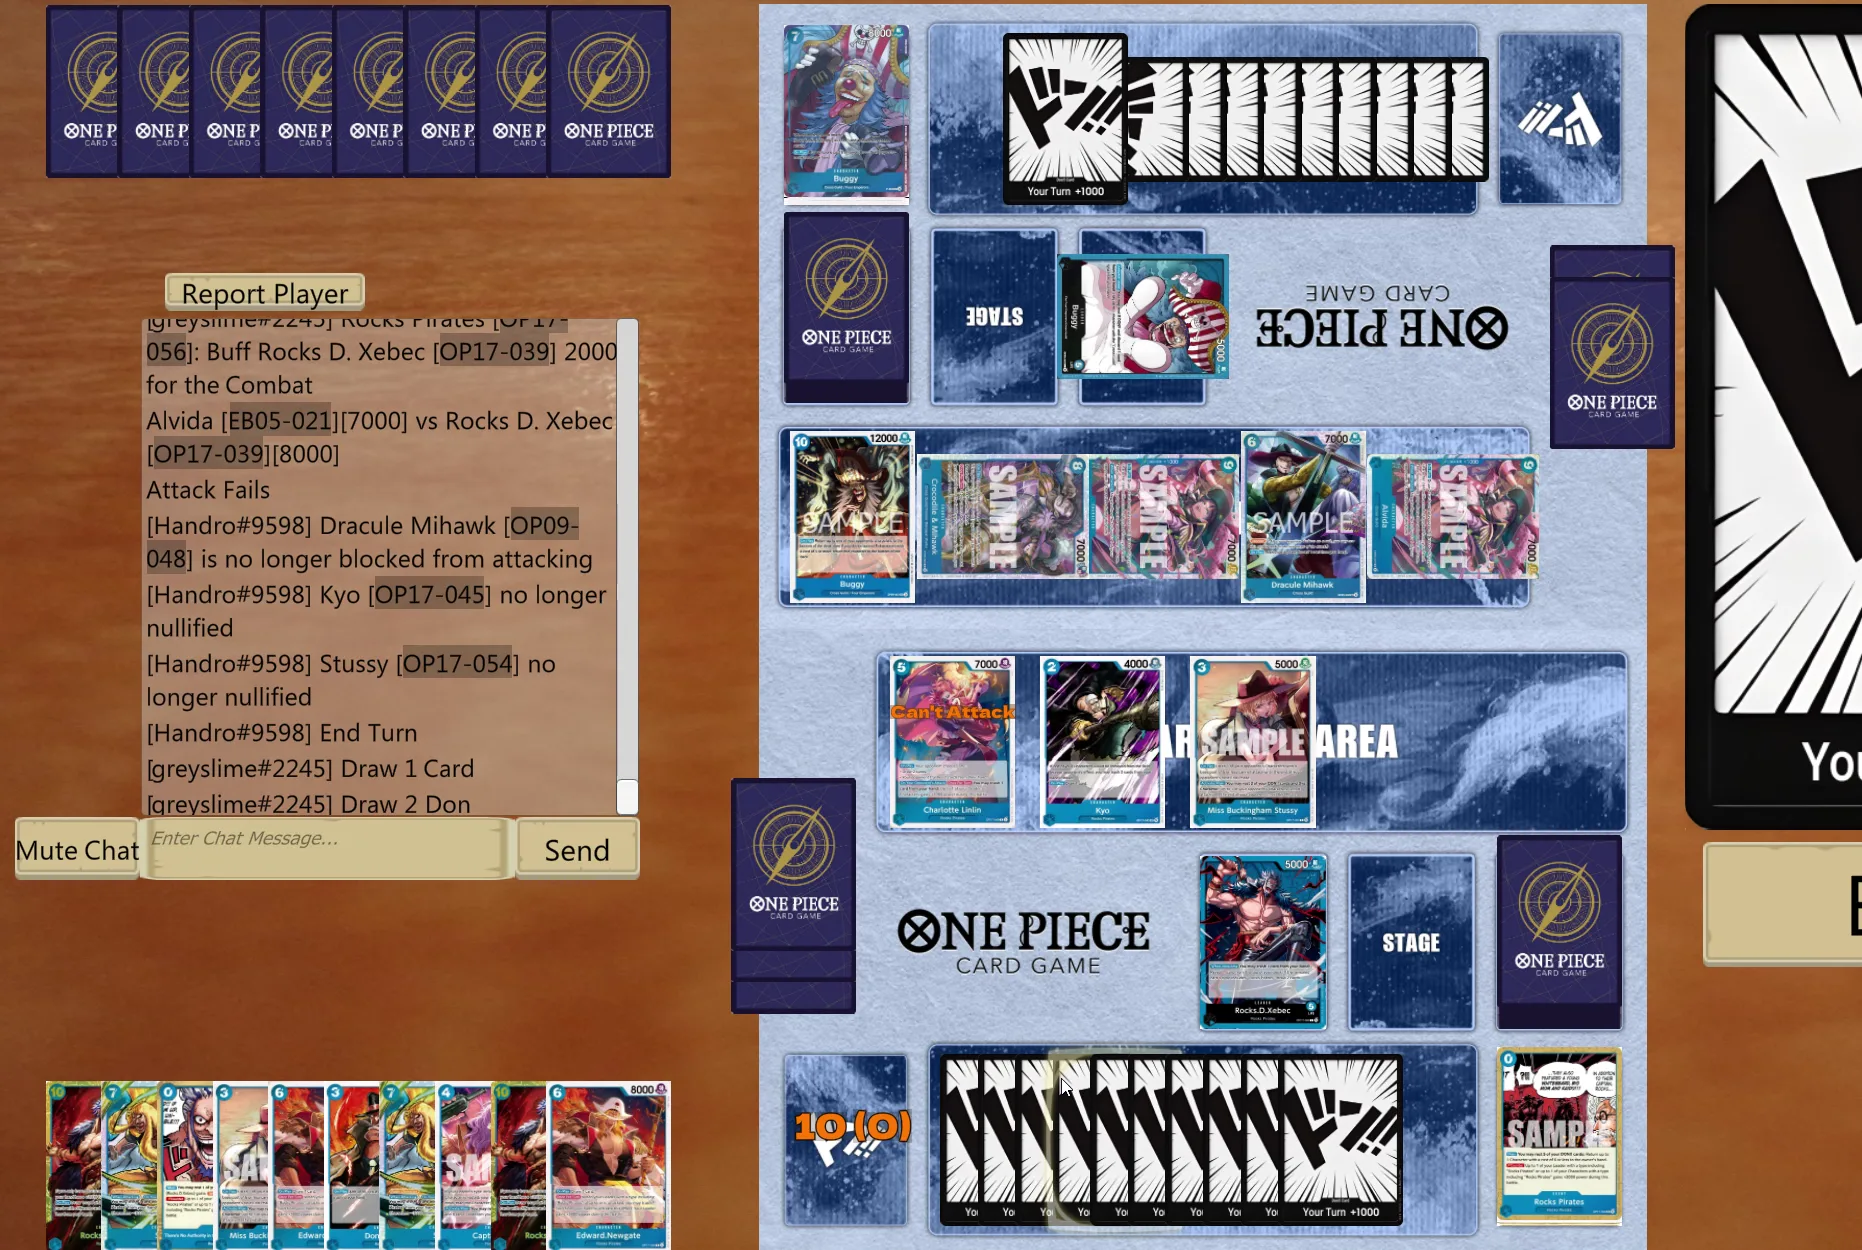
I think the line here has to be Rocks into Shiki, to try to get rid of at least one Alvida… He gives us 4 cards and manages to protect his entire board.
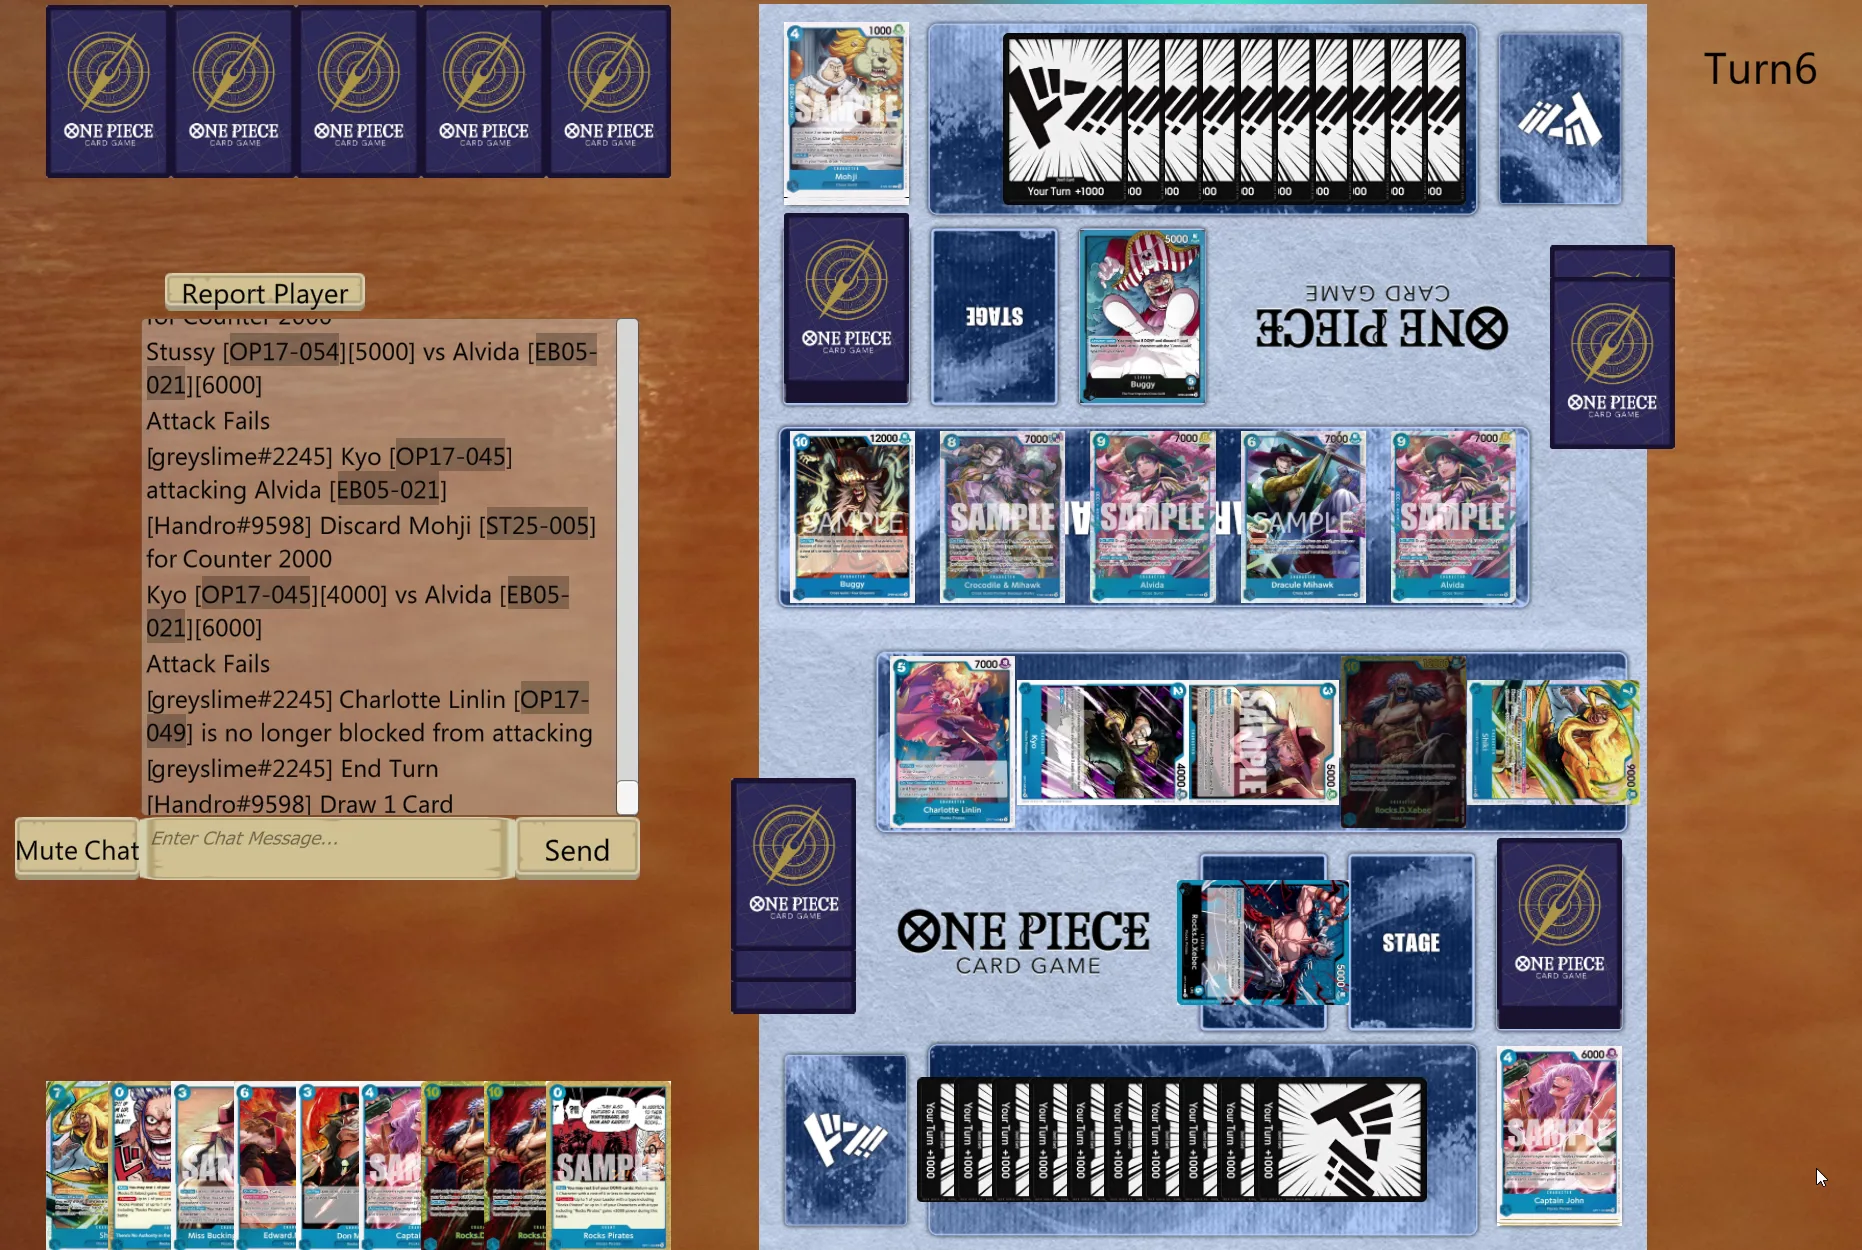
He then proceeds to Galdino the Shiki with his second Galdino, Buggy the Rocks with his second Buggy, and bring us down to 1 life… Pretty strong turn.
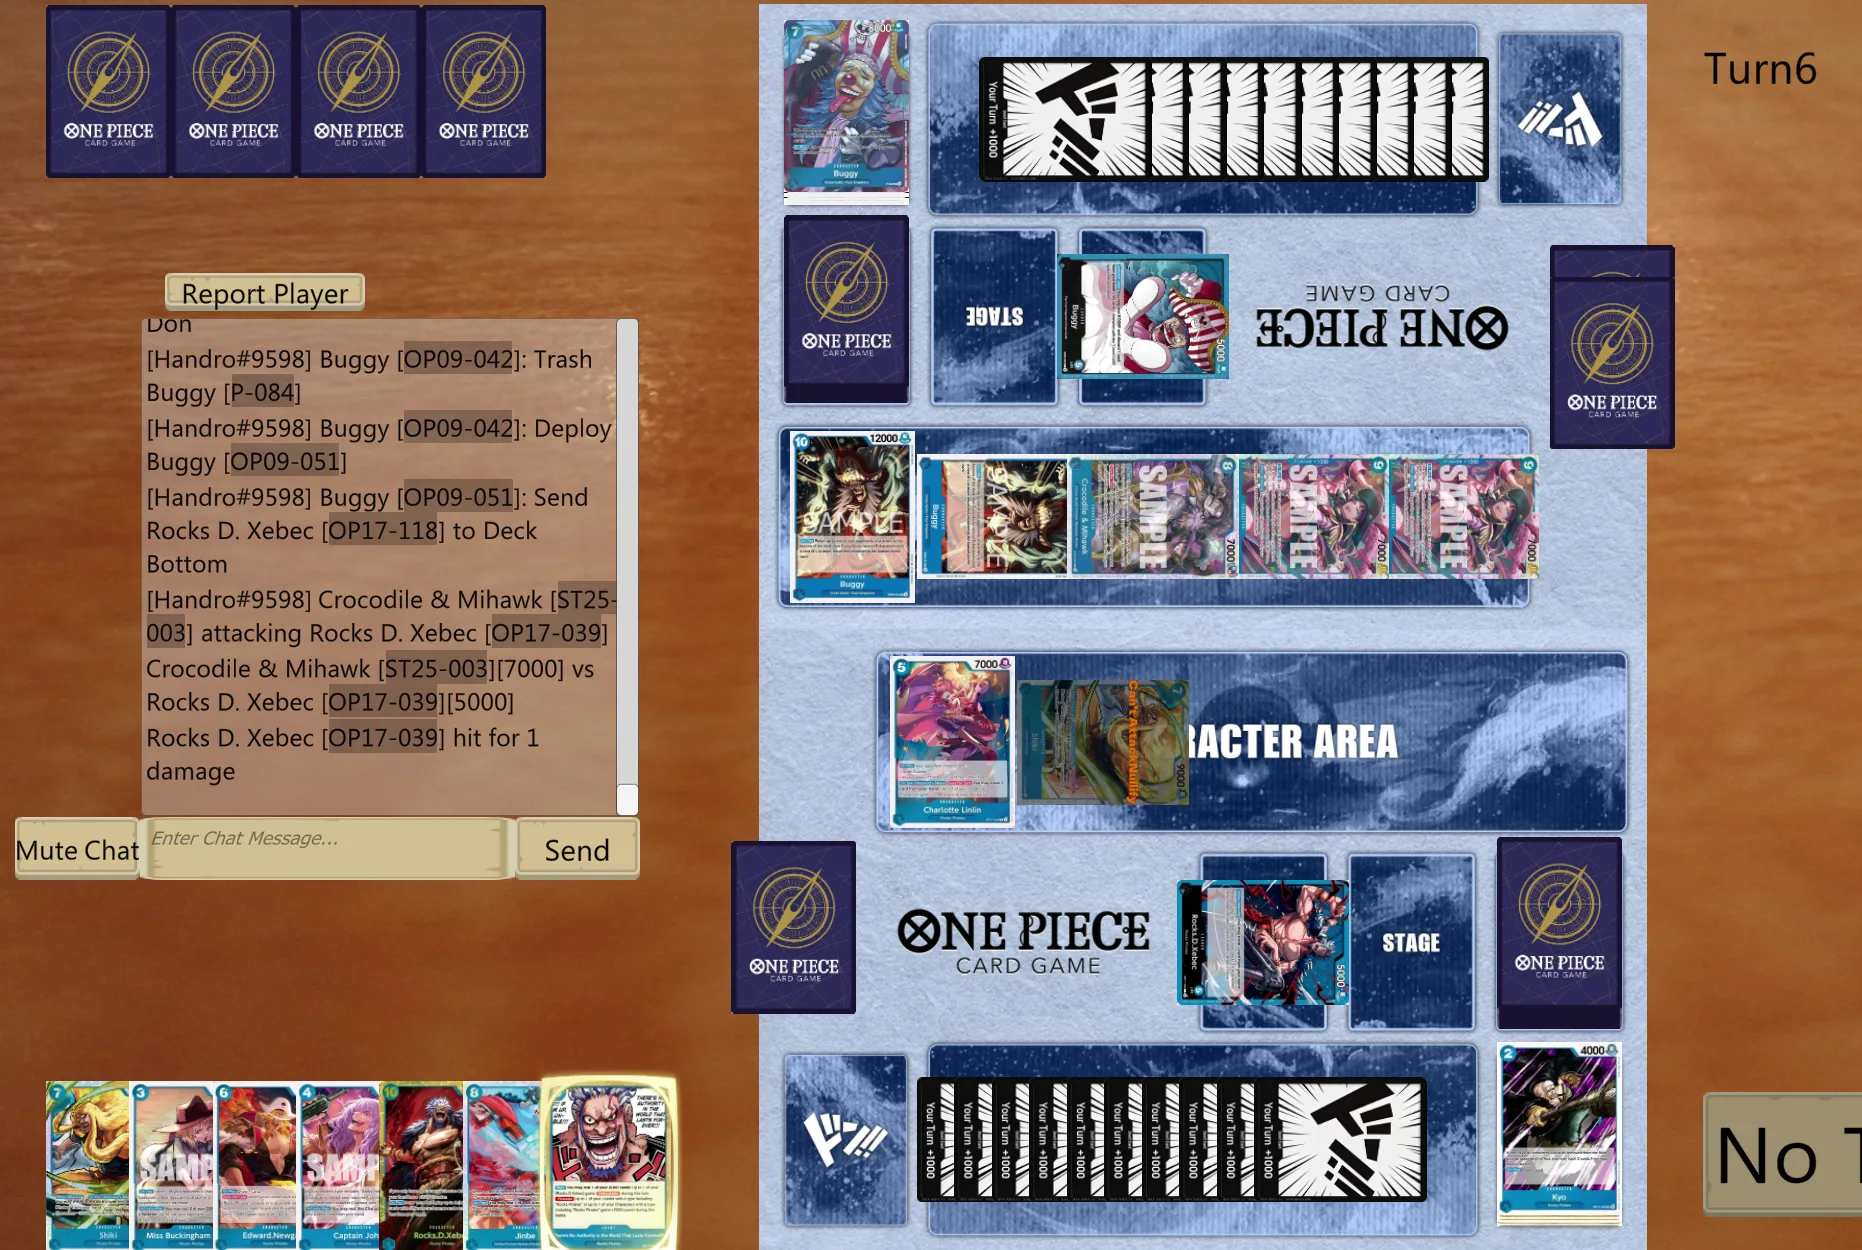
If the Shiki weren’t stunned, there could be an argument for going for lethal, but in this position not even John + the Usopp event could save us (Alvida directly counters it), so it’s GG: you miss the pieces on curve, you lose even if you go first.
The most important pattern to learn
I want to stress a point: the most common board state you will find is essentially this one:
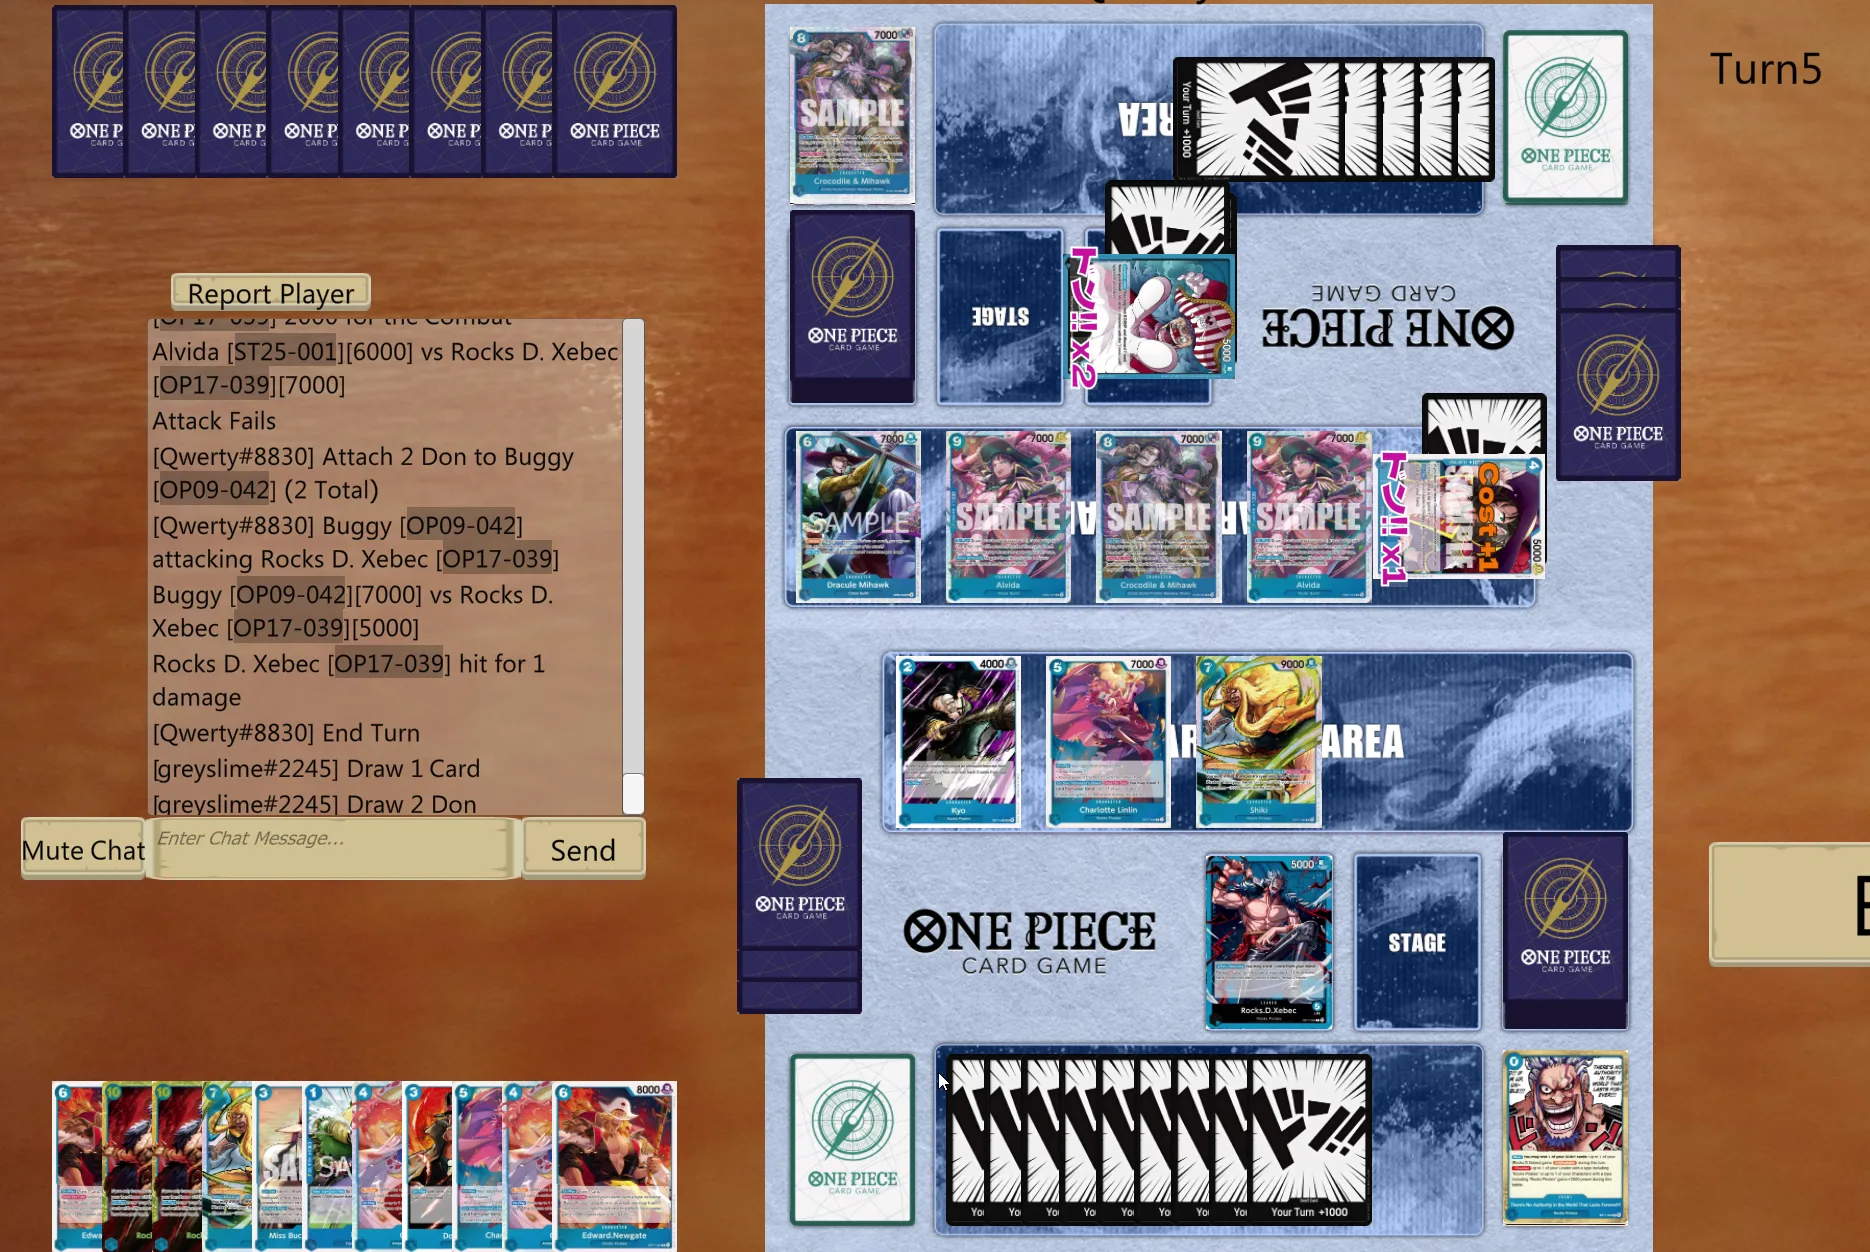
This pattern will repeat often, and while you may be tempted to play the second Shiki, it is often better to save him after the first 10c Buggy hits the board and takes away your first Shiki, so it can swing on a rested Alvida.
A smart play you can make is to develop a threat (in my case Newgate) and a second Kyo, so you force him to swing both Alvidas.
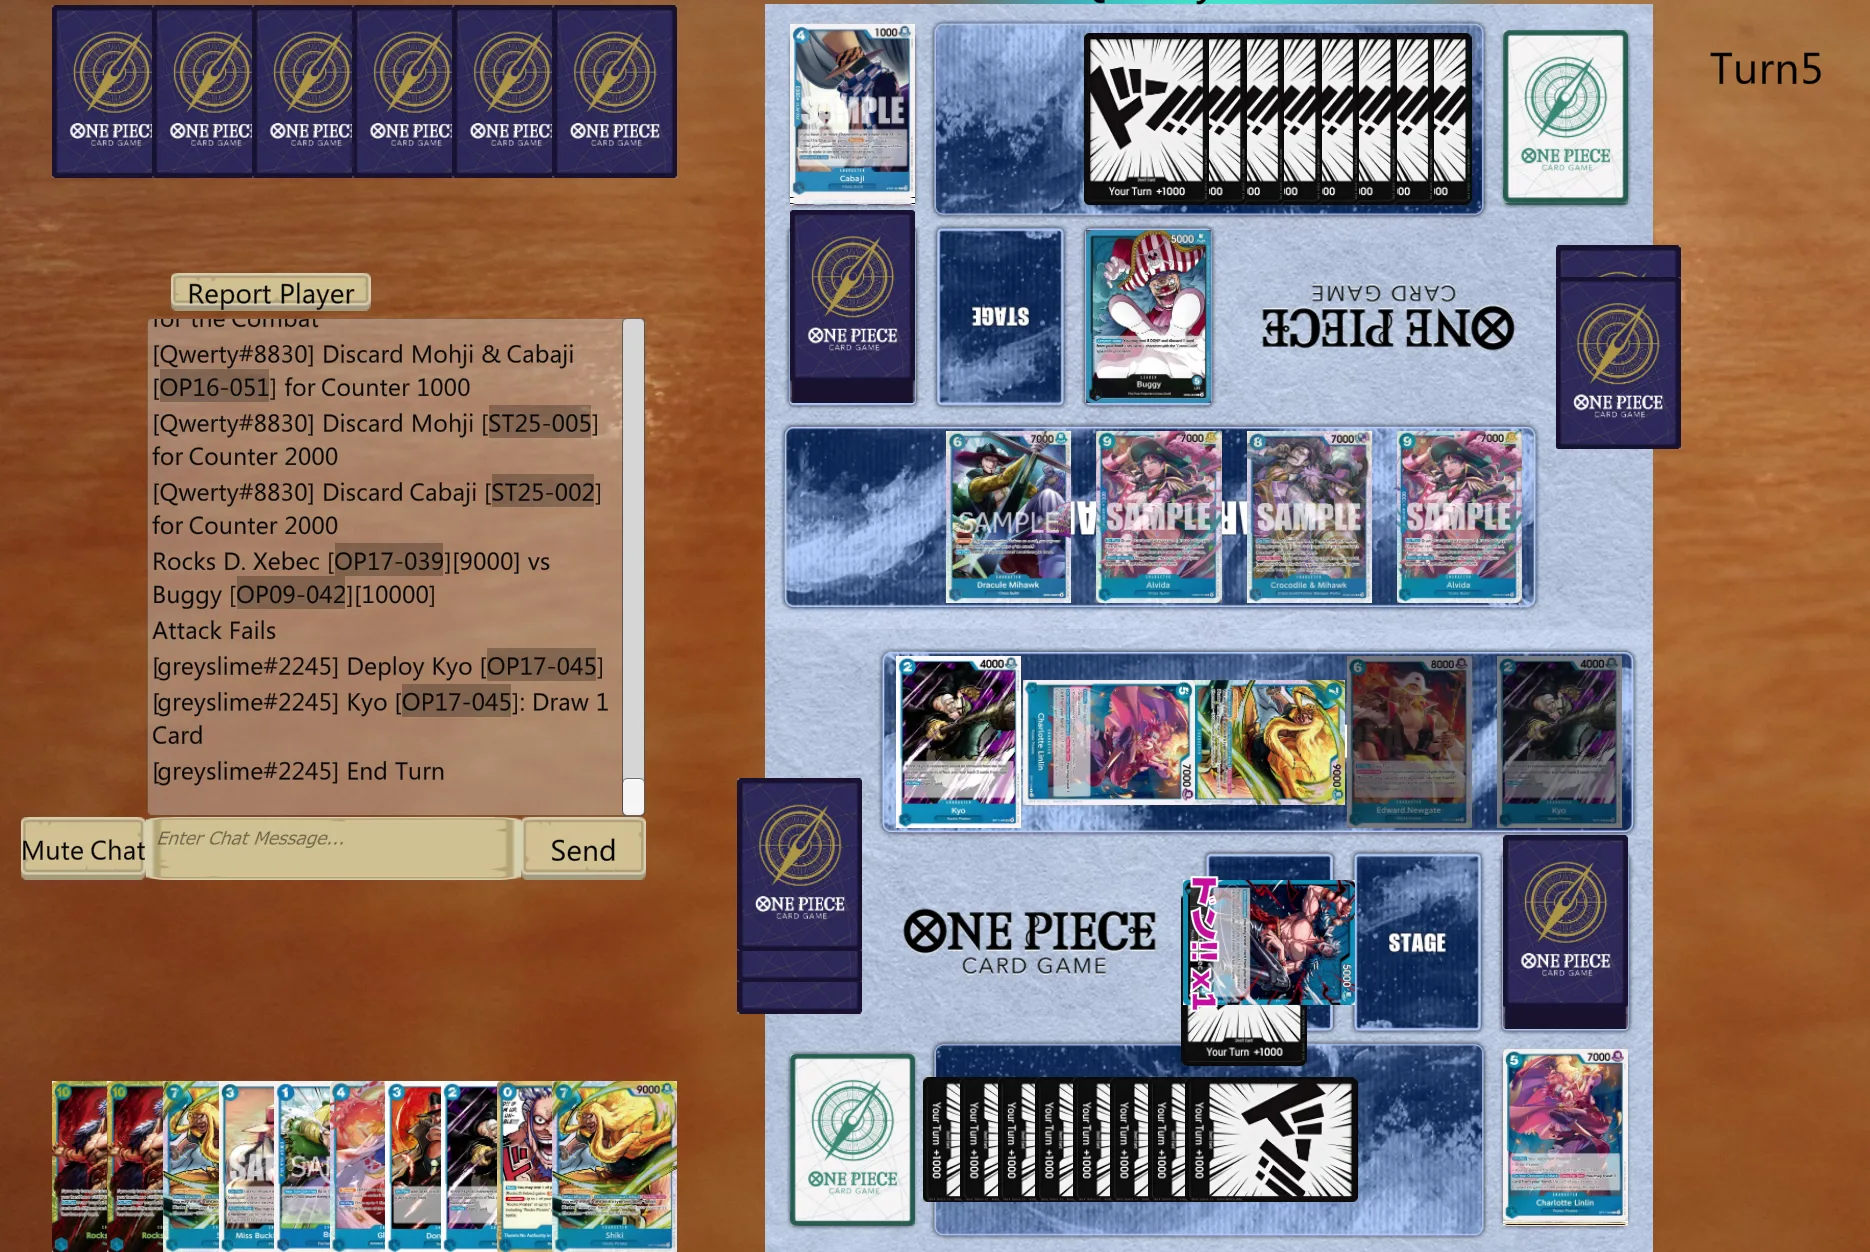
After clearing Shiki, he then finds himself in the position that he has to clear the board, and if he tries to do so we hard counter, especially since they made the mistake of resting their blocker.
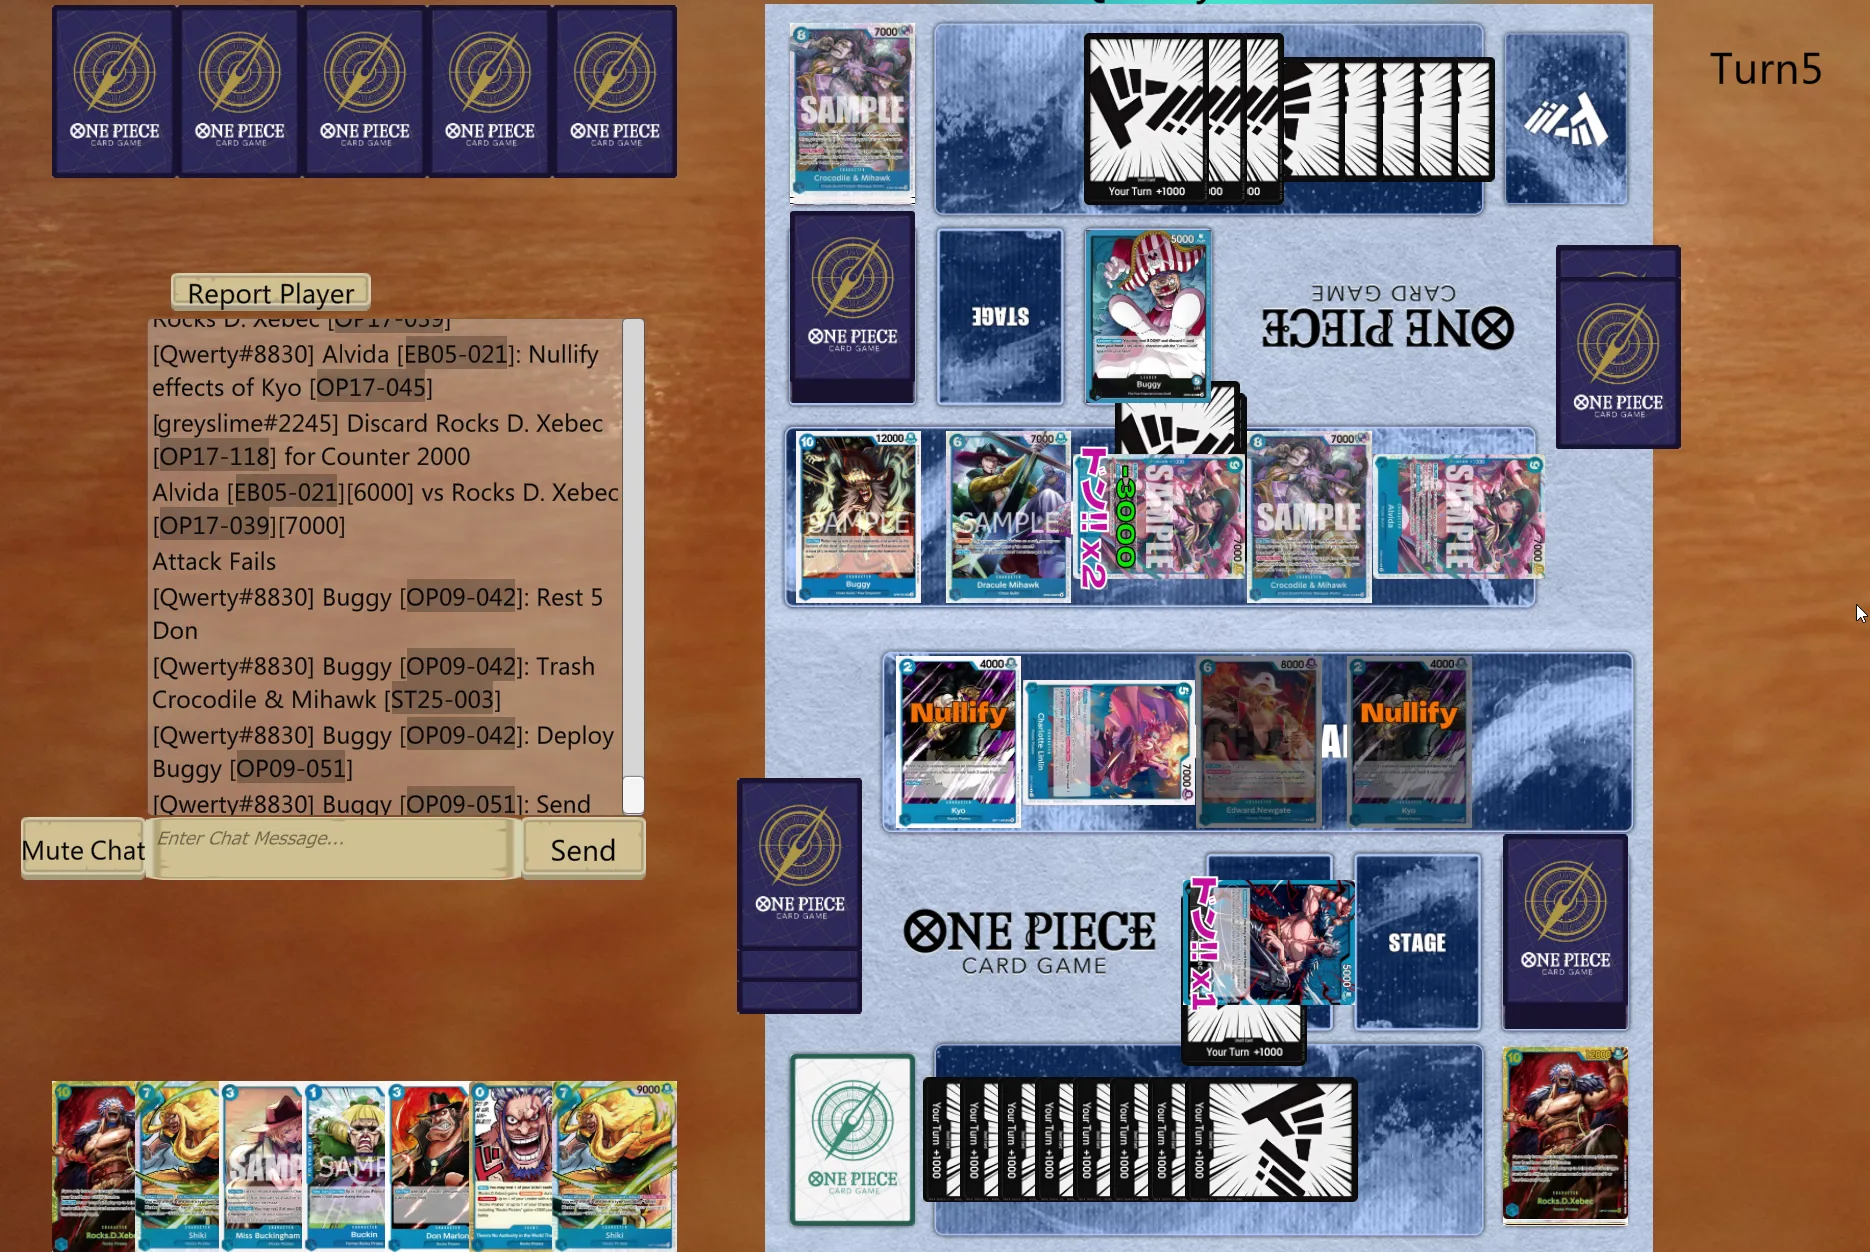
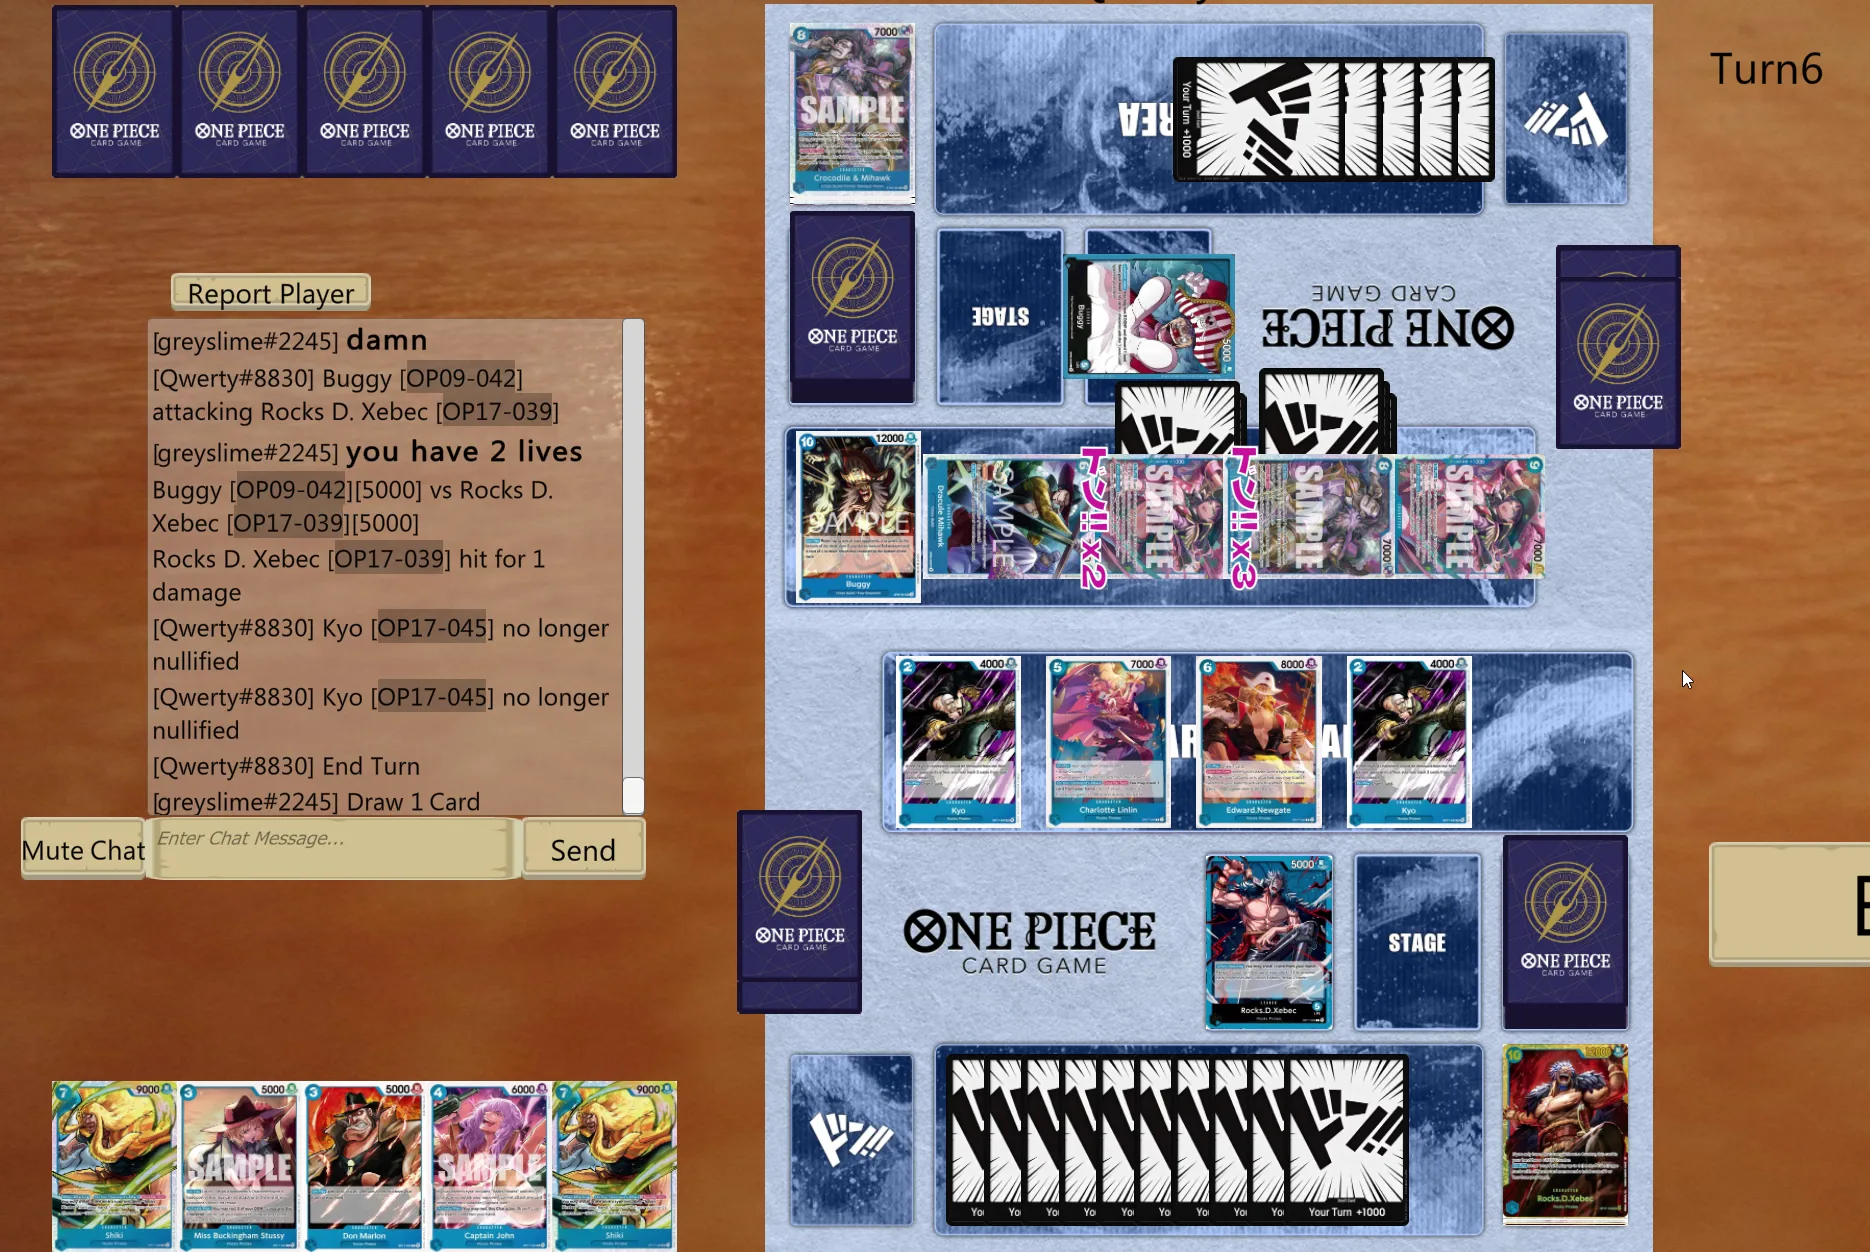
Now they are low on hand size and our Shiki can become pretty effective: we clear what we can, we deplete their hand size and stay out of lethal range.
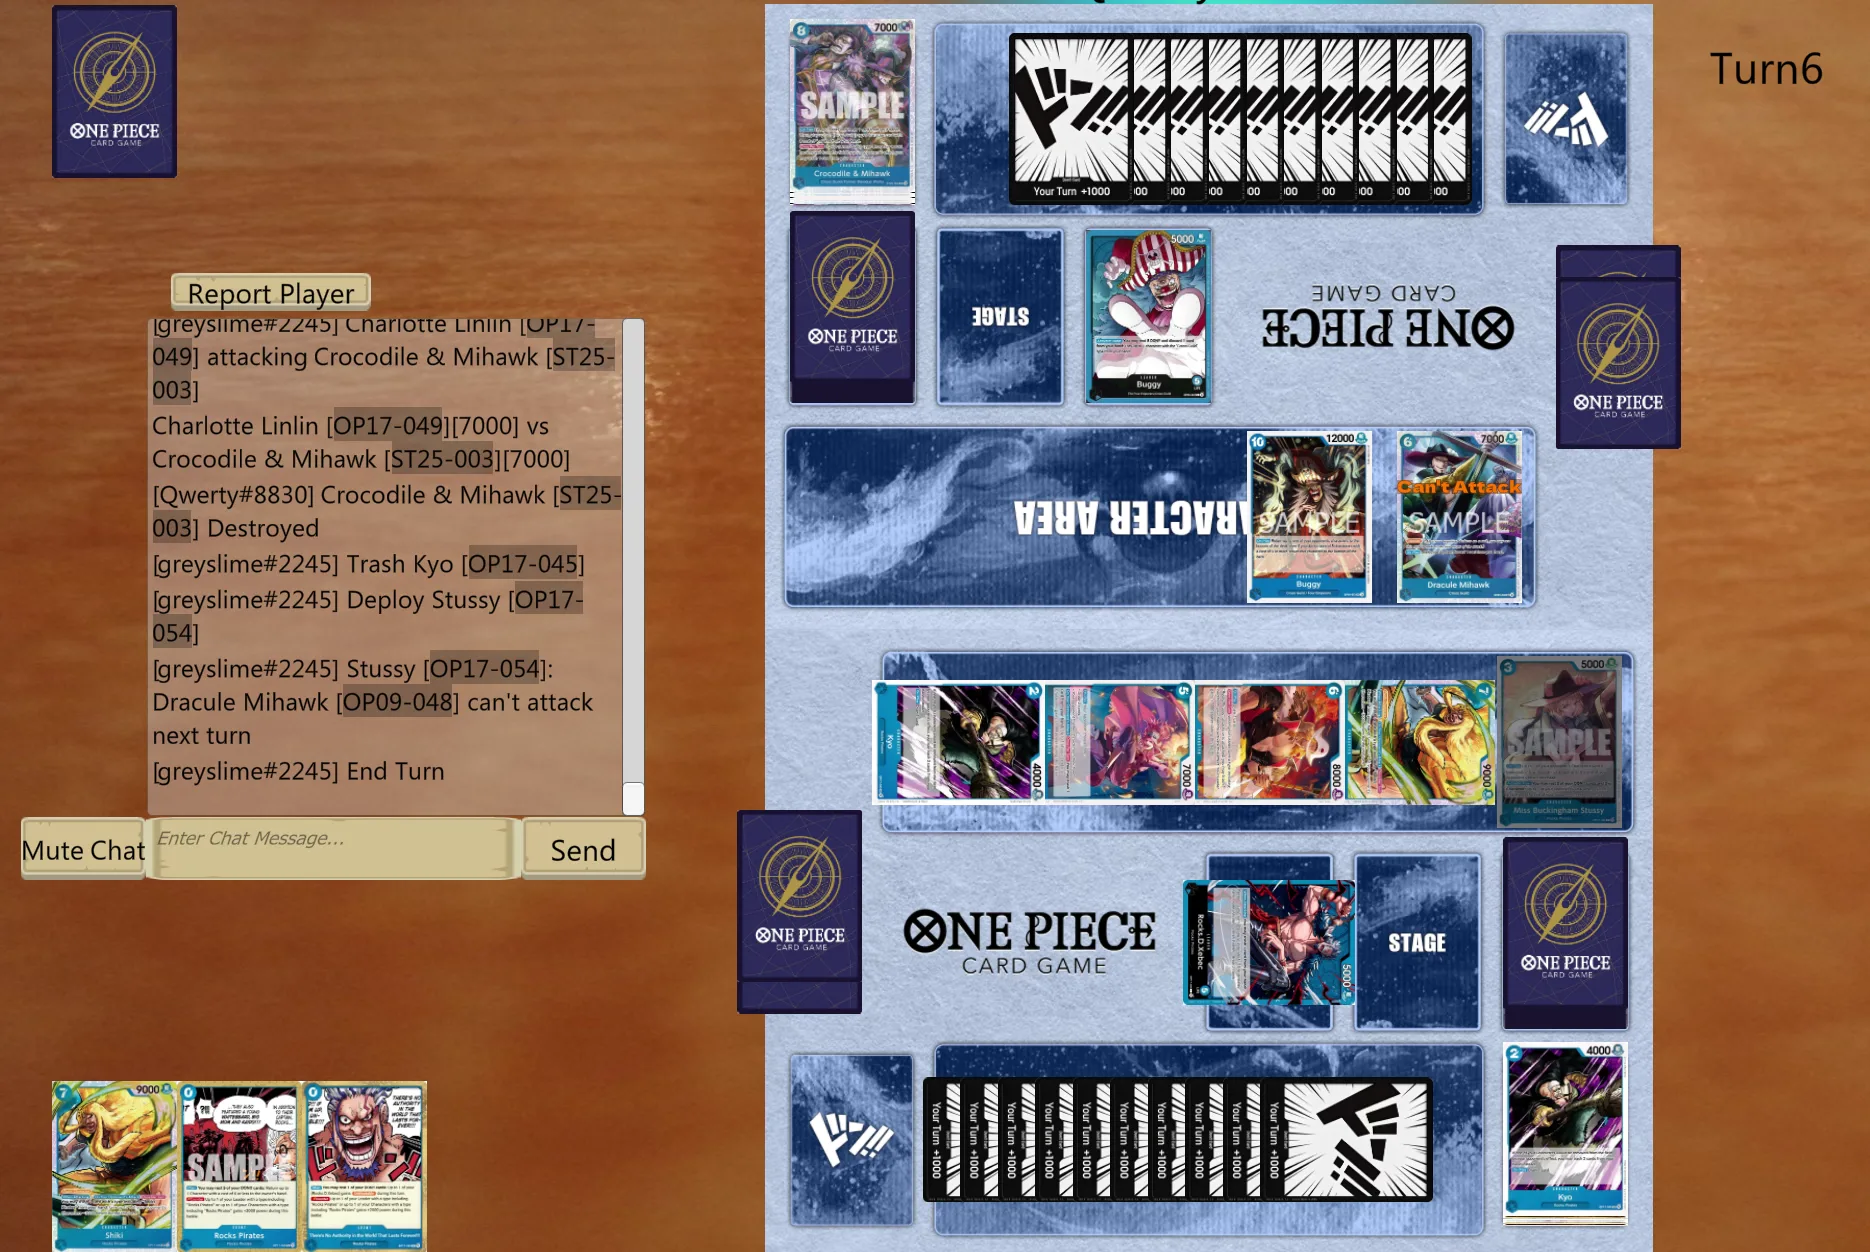
All made possible by the double Kyo play.
Going second sucks
Going second is definitely more uphill. Let’s see an example.
After the regular StreusenMarlonNewgate first turns, we find ourselves in this situation:
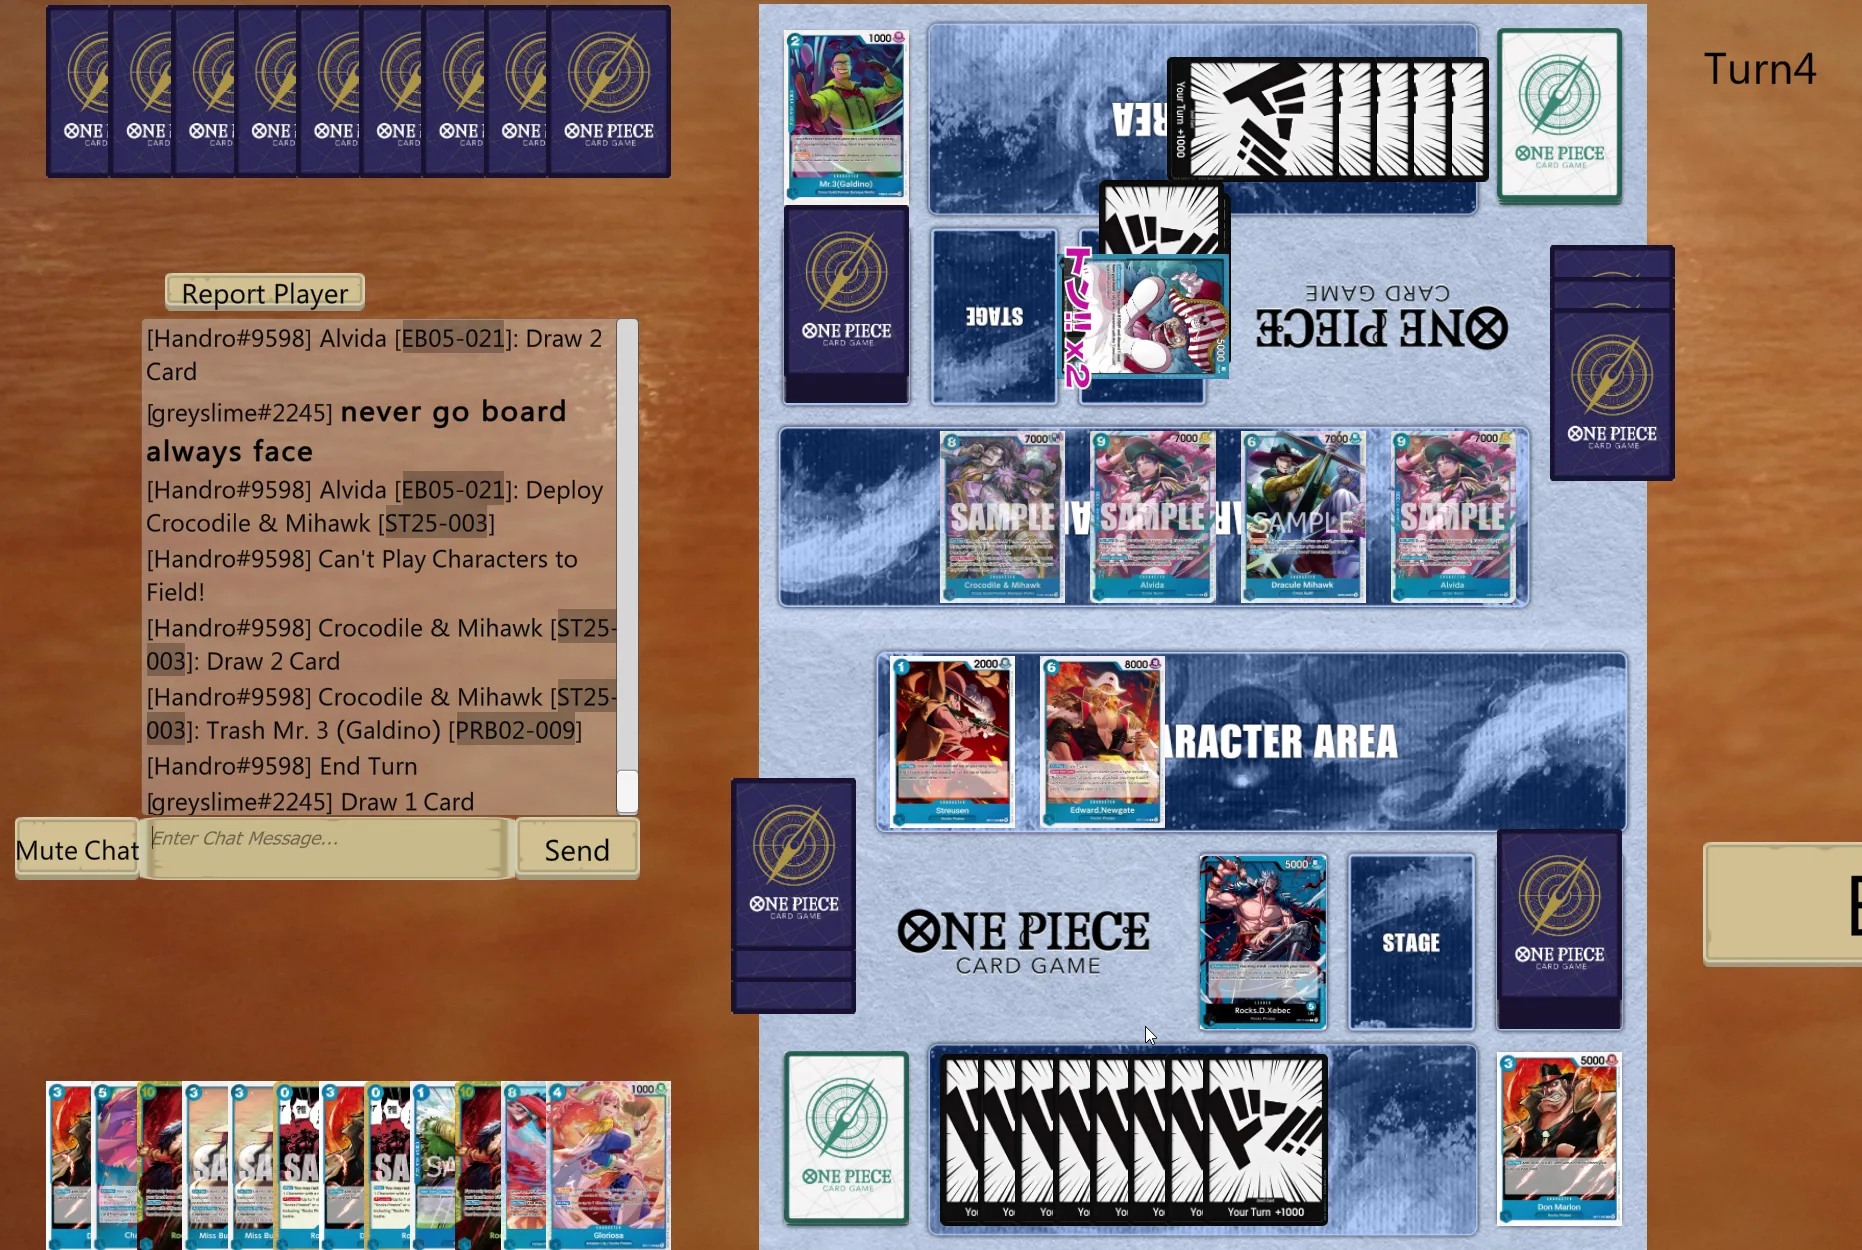
Going first, he can double flood on 5 Don!! and double flood on 7 Don!!.
A bad Buggy player would see the opportunity to negate your Newgate effect with the first Alvida and go double 7k to harass you: this is a huge mistake we can capitalize on and turn the game back in our favor on the next turn with Shiki.
But our opponent doesn’t make this mistake.
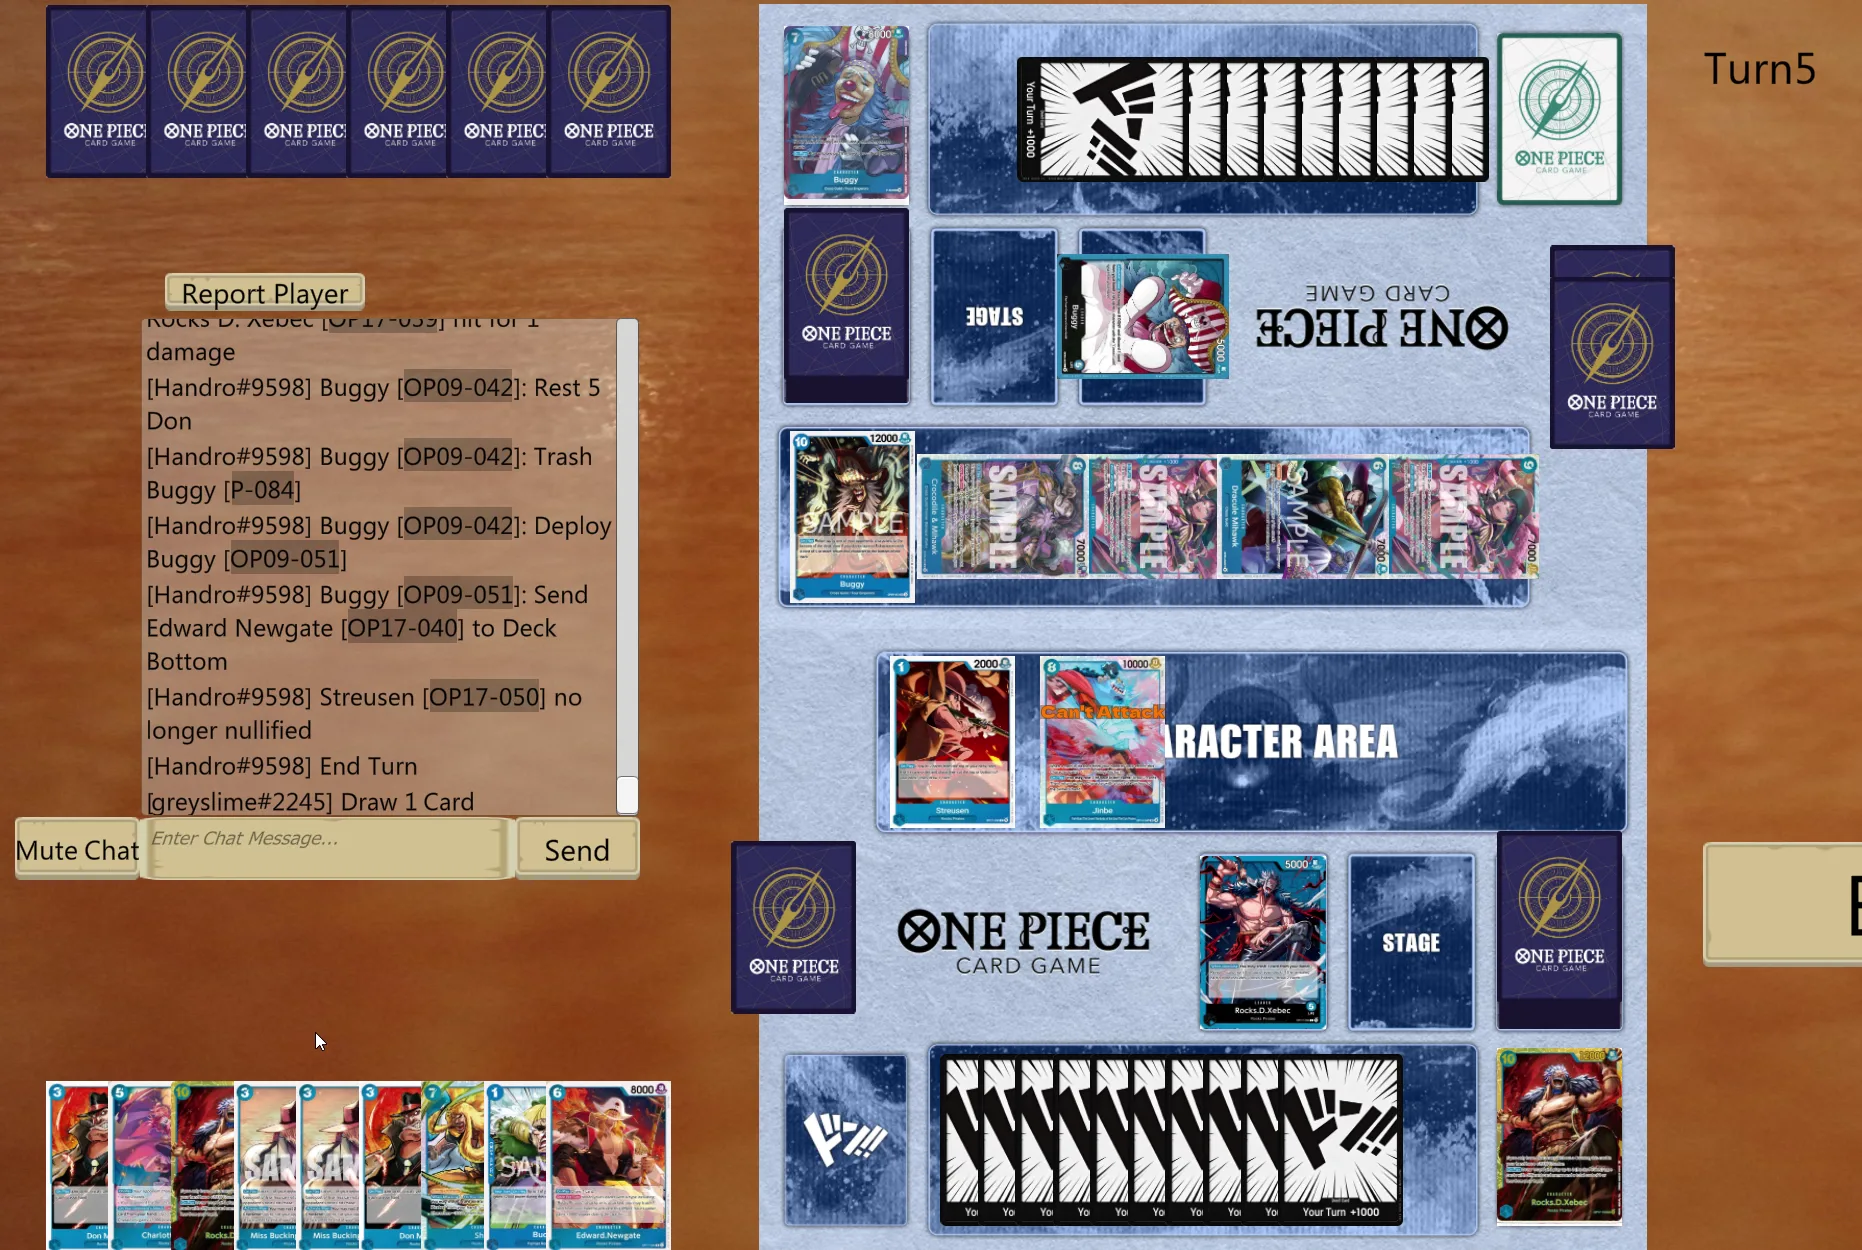
At this point the line could have been to try and find a Kyo out of leader ability + Linlin, but with 2 Alvidas on board pretty much every play we make would be countered by the upcoming Big Bad Buggy.
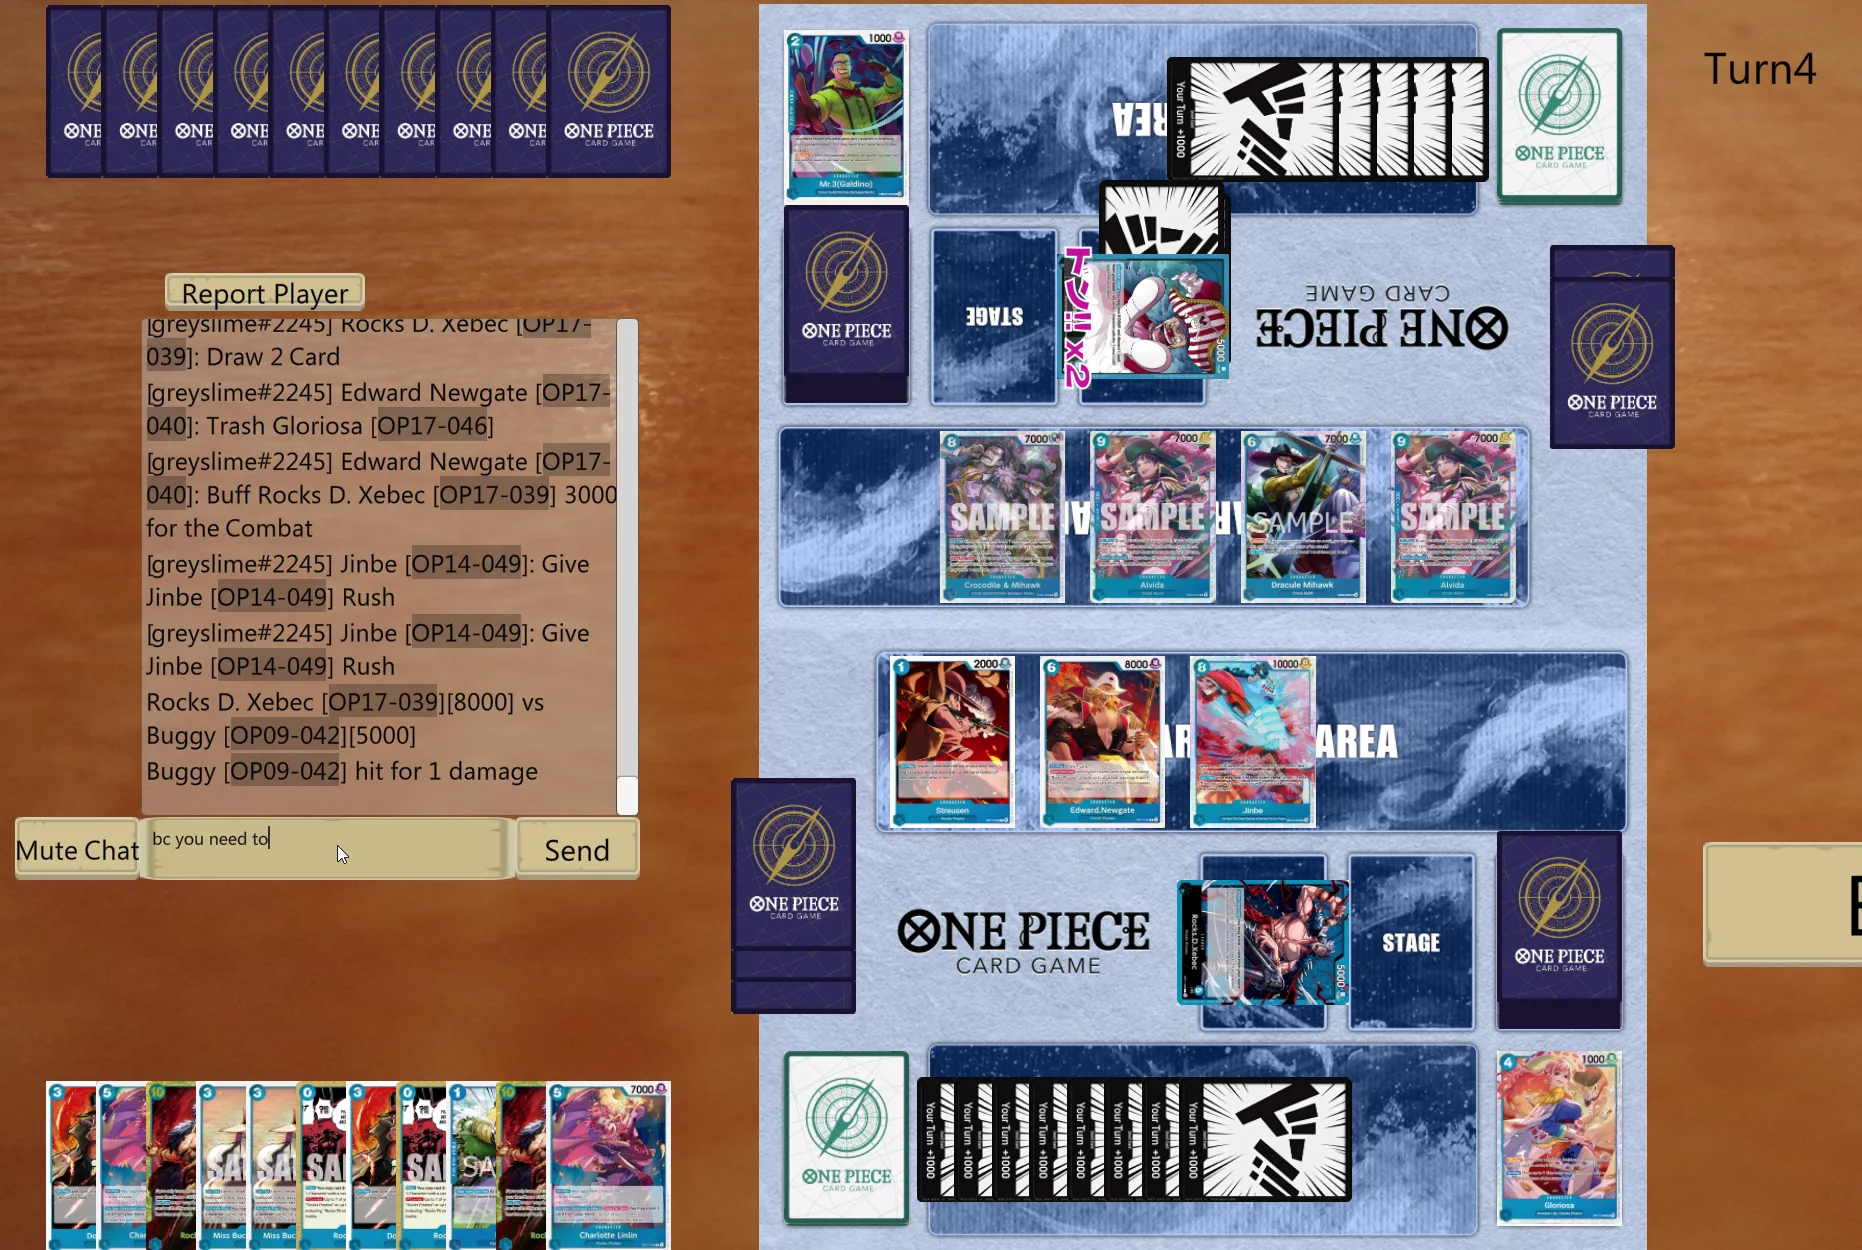
I ended up trying to play a tempo rusher Jinbe to try to race ’em down to an unblockable lethal, but was Bugged + Galdino’d and the game was over.
Conclusion
So I guess the conclusion is, yeah, try to win the dice lol.
Going first, you can have the upper hand if you see your curve (and with some big brain double Kyo plays you can recover menacing board states), even if they see theirs.
If you go second, you have to capitalize on your opponent’s misplays (e.g. turning Alvida sideways or I guess not drawing her lol).
But I do believe that a great Buggy player can win around 80% of his matches against any Rocks player.
Skilleglyph
Big red nose and painted brow,
an Emperor’s crown, who knows how…
But old blood never breaks its vow,
and Buggy grins: “Who’s the clown now?”